Hulp of advies nodig?![]() +44 (0)1782 454499
+44 (0)1782 454499
PRODUCTEN DIE IN DIT PROJECT ZIJN GEBRUIKT
Hoewel het niet per se een uitputtende lijst is, werden de volgende gereedschappen en materialen, geleverd door Easy Composites, in dit project gebruikt.
De hieronder getoonde hoeveelheid is de geschatte hoeveelheid die in het project is gebruikt, afgerond naar de dichtstbijzijnde beschikbare kitgrootte of hoeveelheid.
VERSTERKINGEN
INFUSIE APPARATUUR & VERBRUIKSARTIKELEN
VACUÜMZAKBENODIGDHEDEN

GEREEDSCHAP & APPARATUUR
MATERIALEN & VERBRUIKSARTIKELEN
VIDEO-HANDLEIDING
Beginnersgids voor Koolstofvezel-Harsinfusie
Voor professioneel hoogwaardige onderdelen is harsinjectie een van de belangrijkste methoden om deze onderdelen te construeren. Het levert geweldige prestaties en lichtgewicht onderdelen op met een minimale hoeveelheid specialistische apparatuur en kan worden uitgehard bij kamertemperatuur.
In deze handleiding over harsinjectie komen de volgende onderwerpen aan bod:
- Hoe Injectie Werkt
- Benodigde Materialen
- Geschikte Maltypes
- Lay-up Van de Koolstofvezel
- Infusie Stack
- De Infusie Uitvoeren
- Ontvormen en Afwerken
OVERZICHT TUTORIAL
1. Procesoverzicht
Het harsinfusieproces kan worden samengevat als volgt: de vezels worden droog in de mal geplaatst. Vervolgens wordt een bagging stack aangebracht, de mal wordt vacuümgezogen en er wordt een vacuüm getrokken om de lucht uit de zak te zuigen. De hars wordt vervolgens door het vacuüm in de mal gezogen en verzadigt alle vezels. Het onderdeel kan dan uitharden bij kamertemperatuur.
Correct vervaardigde geïnfuseerde onderdelen hebben een perfecte hars-vezelverhouding en presteren mechanisch zeer goed, vergelijkbaar met onderdelen gemaakt van pre-preg. Ze hebben het voordeel dat ze zowel cosmetisch als mechanisch superieur zijn aan handgelegde onderdelen. Omdat de hars aan het einde van het proces wordt geïntroduceerd, is het bovendien zeer schoon en afgesloten.

2. Overzicht van Apparatuur & Materialen
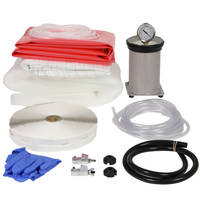
Het gebruik van de juiste materialen en apparatuur is essentieel om de infusie succesvol uit te voeren. Zodra u een mal heeft gemaakt, is dit een lijst van de basismaterialen en verbruiksartikelen die worden gebruikt bij het infusieproces:
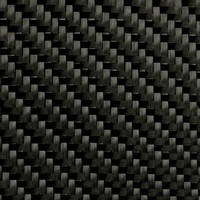
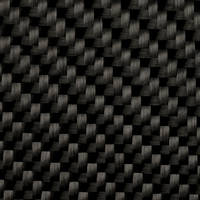
- Weefselversterking - Meestal koolstofvezel, maar er kan een reeks geweven materialen worden gebruikt.
- Spuitlijm - Met uitzondering van zeer vlakke mallen, gebruikt om de stof te positioneren en op zijn plaats te houden.
- Infusiehars - Laagviskeuze infusiehars bevordert de vloei en bevochtiging van de vezels.
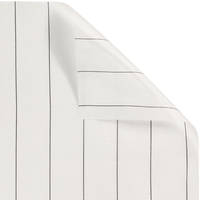
- PP180 Peel Ply - Laat hars doorstromen en is gemakkelijk te verwijderen van het afgewerkte onderdeel.
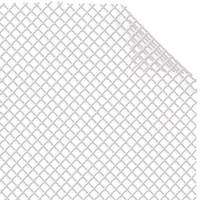
- FM100 Infusion Mesh - Creëert stroomkanalen voor de hars over het weefseloppervlak.
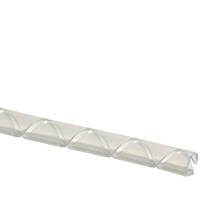
- Resin Infusion Spiral - Creëert een snelstromend harskanaal voor het verdelen van hars.
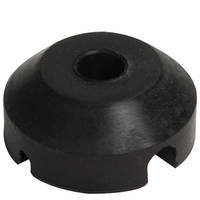
- Infusion Silicon Connector - Gebruikt voor zowel harsinlaat- als vacuümaansluitingen.
- VB160 Vacuum Bagging Film - 50 micron film gebruikt om de zak zelf te maken.
- ST150 Bag Sealing Tape - Gebruikt om de vacuümzak aan de malflenzen te verzegelen.
- PVC Hose - Wegwerpslang voor harsaanvoer en vacuümleiding.
Een van de voordelen van harsinfusie is dat er niet veel apparatuur nodig is om het proces succesvol te voltooien. De volgende items zijn de meest voorkomende apparatuur die nodig is:
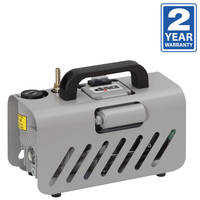
- Vacuümpomp - Geschikt voor het bereiken van 5mbar (~99,5%) of een beter vacuümniveau.
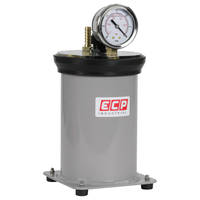
- Catch Pot - Nodig om hars op te vangen die uit de zak komt om de pomp te beschermen.
- Line Clamps - Gebruikt om de harsaanvoer- en vacuümleidingen af te klemmen.
- Lossingsmiddel - Voorkomt dat het onderdeel aan de mal blijft plakken.
- Mengbekers & Stokjes - Voor het vasthouden en mengen van hars.
- Nitril Handschoenen - PBM om de handen te beschermen.
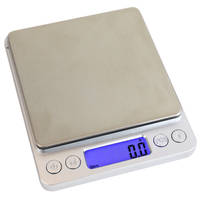
- Digitale Weegschalen - Voor het nauwkeurig afmeten van hars en harder.
3. De Mal Voorbereiden
Voor dit proces heeft u een geschikte mal nodig. Meestal worden deze gemaakt door een mal te nemen van het originele onderdeel of een model. Een belangrijk punt om op te merken is dat voor harsinjectie een grotere flens nodig is om ruimte te bieden aan het baggingproces en de baggingstack. Doorgaans zou ongeveer 100mm (4") voldoende moeten zijn. Hoewel het mogelijk is om een kleinere flens te gebruiken, zal dit de lay-up bemoeilijken.
Het infusieproces wordt uitgevoerd bij kamertemperatuur, wat betekent dat u een breder scala aan materialen voor het maken van mallen heeft. We zouden over het algemeen het Uni-Mould Tooling System aanbevelen vanwege de grote waarde en het gebruiksgemak. U kunt hier een instructievideo voor het Uni-Mould System bekijken: Uni-Mould Tooling System Gebruikershandleiding
In deze fase wordt het lossingsmiddel aangebracht. We raden een chemisch lossingsmiddel aan, zoals onze CR1, voor de superieure lossingseigenschappen. De ST150 gum tape wordt vervolgens rond de flenzen aangebracht terwijl de flenzen schoon en vrij zijn van losse vezels. De mal is dan klaar voor gebruik.
4. De Wapening Aanbrengen
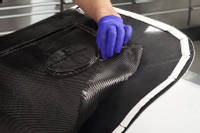
Voor dit specifieke onderdeel wordt de 210g twill carbonweefsel gebruikt voor de oppervlaktelaag. Ter ondersteuning wordt één laag van 650g koolstofvezel gebruikt, omdat deze dezelfde dikte heeft als ongeveer 3 lagen van de 210g doek. De stoffen worden vervolgens uitgesneden, waarbij ongeveer 100mm extra wordt aangehouden om positioneringsfouten mogelijk te maken.
De vezel wordt vervolgens op de mal geplaatst met behulp van een lichte verstuiving van de Fusion Fix EP om hem op zijn plaats te houden. Dit wordt voor beide lagen gedaan, waarbij ervoor wordt gezorgd dat de vezels goed in de hoeken en details worden gedrukt.
5. Infusieverbruiksartikelen
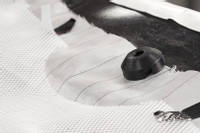
Vanaf dit punt is het proces gericht op het faciliteren van het infusieproces. Dit omvat het maken van de baggingstack door de infusieverbruiksartikelen in de mal te leggen.
Het eerste deel van de stack is de peel ply. Dit wordt vervolgens gevolgd door het infuusgaas waardoor de hars over het onderdeel kan stromen. Zodra het gaas is aangebracht, is het belangrijk om te overwegen waar u de infuusconnectoren en infuusspiraal wilt plaatsen voor de beste harsdoorstroming om ervoor te zorgen dat het onderdeel volledig is geïnfuseerd. Door de regels in de demonstratie en de getoonde voorbeelden te volgen, zou het gemakkelijk mogelijk moeten zijn om de beste manier te plannen om ervoor te zorgen dat het onderdeel volledig met hars wordt bevochtigd.
6. Afdichten en Vacuümzak naar Beneden Trekken
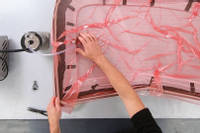
Een zeer hoog vacuümniveau is essentieel om het infusieproces te laten werken, wat betekent dat de vacuümzakfase de meest kritieke fase van de lay-up is. Het is essentieel om een lekvrije zak te krijgen en u mag niet met de infusie beginnen voordat de zak lekvrij is. We hebben een specifieke video over het maken van een verzegelde vacuümzak die hier kan worden bekeken: Hoe lekken in vacuümzakken te vinden, te verhelpen en te vermijden
De baggingfilm wordt op de malflens geseald, waarbij indien nodig plooien worden gebruikt om voldoende overtollige ruimte te laten om ervoor te zorgen dat er voldoende film is om alle details op te vullen zonder te overbruggen. De PVC-slang wordt vervolgens in de Infusion Silicone Connectors gestoken en met gum tape op zijn plaats afgedicht. De slang kan op de pomp worden aangesloten en het vacuüm op de zak worden getrokken, waarbij de film naar behoefte wordt aangepast. De valtest kan vervolgens worden uitgevoerd om ervoor te zorgen dat de zak lekvrij is.
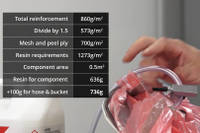
7. Hars Hoeveelheid Berekenen
Nu zijn we klaar om de hars te mengen en de infusie zelf uit te voeren. Om de benodigde hoeveelheid hars te berekenen, berekent u eerst het gewicht van de lay-up per vierkante meter. Zodra dit cijfer bekend is, wordt het gedeeld door 1,5 om de werkelijke hoeveelheid hars te geven die nodig is in het laminaat. 700g per vierkante meter wordt toegevoegd om rekening te houden met het harsverbruik van de peel ply en het gaas.
Dat geeft dan het totale hars per vierkante meter. Dit cijfer wordt vervolgens vermenigvuldigd met de oppervlakte van de mal om de werkelijke hoeveelheid te geven die nodig is voor de grootte van de mal. Vervolgens wordt 100g aan dat totaal toegevoegd om rekening te houden met hars in de slangen en de bodem van de harsvoedingspot.
8. De Infusie Uitvoeren
In dit stadium is de infusie zelf klaar om te worden uitgevoerd. De juiste hoeveelheid hars wordt afgemeten en grondig gemengd. De slang wordt in de mengemmer gestoken en vastgeplakt om beweging te voorkomen.
De infusiehars kan nu worden toegelaten om te stromen - open de lijnklem langzaam zodat de hars tot aan de klem kan stromen, en na een paar seconden, om de lucht uit de slang te laten ontsnappen, volledig openen en de hars in het onderdeel laten stromen en over het laminaat infuseren.
Zodra de hars volledig is geïnfuseerd en in de vacuümleiding stroomt, kan de vacuümleiding volledig worden afgeklemd. De harsaanvoerleiding wordt vervolgens korte tijd open gelaten om iets meer hars binnen te laten - om de cosmetische afwerking te verbeteren. De harsaanvoerleiding kan dan volledig worden afgeklemd en de mal en het onderdeel 24 uur worden gelaten om volledig uit te harden.
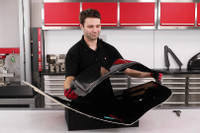
9. Ontvormen
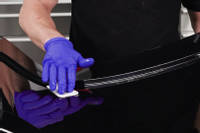
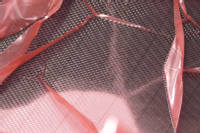
Om te controleren of het onderdeel klaar is om te worden ontvormd, buigt u de hars slang - als het klaar is, moet deze schoon breken - zo niet, wacht dan langer. De vacuümzak kan dan worden verwijderd. De peel ply en mesh worden verwijderd door de randen af te knippen en in stroken van 100mm breed af te trekken. Vervolgens kan het onderdeel worden ontvormd met behulp van ontvormwiggen.
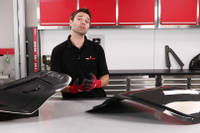
De hoge kwaliteit van de mal heeft geresulteerd in een hoogwaardig afgewerkt onderdeel en, mits het infusieproces correct is voltooid, heeft dit een vlekkeloze, poriënvrije afwerking opgeleverd. Het onderdeel wordt vervolgens bijgesneden en afgewerkt, klaar voor gebruik. Het afgewerkte onderdeel is minder dan een kwart van het gewicht van het originele onderdeel.
DISCUSSIE (14)
Deel al uw vragen of opmerkingen over deze videohandleiding.
Ja, bij gebruik van de tabel of formule is de hoeveelheid de gecombineerde mix van hars en harder.
Het ziet er goed uit, gewoon een donkergrijze kleur massief materiaal. U kunt de snijrand zonder problemen schuren, vlak maken en polijsten.
We hebben er geen video over, nee. Het heeft vooral te maken met het feit dat de druk in de zak iets kan afnemen, waardoor het volume van eventuele achtergebleven lucht aanzienlijk wordt verminderd. Het aanzuigen van de hars gebeurt door de elastische spanning in de zak en het gaas. De harsopname tijdens deze fase is minimaal (misschien 10-20 g op een onderdeel als dit), maar u krijgt meestal een betere oppervlakteafwerking omdat micro-luchtbelletjes krimpen. Misschien kunnen we er in de toekomst gedetailleerder naar kijken.
Hoi Mike, je hebt je 914 omgebouwd tot elektrisch! Geweldig project. Een carbon Targa-top zou daar zeker goed bij passen. Je hebt gelijk dat de bevestiging/vergrendelingshardware en nauwkeurigheid het lastigste onderdeel zijn. Niet onmogelijk, maar een Targa-dak is ingewikkelder dan een conventioneel statisch carrosseriepaneel. Ik hoop wel dat je het doet, en neem zeker contact op met ons technisch team als je advies nodig hebt over de materiaalkeuze of het proces. Ik wens je er het allerbeste mee.
De enige keer dat het voordelig is om een mal van koolstofvezel te maken, is wanneer u een hogetemperatuurproces (zoals prepreg) gebruikt en u koolstofvezel onderdelen maakt. De reden hiervoor is dat bij temperatuur de CTE van het materiaal (de mal en vervolgens het onderdeel) er echt toe doet. Het is voordelig om een mal te hebben die dezelfde thermische uitzetting heeft als het onderdeel dat u erin gaat maken. Voor processen op kamertemperatuur is er echter niet echt een voordeel aan een koolstofmal. Wat een voordeel zou kunnen zijn, is een hars systeem met weinig tot geen krimp. Uni-Mould (zoals de mal die in deze video wordt gebruikt) heeft een zeer lage krimp en een epoxy mal zou een nog lagere krimp hebben. De krimp van de hars maakt dus veel meer verschil dan de versteviging, voor processen op kamertemperatuur.
De beste oplossing is een hoogwaardige 2K blanke autolak. We zullen binnenkort een product genaamd Fantom Clear op voorraad hebben, wat zo'n product is, hoewel er ook andere zijn, zowel in speciale 2K spuitbussen (het type dat je moet activeren en dan binnen 48 uur moet gebruiken) als in het type voor een spuitpistool. Hoewel we wel een blanke gelcoat hebben die zeer goed presteert op het gebied van UV-stabiliteit op lange termijn, is dat over het algemeen niet de manier waarop we een 'carbon look' onderdeel dat dagelijks wordt gebruikt zouden afwerken, omdat het moeilijker te repareren of te herstellen is.
Ja, als u de harsvloei afstanden binnen de in de video uiteengezette regels kunt krijgen (of het hars systeem kunt wijzigen als dat niet lukt), zou u de meeste vormen moeten kunnen infuseren. Het zou afhangen van de afmetingen en verhoudingen van deze kegelvorm, maar (mogelijk met wat vallen en opstaan) zou het mogelijk moeten zijn.
'Galvanische corrosie' is een type corrosie dat optreedt wanneer u twee verschillende materialen met specifieke eigenschappen in direct contact met elkaar hebt, in de aanwezigheid van een elektrolyt. In een koolstofvezel context is galvanische corrosie een probleem wanneer u koolstofvezel in direct contact hebt met aluminium, in de aanwezigheid van zout water. Het is alleen een probleem als al deze dingen aanwezig zijn. Voor koolstofvezel voertuigpanelen is het risico eigenlijk alleen aanwezig wanneer u koolstofvezel panelen rechtstreeks op aluminium beugels of een aluminium subframe lijmt, en het voertuig vervolgens gebruikt op een manier die deze gebieden regelmatig blootstelt aan zout water (zoals Britse winterwegen). Gelukkig is de oplossing vrij eenvoudig en komt het erop neer dat u ervoor zorgt dat koolstofvezel niet in direct contact komt met aluminium, meestal door een of twee lagen glasvezelversterking toe te voegen tussen koolstofvezel en aluminium componenten bij het rechtstreeks verlijmen of verbinden ervan.
De gewichtsbesparing kan groot zijn in vergelijking met originele OEM-onderdelen. Op een R8 is dit een cosmetisch sierpaneel, dus het vervangen van beide op een track/raceauto is al bijna 6 kg aan besparing!
Ja, u kunt het IN2 hars systeem nabehandelen. Als het praktisch is om dit te doen, wordt het over het algemeen als een goed idee beschouwd. Nabehandeling zal de mechanische prestaties met een paar procent verbeteren en de Tg (temperatuurbestendigheid) van het onderdeel verhogen. Het kan ook de uitharding versnellen, wat erg handig kan zijn bij productie in grote volumes. Raadpleeg het technisch gegevensblad voor de IN2 hars voor voorgestelde nabehandelingscycli.
Het hangt af van de print. De meeste prints hebben een hoge porositeit en een relatief lage druksterkte, waardoor ze kunnen worden geplet of veel hars kunnen absorberen. Een hoog infill-niveau op de print kan dat verminderen. Uiteraard moet de buitenkant glad worden geschuurd en vervolgens waarschijnlijk het beste worden gelakt met een UV-bestendige blanke lak.
We hebben een product genaamd GC50 dat speciaal voor dit doel is ontworpen. Het is een epoxy-compatibele polyester gelcoat die alleen op deze manier mag worden gebruikt. Omdat het polyester is, is het vrijwel perfect UV-stabiel; het epoxy-compatibele deel betekent dat het hard en glad uithardt op de open kant, klaar voor de epoxy om eraan te hechten (in plaats van plakkerig te blijven zoals conventionele polyester gelcoats doen). De voordelen van een in-mould coating zijn duidelijk (geen gevreesde sinaasappelhuid als uw spuitwerk niet goed genoeg is), maar de nadelen zijn een kleine verandering in het uiterlijk van het carbon, vooral bij harsinfusie, omdat de in-mould coating zelf met een lichte textuur naar beneden gaat en deze textuur overdraagt op de koolstofvezel, en ook als er iets misgaat met de infusie (hier of daar een droge plek), dan kunt u het gemakkelijk repareren en er vervolgens overheen spuiten als u geen in-mould coating heeft, maar als u dat wel heeft, is het veel moeilijker te herstellen.
Het maken van zo'n formaat en vorm als een enkel stuk vormwerk zou zeker een uitdaging zijn, maar niet onmogelijk. Je hebt zeker een gespleten mal nodig, zoals je beschrijft. Aangenomen dat de deuropening groot genoeg is om binnen te werken, zou ik het hele ding waarschijnlijk omdraaien zodat de deur/het luik onderaan zit; veel gemakkelijker om op deze manier te werken en je staat niet op de versteviging als je in en uit stapt.
Dan hangt het af van het proces dat u wilt gebruiken. Prepreg zou gemakkelijker te lamineren zijn, maar u zou de hele structuur van 8m+ in de oven moeten kunnen uitharden, wat waarschijnlijk niet praktisch is, en dus zou u overblijven met harsinjectie (mechanisch beter, maar ingewikkelder op te zetten) of een conventionele natte lay-up. Ervan uitgaande dat u op zoek bent naar de beste prestaties, betekent dat infusie. Om dit te doen, begint u met het flashtapen van de naden op de spleten (zodat ze luchtdicht zijn) en legt u vervolgens de versteviging erin; u hebt heel wat spuitlijm nodig om het ondersteboven op een cilinder te houden. De harsstroom zal veel ingewikkelder en moeilijker te voorspellen zijn op deze vorm, dus u zult microporeuze membranen (DD Compound MTI slang etc.) moeten gebruiken om de luchtstroom te behouden en droge plekken te vermijden. Dan het hele ding in een enorme zak, die bijna zeker een envelopzak zou moeten zijn (dus u verpakt de binnen- en buitenkant van de mal, als een gigantische langwerpige donut!
Als je serieus bent over het project, neem dan contact op met ons technisch team en we kunnen je meer gedetailleerd advies geven over producten en processen. En, succes ermee!
Bedankt voor de reactie, dit is een zeer interessante vraag en absoluut een eigen video waard, hetzij een spotlight, hetzij mogelijk het hoofd kanaal, omdat het een belangrijk onderdeel is van veel projecten. Om het samen te vatten, FusionFix EP zal een residu achterlaten, maar het is niet te zien en kan niet gemakkelijk worden verwijderd. Sterke oplosmiddelen (zoals aceton) kunnen het residu verwijderen, wat een zeer vage 'dither' op het oppervlak achterlaat. Voor de meeste onderdelen in de meeste omstandigheden denken we dat je niets hoeft te doen (d.w.z. het gewoon zo laten), wat een gamechanger is. Als je dacht dat het onderdeel zou kunnen worden blootgesteld aan sterke oplosmiddelen (zoals aceton), dan zou je het residu willen verwijderen. Maar, om eerlijk te zijn, je zou waarschijnlijk moeten denken in termen van een sterkere coating voor onderdelen die toch al worden blootgesteld aan agressieve chemicaliën/oplosmiddelen.
EEN OPMERKING OF VRAAG ACHTERLATEN
PRODUCTEN DIE IN DIT PROJECT ZIJN GEBRUIKT
Hoewel het niet per se een uitputtende lijst is, werden de volgende gereedschappen en materialen, geleverd door Easy Composites, in dit project gebruikt.
De hieronder getoonde hoeveelheid is de geschatte hoeveelheid die in het project is gebruikt, afgerond naar de dichtstbijzijnde beschikbare kitgrootte of hoeveelheid.
VERSTERKINGEN
INFUSIE APPARATUUR & VERBRUIKSARTIKELEN
VACUÜMZAKBENODIGDHEDEN
GEREEDSCHAP & APPARATUUR
MATERIALEN & VERBRUIKSARTIKELEN
DISCUSSIE (14)
Deel al uw vragen of opmerkingen over deze videohandleiding.
Ja, bij gebruik van de tabel of formule is de hoeveelheid de gecombineerde mix van hars en harder.
Het ziet er goed uit, gewoon een donkergrijze kleur massief materiaal. U kunt de snijrand zonder problemen schuren, vlak maken en polijsten.
We hebben er geen video over, nee. Het heeft vooral te maken met het feit dat de druk in de zak iets kan afnemen, waardoor het volume van eventuele achtergebleven lucht aanzienlijk wordt verminderd. Het aanzuigen van de hars gebeurt door de elastische spanning in de zak en het gaas. De harsopname tijdens deze fase is minimaal (misschien 10-20 g op een onderdeel als dit), maar u krijgt meestal een betere oppervlakteafwerking omdat micro-luchtbelletjes krimpen. Misschien kunnen we er in de toekomst gedetailleerder naar kijken.
Hoi Mike, je hebt je 914 omgebouwd tot elektrisch! Geweldig project. Een carbon Targa-top zou daar zeker goed bij passen. Je hebt gelijk dat de bevestiging/vergrendelingshardware en nauwkeurigheid het lastigste onderdeel zijn. Niet onmogelijk, maar een Targa-dak is ingewikkelder dan een conventioneel statisch carrosseriepaneel. Ik hoop wel dat je het doet, en neem zeker contact op met ons technisch team als je advies nodig hebt over de materiaalkeuze of het proces. Ik wens je er het allerbeste mee.
De enige keer dat het voordelig is om een mal van koolstofvezel te maken, is wanneer u een hogetemperatuurproces (zoals prepreg) gebruikt en u koolstofvezel onderdelen maakt. De reden hiervoor is dat bij temperatuur de CTE van het materiaal (de mal en vervolgens het onderdeel) er echt toe doet. Het is voordelig om een mal te hebben die dezelfde thermische uitzetting heeft als het onderdeel dat u erin gaat maken. Voor processen op kamertemperatuur is er echter niet echt een voordeel aan een koolstofmal. Wat een voordeel zou kunnen zijn, is een hars systeem met weinig tot geen krimp. Uni-Mould (zoals de mal die in deze video wordt gebruikt) heeft een zeer lage krimp en een epoxy mal zou een nog lagere krimp hebben. De krimp van de hars maakt dus veel meer verschil dan de versteviging, voor processen op kamertemperatuur.
De beste oplossing is een hoogwaardige 2K blanke autolak. We zullen binnenkort een product genaamd Fantom Clear op voorraad hebben, wat zo'n product is, hoewel er ook andere zijn, zowel in speciale 2K spuitbussen (het type dat je moet activeren en dan binnen 48 uur moet gebruiken) als in het type voor een spuitpistool. Hoewel we wel een blanke gelcoat hebben die zeer goed presteert op het gebied van UV-stabiliteit op lange termijn, is dat over het algemeen niet de manier waarop we een 'carbon look' onderdeel dat dagelijks wordt gebruikt zouden afwerken, omdat het moeilijker te repareren of te herstellen is.
Ja, als u de harsvloei afstanden binnen de in de video uiteengezette regels kunt krijgen (of het hars systeem kunt wijzigen als dat niet lukt), zou u de meeste vormen moeten kunnen infuseren. Het zou afhangen van de afmetingen en verhoudingen van deze kegelvorm, maar (mogelijk met wat vallen en opstaan) zou het mogelijk moeten zijn.
'Galvanische corrosie' is een type corrosie dat optreedt wanneer u twee verschillende materialen met specifieke eigenschappen in direct contact met elkaar hebt, in de aanwezigheid van een elektrolyt. In een koolstofvezel context is galvanische corrosie een probleem wanneer u koolstofvezel in direct contact hebt met aluminium, in de aanwezigheid van zout water. Het is alleen een probleem als al deze dingen aanwezig zijn. Voor koolstofvezel voertuigpanelen is het risico eigenlijk alleen aanwezig wanneer u koolstofvezel panelen rechtstreeks op aluminium beugels of een aluminium subframe lijmt, en het voertuig vervolgens gebruikt op een manier die deze gebieden regelmatig blootstelt aan zout water (zoals Britse winterwegen). Gelukkig is de oplossing vrij eenvoudig en komt het erop neer dat u ervoor zorgt dat koolstofvezel niet in direct contact komt met aluminium, meestal door een of twee lagen glasvezelversterking toe te voegen tussen koolstofvezel en aluminium componenten bij het rechtstreeks verlijmen of verbinden ervan.
De gewichtsbesparing kan groot zijn in vergelijking met originele OEM-onderdelen. Op een R8 is dit een cosmetisch sierpaneel, dus het vervangen van beide op een track/raceauto is al bijna 6 kg aan besparing!
Ja, u kunt het IN2 hars systeem nabehandelen. Als het praktisch is om dit te doen, wordt het over het algemeen als een goed idee beschouwd. Nabehandeling zal de mechanische prestaties met een paar procent verbeteren en de Tg (temperatuurbestendigheid) van het onderdeel verhogen. Het kan ook de uitharding versnellen, wat erg handig kan zijn bij productie in grote volumes. Raadpleeg het technisch gegevensblad voor de IN2 hars voor voorgestelde nabehandelingscycli.
Het hangt af van de print. De meeste prints hebben een hoge porositeit en een relatief lage druksterkte, waardoor ze kunnen worden geplet of veel hars kunnen absorberen. Een hoog infill-niveau op de print kan dat verminderen. Uiteraard moet de buitenkant glad worden geschuurd en vervolgens waarschijnlijk het beste worden gelakt met een UV-bestendige blanke lak.
We hebben een product genaamd GC50 dat speciaal voor dit doel is ontworpen. Het is een epoxy-compatibele polyester gelcoat die alleen op deze manier mag worden gebruikt. Omdat het polyester is, is het vrijwel perfect UV-stabiel; het epoxy-compatibele deel betekent dat het hard en glad uithardt op de open kant, klaar voor de epoxy om eraan te hechten (in plaats van plakkerig te blijven zoals conventionele polyester gelcoats doen). De voordelen van een in-mould coating zijn duidelijk (geen gevreesde sinaasappelhuid als uw spuitwerk niet goed genoeg is), maar de nadelen zijn een kleine verandering in het uiterlijk van het carbon, vooral bij harsinfusie, omdat de in-mould coating zelf met een lichte textuur naar beneden gaat en deze textuur overdraagt op de koolstofvezel, en ook als er iets misgaat met de infusie (hier of daar een droge plek), dan kunt u het gemakkelijk repareren en er vervolgens overheen spuiten als u geen in-mould coating heeft, maar als u dat wel heeft, is het veel moeilijker te herstellen.
Het maken van zo'n formaat en vorm als een enkel stuk vormwerk zou zeker een uitdaging zijn, maar niet onmogelijk. Je hebt zeker een gespleten mal nodig, zoals je beschrijft. Aangenomen dat de deuropening groot genoeg is om binnen te werken, zou ik het hele ding waarschijnlijk omdraaien zodat de deur/het luik onderaan zit; veel gemakkelijker om op deze manier te werken en je staat niet op de versteviging als je in en uit stapt.
Dan hangt het af van het proces dat u wilt gebruiken. Prepreg zou gemakkelijker te lamineren zijn, maar u zou de hele structuur van 8m+ in de oven moeten kunnen uitharden, wat waarschijnlijk niet praktisch is, en dus zou u overblijven met harsinjectie (mechanisch beter, maar ingewikkelder op te zetten) of een conventionele natte lay-up. Ervan uitgaande dat u op zoek bent naar de beste prestaties, betekent dat infusie. Om dit te doen, begint u met het flashtapen van de naden op de spleten (zodat ze luchtdicht zijn) en legt u vervolgens de versteviging erin; u hebt heel wat spuitlijm nodig om het ondersteboven op een cilinder te houden. De harsstroom zal veel ingewikkelder en moeilijker te voorspellen zijn op deze vorm, dus u zult microporeuze membranen (DD Compound MTI slang etc.) moeten gebruiken om de luchtstroom te behouden en droge plekken te vermijden. Dan het hele ding in een enorme zak, die bijna zeker een envelopzak zou moeten zijn (dus u verpakt de binnen- en buitenkant van de mal, als een gigantische langwerpige donut!
Als je serieus bent over het project, neem dan contact op met ons technisch team en we kunnen je meer gedetailleerd advies geven over producten en processen. En, succes ermee!
Bedankt voor de reactie, dit is een zeer interessante vraag en absoluut een eigen video waard, hetzij een spotlight, hetzij mogelijk het hoofd kanaal, omdat het een belangrijk onderdeel is van veel projecten. Om het samen te vatten, FusionFix EP zal een residu achterlaten, maar het is niet te zien en kan niet gemakkelijk worden verwijderd. Sterke oplosmiddelen (zoals aceton) kunnen het residu verwijderen, wat een zeer vage 'dither' op het oppervlak achterlaat. Voor de meeste onderdelen in de meeste omstandigheden denken we dat je niets hoeft te doen (d.w.z. het gewoon zo laten), wat een gamechanger is. Als je dacht dat het onderdeel zou kunnen worden blootgesteld aan sterke oplosmiddelen (zoals aceton), dan zou je het residu willen verwijderen. Maar, om eerlijk te zijn, je zou waarschijnlijk moeten denken in termen van een sterkere coating voor onderdelen die toch al worden blootgesteld aan agressieve chemicaliën/oplosmiddelen.
EEN OPMERKING OF VRAAG ACHTERLATEN
100% VEILIG
BETAALMETHODEN
Easy Composites EU B.V., geregistreerd in Nederland 73601195. Alle inhoud auteursrecht (C) Easy Composites Ltd, 2025. Alle rechten voorbehouden.