Hulp of advies nodig?![]() +44 (0)1782 454499
+44 (0)1782 454499
Downloads (1)
| Resin River Tafel Handboek |
PRODUCTEN DIE IN DIT PROJECT ZIJN GEBRUIKT
Hoewel het niet per se een uitputtende lijst is, werden de volgende gereedschappen en materialen, geleverd door Easy Composites, in dit project gebruikt.
De hieronder getoonde hoeveelheid is de geschatte hoeveelheid die in het project is gebruikt, afgerond naar de dichtstbijzijnde beschikbare kitgrootte of hoeveelheid.
MATERIALEN & VERBRUIKSARTIKELEN
GEREEDSCHAP & APPARATUUR
POLIJSTEN
VIDEO-HANDLEIDING
Zo Maak je een Riviertafel van Epoxyhars met Levende Randen
Download ons gratis eBook 'The How to Make a Resin River Table Handbook'.
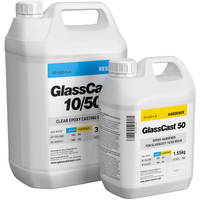
GlassCast® 50 is een nieuwe epoxy giethars van de makers van het bekende GlassCast® product. GlassCast 50 is perfect voor projecten die diepe, waterheldere, bubbelvrije gietingen vereisen en de speciale formule maakt het het ideale product voor gebruik met hout - zoals de prachtige harsriviertafels, het vullen van knoesten en andere meubelprojecten.
Deze stapsgewijze handleiding - bestaande uit de tutorialvideo en het gratis te downloaden eBook - biedt u alle informatie die u ooit nodig zou kunnen hebben voor het maken van uw eigen live-edge riviertafel, inclusief planning, gieten, afwerking en onderhoud van uw tafel. Het bevat ook handige tips en best-practice adviezen. Hier zijn de stappen in het kort:
OVERZICHT TUTORIAL
1. Voordat je begint
Om uw DIY hars riviertafel project te starten, moet u uw hout kiezen; het moet zo droog en vlak mogelijk zijn en hoe interessanter het hout, hoe beter voor dit type project, dit hangt echter af van uw persoonlijke smaak. Als u geen toegang heeft tot een professionele werkplaats, kunt u uw houtleverancier vragen het hout op de door u gewenste dikte te schaven en het doormidden te zagen, klaar om het rivierkanaal te creëren. U heeft toegang nodig tot diverse gereedschappen en materialen en het is erg belangrijk dat u werkt onder gecontroleerde werkplaatsomstandigheden om optimale resultaten te bereiken - zoals een droge verwarmde werkplaats en GlassCast® 50 op kamertemperatuur gedurende de gehele verwerkings- en uithardingstijd.
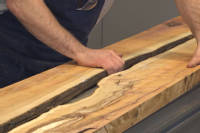
2. Het voorbereiden en stabiliseren van het hout
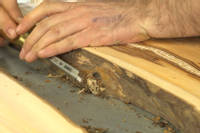
Voor deze conventionele doe-het-zelf live-edge harsriviertafel gaat de stapsgewijze handleiding ervan uit dat het hout een live-edge of waney-edge heeft en in het midden is gespleten, vervolgens omgedraaid en omgekeerd, zodat het met de opening voor de rivier een nauwkeurige rechthoek vormt. Als de live-edge schors of los materiaal heeft, moet dit volledig worden verwijderd, zodat er een sterke chemische binding ontstaat wanneer de hars en het hout elkaar raken. De beste manier om dit te doen, is door het losse materiaal met een beitel te verwijderen, vervolgens het oppervlak te schuren en vuil/stof te verwijderen.
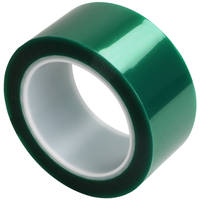
Als uw hout spleten, scheuren of knoestgaten aan de onderkant heeft, moeten deze worden opgevuld met een kleine hoeveelheid hars (die op het tafelblad kunnen worden opgevuld wanneer de hoofdlaag wordt gegoten). Mogelijk moet u deze kleine gietingen bijvullen, omdat het hout een deel van de hars zal absorberen. Flash/lossingstape is ideaal voor het creëren van een tijdelijke barrière indien nodig, omdat het niet aan de uitgeharde hars blijft kleven, en het doel is om iets over het gat heen te gieten. Zodra het volledig is uitgehard, gebruikt u een handschuurmachine om eventuele hoge plekken te verwijderen.
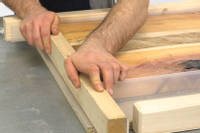
3. Het opzetten van harsbarrières
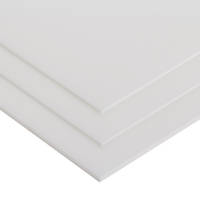
Omdat de harsrivier grotendeels niet wordt ondersteund, moet u een barrière (zowel basis als zijkanten) rond het hout plaatsen, controleren of deze waterdicht is en gemaakt is van materiaal waar de GlassCast® 50 niet aan blijft kleven. We hebben polypropyleenplaat gebruikt, wat een geweldige gladde oppervlakteafwerking geeft, en een hotmelt-lijmpistool gebruikt om de barrières te bevestigen en af te dichten. In dit stadium moet u extra steun aan de zijkanten toevoegen om de barrières te ondersteunen wanneer het gewicht van de hars erin wordt gegoten, en de klemming plannen die nodig is om de planken op hun plaats en vlak te houden. Wanneer u tevreden bent met de opstelling, verwijdert u de klemmen en uw hout uit de container en bent u klaar om te gieten!
4. Het voorbereiden en gieten van de hars
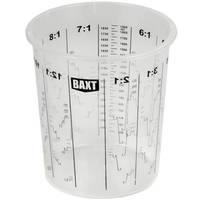
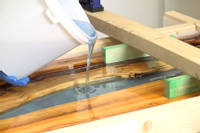
We raden aan om de GlassCast® 50 hars voor het hele project af te meten of te wegen als u kleur of effecten toevoegt, omdat dit zorgt voor een consistente kleur/effect. In de tutorial hebben we blauw doorschijnend kleurpigment toegevoegd - een paar druppels per keer toevoegen totdat we onze gekozen kleur bereikten, we gebruikten een kleurpigment zodat de hars nog steeds doorschijnend was, maar eruit zou zien als een rivier. Meet vervolgens de juiste hoeveelheid GlassCast® 50 verharder af voor elke gieting (niet meer dan 25mm diepte in één gieting) en meng grondig voordat u het overbrengt naar een tweede container en opnieuw mengt (dit staat ook bekend als 'dubbel potten'). Vervolgens worden de volgende gietingen gemaakt:
- Basislaag & Sealing Coat
- Hoofdlaag - Laag 1
- Hoofdlaag - Laag 2
- Herhaal indien nodig
Na elke gieting moet de hars de B-fase bereiken - dit betekent dat de hars gedeeltelijk is uitgehard en stevig begint te worden wanneer u het oppervlak aanraakt (met een gehandschoende vinger) u kunt een markering maken, maar er blijft geen hars aan uw vinger kleven. Gieten bovenop de onderliggende laag in de B-fase zorgt voor een sterke chemische binding - alsof het gieten als een enkele gieting is gedaan.
Denk eraan dat je de 25mm enkele gietdiepte niet overschrijdt en meng indien nodig meerdere kleinere batches en gebruik de dubbele gietmethode om een grondige menging te verzekeren. GlassCast® 50 ontgast zichzelf, maar als je merkt dat je luchtbellen hebt, gebruik dan een warmtepistool of een haardroger op een lage temperatuur om ze te helpen verwijderen.
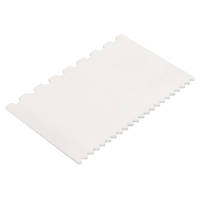
Het belangrijkste advies dat we kunnen geven is het gieten van een basis-/afdichtingslaag vóór de hoofdgieting - hierdoor worden alle oppervlakken van het hout volledig afgedicht en wordt het insluiten van lucht geminimaliseerd. Giet een laag in de barrièrecontainer en breng het hout opnieuw aan. Breng vervolgens met een kwast een dunne laag hars aan op alle blootgestelde randen en vul eventuele knoesten of scheuren op. Breng vervolgens de klemmen aan en zet ze vast. Zodra de B-fase is bereikt, giet u laag 1 van de hoofdgieting en herhaalt u dit indien nodig totdat de hars net iets boven het rivierkanaal uitsteekt en laat u het volledig uitharden.

5. Het afwerken van het oppervlak
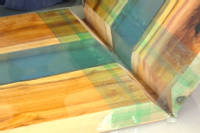
Na uitharding verwijder je de barrières en bepaal je de uiteindelijke afwerking die je wilt bereiken. De tutorial laat een natuurlijke houtafwerking zien die contrasteert met een glanzende hoogglans harsrivier. Om dit te bereiken moet je het oppervlak van het stuk volledig vlak maken - er zijn verschillende manieren om dit te doen, afhankelijk van de apparatuur die je tot je beschikking hebt. Wij gebruikten een bovenfrees op een brug en gingen meerdere keren over het hele oppervlak. Daarna werkten we met een handschuurmachine van grof naar fijn tot een gladde afwerking was bereikt.
Het eBook beschrijft ook hoe je overal een hoogglanzende afwerking kunt krijgen - het hangt echt van je persoonlijke smaak af, misschien wil je het zelfs dekkend laten na het schuren.
6. Het snijden en verbinden van de zijkanten
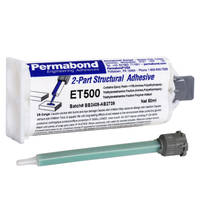
We wilden een salontafel maken met een watervaleffect door zijkanten te gebruiken die zijn gemaakt van een stuk hout en hars in plaats van losse poten, zodat het lijkt alsof de rivier door het hele blad en de zijkanten stroomt. We maakten verstekverbindingen met een bladhoek van 45°C en brachten de verbindingen samen met een heldere epoxylijm - Permabond ET500. We gebruikten plakband aan alle kanten van de verbinding om een scharnier te maken, brachten de lijm aan en klemden deze vast in een hoek van 90°C terwijl de lijm uithardde.
7. Het afwerken en polijsten van het hout en de hars
Ten eerste is het belangrijk om het hout te verzegelen om het te beschermen tegen het polijstproces met hars. Of je een beits, was of olie gebruikt, hangt af van je persoonlijke voorkeur - wij gebruikten een heldere Deense olie en brachten die aan met een pluisvrije doek.
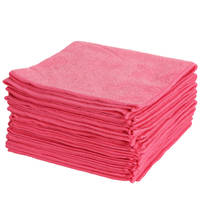
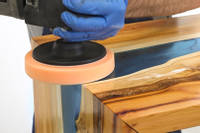
Tot slot hebben we de harsrivier gepolijst met Pai Cristal NW1 polijstpasta en een hand-polijstmachine. Breng de polijstpasta royaal aan op de hars en polijst, vul de pasta naar behoefte aan tot volledige glans is bereikt en veeg het vervolgens af met een zachte, schone doek.

8. Nazorg
Tips om de prachtige uitstraling van je resin riviertafel te onderhouden en te verlengen zijn onder andere:
- Plaats hete voorwerpen niet rechtstreeks op het oppervlak, maar gebruik hittebestendige matten.
- GlassCast® 50 is ontworpen met de beste UV-stabiliteit van alle epoxyharsen op de markt en is jarenlang bestand tegen indirect zonlicht, maar mag niet rechtstreeks aan UV-licht worden blootgesteld.
- Krassen en vlekken herstellen - door het herhalen van de afwerkings- en polijststappen is het mogelijk om het oppervlak te herstellen tot een hoogglanzende afwerking als het beschadigd is.
Als je meer wilt weten over het product en alternatieve ideeën, ga dan naar de GlassCast® 50 productpagina.
DISCUSSIE (60)
Deel al uw vragen of opmerkingen over deze videohandleiding.
EEN OPMERKING OF VRAAG ACHTERLATEN
Downloads (1)
| Resin River Tafel Handboek |
PRODUCTEN DIE IN DIT PROJECT ZIJN GEBRUIKT
Hoewel het niet per se een uitputtende lijst is, werden de volgende gereedschappen en materialen, geleverd door Easy Composites, in dit project gebruikt.
De hieronder getoonde hoeveelheid is de geschatte hoeveelheid die in het project is gebruikt, afgerond naar de dichtstbijzijnde beschikbare kitgrootte of hoeveelheid.
MATERIALEN & VERBRUIKSARTIKELEN
GEREEDSCHAP & APPARATUUR
POLIJSTEN
DISCUSSIE (60)
Deel al uw vragen of opmerkingen over deze videohandleiding.
EEN OPMERKING OF VRAAG ACHTERLATEN
100% VEILIG
BETAALMETHODEN
Easy Composites EU B.V., geregistreerd in Nederland 73601195. Alle inhoud auteursrecht (C) Easy Composites Ltd, 2025. Alle rechten voorbehouden.