Need any help or advice?![]() +44 (0)1782 454499
+44 (0)1782 454499
PRODUCTS USED IN THIS PROJECT
Although not necessarily an exhaustive list, the following tools and materials, supplied by Easy Composites, were used in this project.
The quantity shown below is the approximate amount used in the project rounded up to the nearest available kit size or quantity.
ANCILLARIES
TOOLS & EQUIPMENT

COMPONENT MATERIALS
MATERIALS & CONSUMABLES
VIDEO TUTORIAL
Mouldless Construction for One-Off and Prototype Components
In this composites video tutorial we demonstrate how to make carbon fibre or fibreglass (GRP/FRP) components without the need for a female mould by laminating the reinforcement directly onto a foam ‘former’, flatting and finishing the surface and then, once cured, removing the foam.
INTRODUCTION
For less weight-critical one-off components or pre-production prototypes, this process can cut time and cost out of the conventional process for making a composite part which is normally to first make a pattern, then take a female mould off that pattern, before finally using the mould to make the finished component, often referred to as the moulding.
The obvious advantages to a 'mould-less' process are the reduced materials, time and cost involved in making both a pattern and a mould, neither of which, in the case of a one-off component, will be required once the final component has been made.
Another advantage is that fully 3D shapes, like the efficiency racer made in the tutorial, which would otherwise require multi-part split-moulds in order to make it possible to remove the component from the mould, can be made in one single piece with the foam broken up and extracted in pieces afterwards.
There are however significant disadvantages to this this process which should also be considered:
- No repeatability - If you require more than once component, it would be less work, and yield a better product, to use a conventional moulding process.
- Heavier components - Using a mould-less construction method, it is impossible to produce components as light (for the same strength) as a moulded part, especially one that has been vacuum consolidated.
- Compromised appearance - For unpainted carbon fibre parts that will show-off the carbon fibre appearance, a mould-less construction process will always result in some additional weave distortion or visual ‘ripple’ in the reinforcement.
WHAT YOU WILL LEARN
In this tutorial we go through the full process of making a well-finished carbon fibre bodyshell for an efficiency racer by simply laying carbon fibre and resin onto a hand-shaped polystyrene foam former.
The tutorial and guide include information on:
- What materials are suitable for the former
- Methods for shaping the foam former to match your design
- How to prevent resin from sticking to the foam
- Hand-laminating the resin and reinforcement onto the former
- Overcoating with additional resin to improve the finish
WHAT YOU WILL NEED
Materials and Equipment Needed to Complete the Project
Foam to Make the Former - See section 1 below.
Spray Adhesive - Used to stick the release film to the foam former. We recommend 3M Scotch Super 77 although most general purpose permanent spray adhesives should do. Easy Composites’ FusionFix is not suitable.
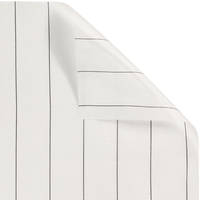
Unperforated Release Film - R210 release film used to prevent the laminating epoxy from sticking to the foam.
Peel Ply (optional) - PP180 peel ply is used to improve the consistency and finish on the inside of the laminate and improve secondary bonding.
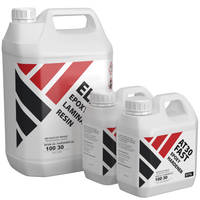
Epoxy Laminating Resin - A suitable epoxy laminating resin to wet out the reinforcement; we use EL2 Epoxy Laminating Resin with AT30 SLOW hardener for a long working time and excellent mechanical properties.
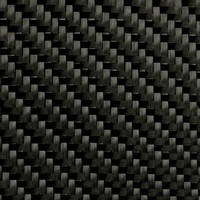
Reinforcement (i.e. carbon fibre) - 3 layers of 210g 2x2 twill carbon fibre form the main reinforcement for the component. Most composite reinforcements would be suitable such as carbon fibre, glass fibre, flax etc. Aramids (such as Kevlar) can be used but are very difficult to sand flat.
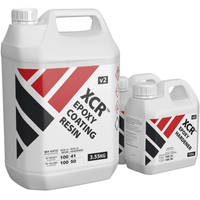
Epoxy Coating Resin - CR Coating Resin is applied in multiple coats over the top of the laminate and then flatted and polished to improve the surface finish.
Dual Action / Random Orbit Sander (optional) - Flatting and polishing an unmoulded component.
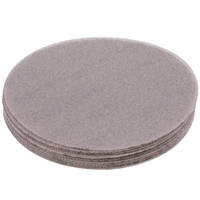
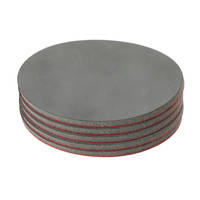
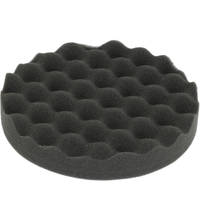
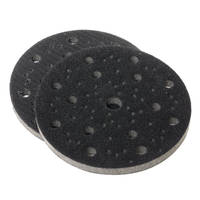
Flatting / Finishing Abrasives - This process involves a lot of sanding and flatting. We use a Mirka Deros orbital sander with Abranet Ace and Abralon pads.
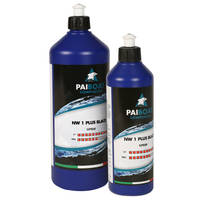
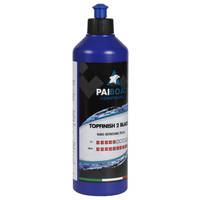
Polishing Compound (optional pads and polisher) - NW1 Black cutting compound followed by TOPFINISH2 polishing compound are used to leave the component with a high gloss finish.
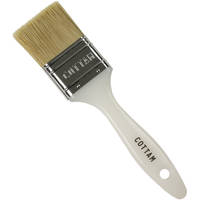
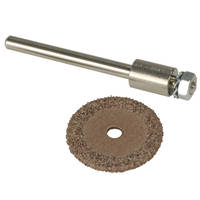
Ancillaries - Laminating brushes, acetone (for cleaning), PPE, Perma-Grit cutting wheel, fabric scissors, hand-tools tools for cutting and shaping the foam.
STEP-BY-STEP GUIDE
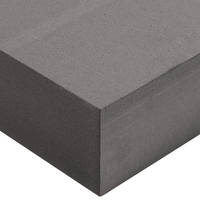
1. Suitable Foam to Make the Former
Most types of foam can be used to make the former. In the interests of keeping the cost of the project to a minimum, expanded polystyrene (also known as 'bead board') is inexpensive and widely available as it is often used as home insulation in for construction and DIY projects.
Other types of foam can also be used, such as RTM Styrofoam (blue foam) and the more expensive polyurethane foam, which is more conventionally used in composites pattern making.
If you choose any type of polystyrene foam, it is very important to remember that solvent-based resins, such polyester resin and body-filler, will dissolve the foam if they come into direct contact with it. In this tutorial we don't use any solvent-based resins but this is an important consideration if you were to use polyester resins or fillers.
2. Shape the Foam
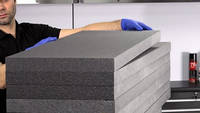
In this case stock sheets of polystyrene foam are used to create the shape. The sheets are cut into sizes suitable for creating a block of foam slightly bigger than the planned project size. The blocks are then bonded together using a foaming PU adhesive such as Gorilla Glue. This is chosen because of its strength, ease of use and the foaming action which makes it sand similarly to the foam.
Once the block is bonded together, simple cardboard templates of the top and side view are created. Alternatively, the foam could be easily CNC cut, or use a hybrid approach of using sectional views with the gaps filled with foam and sanded to the view profiles. Hot wire could be use but it will not cut the adhesive and can be harder to initially sand so is best suited to projects such as aerofoil profiles and similar.
The initial rough shaping is done with a traditional wood saw. The foam is easily cut to shape using the saw and the basic shape can be easily and quickly created this way. To further refine the shape, the other side of the template is used as a sanding guide to accurately refine the shape. This can be done by hand or with an orbital sander with a 120 grit disc.
For the fine finishing and shaping the compound curves, the block is sanded freehand without templates. If a high degree of accuracy is needed, further templates can be used to keep the sanding accurate. Care needs to be taken to ensure the shape develops as intended and regular checking is needed to ensure progress is good. This stage is critical as it is developing the final shape of the project. Often, running a hand over the surface of the block will highlight high spots and rough spots that would otherwise be difficult to see. The block is then finished by hand sanding to get a smoother finish and help finish any fine details and curves.
3. Apply Release Film to the Foam
The purpose of the release film is to prevent the resin from bonding to the foam. Traditional release agents like wax or PVA don't work on the open texture of a foam like polystyrene and would still allow the resin to mechanically bond to it, making it difficult to remove. Hence, wrapping the foam with release film will often provide a quick and clean way to get a reliable release from the polystyrene. The release film is bonded to the foam block using a conventional tacky spray adhesive such as 3M Super 77 or other spray adhesives.
The film is then applied to the foam block and smoothed out as it is applied. Small creases are not an issue as they will not be seen on the finished part. The shape may need several pieces of film and they are applied in the same way and overlapped and taped using Flash Release Tape to cover the block completely.
4. Using Peel Ply
The first layer of the layup is the peel ply which is used to provide a smooth consistent surface to the inside of the part. The peel ply is laid on the surface and marked up to provide a cutting line. This is then cut out. At the same time, the peel ply can then be used as a template guide for cutting the carbon fibre. In this case we are aiming for 1mm thickness which is approximately three layers of material. The shape of this project means that the process is split into a top and bottom half for the laminating but many shapes it will be possible to do the process in one go.
In this case, the EL2 Epoxy Laminating resin is used and a batch is mixed up to laminate the peel ply. A layer of resin is brushed onto the foam and the peel ply is laid on and wetted out with resin before moving onto the carbon fibre laminate itself. As a rough guide, in hand layup, the amount of resin needed to wet out the fabric is the same as the weight of the fabric which makes it relatively easy to calculate the amount of resin needed.
5. Laminating the Reinforcement
Now that the peel ply has been wetted out, the layers of reinforcement are applied and wetted out one layer at a time until all three layers have been applied. Care needs to be taken to wet out the fibres fully working the resin into the fibre up the fabric. Flat spreaders, squeegees and even finned rollers can be used to spread the resin. The aim is to wet out the fibres fully but not to leave an excessive wet film or resin pooling over the surface. Once the layers of reinforcement have been applied, the edges of the fabric can be trimmed off to neaten the edges. The laminate is then left to fully cure.
To prepare for the second layup, the edges of the carbon are de-nibbed and keyed up using 120 grit sandpaper. The second half of the layup is much the same as the first and the peel ply and three layers of fabric are laminated onto the surface as before. Once this is complete, the whole part is left to cure for 24 hours.
6. Keying and De-Nibbing the Reinforcement
Now that the part has cured, using a 120 grit paper, de-nib and key the surface of the part. The purpose is not to sand into the carbon but to remove any slight high spots and give the surface an overall key ready for the resin coating. This can be done with an orbital sander although some corners and areas of detail may still need hand sanding to get an even finish. Once the surface has been fully sanded, the part should be wiped down to remove any dust or debris.
7. Applying the Coating Resin
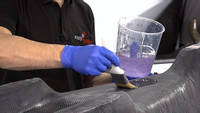
An additional resin coating is necessary to provide a surface that can be flatted and smoothed without sanding into (or through!) the thin layer of carbon fibre. XCR Coating Resin is ideal for this and, once flatted and polished, provides an excellent clear gloss finish.
The resin is weighed out and thoroughly mixed using the 'double-potting' method. The resin is then brushed onto the surface in a reasonably thick layer. It should be just thick enough that is does not run or flow off excessively. Once and even coat has been applied, the resin is then left to partially cure until the B stage, where the resin is just firmed up but still tacky. This is the ideal stage to apply additional coats. A second coat of the XCR Coating Resin is applied much in the same way as the first and then allowed to fully cure.
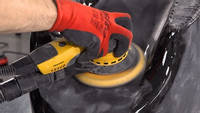
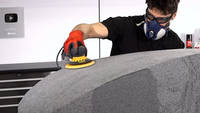
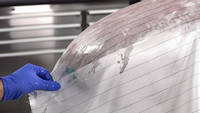
8. Final Flatting
After the brush application of the XCR Coating Resin, the surface will be glossy but still slightly uneven. There may also be high spots, runs and drips which all need sanding out. This is done on an orbital sander with a 120 grit sanding disc. Work evenly over the whole surface, regularly checking progress to see where extra work is needed.
It is likely that in some places you may cut into the carbon fibre, if so it is necessary to apply another thin coat of XCR resin to the part.
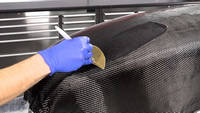
Once that is cured, a final sand is necessary to remove any slight surface defects. As the finish is already significantly smoother, we can start with a 400 grit disc and sand it smooth with the orbital sander. From this point, finer grade papers will be used to remove the scratches from the previous grit to get a very smooth surface ready for polishing.
At this point an 800 grit disc is used. A foam interface pad is used between the disc and sander as it helps increase the surface contact on compound curves and helps avoid areas being missed. This is then followed up with a 1000 and 2000 grit Abralon pads which already have a foam backing so no interface pad is needed. A misting of water on these finer grades will help avoid paper clogging and help give a smoother finish. The part is then cleaned thoroughly before moving on to polishing.
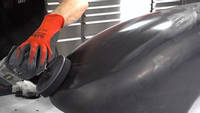
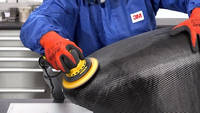
9. Polishing
The part is then polished using our NW1 Coarse Polishing compound. This is evenly and sparingly spread over the surface of the part and then polished using a polishing machine and a soft pad. Work evenly over the surface and keep the pad moving to avoid excessive heating of the surface. If it gets more than lightly warm to the touch, allow the part to cool before continuing.
The NW1 is a self-diminishing polish which means it gets finer the more it is worked. For many applications, the gloss produced by the NW1 is all that is needed. However, for a very high gloss finish, the NW1 can be followed up with the TopFinish 2 which is applied and buffed in the same way.
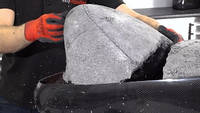
10. Trimming and Removing the Foam
All that is left is to trim the wheel wells, cut out the hatch and remove the foam. A cut line for the hatch is marked out and then the hatch is carefully cut using a Permagrit 19mm tungsten carbide cutting disc. The Wheel wells are trimmed by using a flap wheel in a grinder to sand down the bottoms and expose the foam. The hatch is then removed exposing the foam.
Removing the foam is best done with a chisel and ripping it out by hand. Although a strong solvent can be used, this will leave a lot of flammable mess and residue to dispose of, so for a project this size, removing by hand is the best method. Dig out all the foam and remove it from the finished part. The release film and peel ply is then easy to rip from the surface of the part. The even peel ply finish is ideal for any further bonding or laminating depending on the application of the finished part.
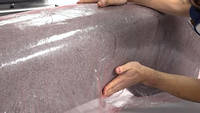
A rebate is created to mount the hatch to. This is simply done by cutting some 0.75mm carbon sheet into strips then bonding this onto the edge of the part around the hatch opening using some VM100 Methyl Methacrylate Adhesive. The part was then finished with a partial vinyl wrap and some decals to give the completed part.
DISCUSSION (16)
Please share any questions or comments you may have about this video tutorial.
Yes you can glue blocks together in both directions to make a block of the size you need from smaller blocks.
Both constructions would be completely valid, it comes down to how important the weight savings are versus the (potentially) increased complexity of going with a more optimised (i.e. lightweight) construction. Sheathing composites over plywood is a very straightforward process where little can go wrong. Your structure will inevitably be stronger than you need and so you don't need to give much thought to whether it will be strong enough to support a person's weight etc. If you go for a lighter weight all-composite construction then you have the added work of making moulds but it sounds like you're prepared for that. In terms of the strength you'll need to bear different loads, it's pretty much impossible to say without knowing the span, the shape, the thickness, the supports etc, but you'll probably have an instinct for it already. You can start with a laminate that's on the lean side and then, if it doesn't feel strong enough (i.e. it flexes) you could add more reinforcement from the back to stiffen it up. Another option, somewhere between the two techniques, would be to use PVC foam as the core (in place of the plywood) and then sheath over the foam. This way you don't have the heavy plywood core, significantly reducing the weight without making the construction much more complicated.
We would never recommend spraying epoxy resin. You certainly couldn't spray the XCR coating resin, although it's not thick for a resin it is too thick to spray and thinning it is not a good idea. If you want to spray the final finish, instead of brush applying and then flatting back then it would be a much better idea to use a conventional 2k clear coat which could be applied in the normal way.
Yes, it's strange one with traditional vacuum bagging that more vacuum pressure often isn't a better thing. The problem with too much pressure when vacuum bagging a wet-layup is that the vacuum bagging stack (usually peel ply, perforated film, breather, bag) had the ability to pull too much resin out of the laminate, effectively bleeding it try. You can try to mitigate this by limiting the amount of breather, using film with less perforation or overlapping the perforated film but these are all a rather inexact science. It's true that more vacuum pressure will give you more consolidation, which is a good thing, but - if unchecked - it will give you an overly dry laminate and a poor surface finish, which is usually more harmful to performance than a reduced vacuum level. Experience has taught us that around 20% provides sufficient pressure to adequately consolidate the laminate without bleeding it too dry. We find this approach more reliable than a higher pressure and use of alternative mitigating measures, especially when you're doing a new part for the first time (i.e. without the benefit of plenty of cycles of experimentation).
Providing your foam former could take the pressure without deforming (which is NOT guaranteed even at just 20% vac) then this same vacuum level (20% max) would probably be about right for any vac bagged, wet layup process, including vacuum bagging an overlaid construction like this.
Hard to quantify without direct comparison and mechanical testing. However in an advanced pre-preg type moulding, consolidation of the fibres would likely be superior so you would expect some improvements in mechanical performance. Plus it would be considerably lighter due to consolidation of the fibres removing excess resin and no need for multiple layers of resin to give a good surface as pre-preg in a good mould should have a good surface straight out the mould.
Polystyrene is recyclable in commercial waste disposal. However many domestic waste recycling services do not accept polystyrene which is a shame as it is a recyclable material.
Thanks Fredy, yes, you're right, this is a case of 'sticking with it' until it comes good. Although the finished product isn't perfect by a moulded component standard, it does finish up to still be a well finished and highly presentable component, especially for one-off or prototype projects.
No, we wouldn't use a solvent to clean off sanding dust; there would be no advantage to solvent over a damp cloth. Solvents only help when you need to dissolve something (like grease). Sanding dust will wipe off just fine.
Yes, I hope we made it clear throughout the video, this is NOT the highest performance construction method. We've done plenty of videos on resin infusion, prepregs, cores, CNC machining patterns, etc. All of this technology can produce stronger lighter parts but in many situations this is either overkill, not accessible (due to lack of equipment) or just out of reach financially. For example, lots of school 'Greenpower' teams just don't have the budget for high temperature tooling, curing ovens, prepregs etc. We wanted to show that a limited budget doesn't mean they can't design and make their own bodyshells.
That might be an issue of using particularly heavy fabrics (like 12k) or it could come down to the quality of the fibre and fabric itself. Fibre from different manufacturers, and fibre with different types of 'sizing' (the treatment applied to the fibres to help resin to bond to them) can give them very different behaviour. Over the years, we've come across some odd-ball carbon fabrics that feel really stiff and unpliable. A suitable carbon cloth should be super-soft and really wouldn't be expected to cause any problems sitting down properly on the outside of a modest curve.
If you wanted to infuse, you would still need the prepare the pattern. Then it would need to be sealed to provide a smooth surface to take a mould from, then make the mould, trim the mould, all before you could even consider the infusion process. On balance this is quicker and for a one off a much easier way to go.
If you had a need for multiple parts or the method was strucurally too compromised for your needs, then a more traditional approach using a mould may well work better for you.
Hi Andrew, yes, it is possible to dissolve polystyrene with acetone but it's also a pretty nasty process. Acetone is, of course, a highly flammable solvent. You need quite a lot of it to dissolve the foam and the resulting plastic solvent sludge is messy and also incredibly flammable. However, in situations where the foam can't be extracting through normal mechanical means then this is an option, so long as you know what you're doing and mitigate risks.
Thanks for the feedback. Yes, that was definitely the idea with this one. We've done a lot of high-tech composites recently but there's still a huge amount of what people are really out there doing that's a lot more 'practical', like this. We like to encourage and help with it all.
LEAVE A COMMENT OR QUESTION
PRODUCTS USED IN THIS PROJECT
Although not necessarily an exhaustive list, the following tools and materials, supplied by Easy Composites, were used in this project.
The quantity shown below is the approximate amount used in the project rounded up to the nearest available kit size or quantity.
ANCILLARIES
TOOLS & EQUIPMENT
COMPONENT MATERIALS
MATERIALS & CONSUMABLES
DISCUSSION (16)
Please share any questions or comments you may have about this video tutorial.
Yes you can glue blocks together in both directions to make a block of the size you need from smaller blocks.
Both constructions would be completely valid, it comes down to how important the weight savings are versus the (potentially) increased complexity of going with a more optimised (i.e. lightweight) construction. Sheathing composites over plywood is a very straightforward process where little can go wrong. Your structure will inevitably be stronger than you need and so you don't need to give much thought to whether it will be strong enough to support a person's weight etc. If you go for a lighter weight all-composite construction then you have the added work of making moulds but it sounds like you're prepared for that. In terms of the strength you'll need to bear different loads, it's pretty much impossible to say without knowing the span, the shape, the thickness, the supports etc, but you'll probably have an instinct for it already. You can start with a laminate that's on the lean side and then, if it doesn't feel strong enough (i.e. it flexes) you could add more reinforcement from the back to stiffen it up. Another option, somewhere between the two techniques, would be to use PVC foam as the core (in place of the plywood) and then sheath over the foam. This way you don't have the heavy plywood core, significantly reducing the weight without making the construction much more complicated.
We would never recommend spraying epoxy resin. You certainly couldn't spray the XCR coating resin, although it's not thick for a resin it is too thick to spray and thinning it is not a good idea. If you want to spray the final finish, instead of brush applying and then flatting back then it would be a much better idea to use a conventional 2k clear coat which could be applied in the normal way.
Yes, it's strange one with traditional vacuum bagging that more vacuum pressure often isn't a better thing. The problem with too much pressure when vacuum bagging a wet-layup is that the vacuum bagging stack (usually peel ply, perforated film, breather, bag) had the ability to pull too much resin out of the laminate, effectively bleeding it try. You can try to mitigate this by limiting the amount of breather, using film with less perforation or overlapping the perforated film but these are all a rather inexact science. It's true that more vacuum pressure will give you more consolidation, which is a good thing, but - if unchecked - it will give you an overly dry laminate and a poor surface finish, which is usually more harmful to performance than a reduced vacuum level. Experience has taught us that around 20% provides sufficient pressure to adequately consolidate the laminate without bleeding it too dry. We find this approach more reliable than a higher pressure and use of alternative mitigating measures, especially when you're doing a new part for the first time (i.e. without the benefit of plenty of cycles of experimentation).
Providing your foam former could take the pressure without deforming (which is NOT guaranteed even at just 20% vac) then this same vacuum level (20% max) would probably be about right for any vac bagged, wet layup process, including vacuum bagging an overlaid construction like this.
Hard to quantify without direct comparison and mechanical testing. However in an advanced pre-preg type moulding, consolidation of the fibres would likely be superior so you would expect some improvements in mechanical performance. Plus it would be considerably lighter due to consolidation of the fibres removing excess resin and no need for multiple layers of resin to give a good surface as pre-preg in a good mould should have a good surface straight out the mould.
Polystyrene is recyclable in commercial waste disposal. However many domestic waste recycling services do not accept polystyrene which is a shame as it is a recyclable material.
Thanks Fredy, yes, you're right, this is a case of 'sticking with it' until it comes good. Although the finished product isn't perfect by a moulded component standard, it does finish up to still be a well finished and highly presentable component, especially for one-off or prototype projects.
No, we wouldn't use a solvent to clean off sanding dust; there would be no advantage to solvent over a damp cloth. Solvents only help when you need to dissolve something (like grease). Sanding dust will wipe off just fine.
Yes, I hope we made it clear throughout the video, this is NOT the highest performance construction method. We've done plenty of videos on resin infusion, prepregs, cores, CNC machining patterns, etc. All of this technology can produce stronger lighter parts but in many situations this is either overkill, not accessible (due to lack of equipment) or just out of reach financially. For example, lots of school 'Greenpower' teams just don't have the budget for high temperature tooling, curing ovens, prepregs etc. We wanted to show that a limited budget doesn't mean they can't design and make their own bodyshells.
That might be an issue of using particularly heavy fabrics (like 12k) or it could come down to the quality of the fibre and fabric itself. Fibre from different manufacturers, and fibre with different types of 'sizing' (the treatment applied to the fibres to help resin to bond to them) can give them very different behaviour. Over the years, we've come across some odd-ball carbon fabrics that feel really stiff and unpliable. A suitable carbon cloth should be super-soft and really wouldn't be expected to cause any problems sitting down properly on the outside of a modest curve.
If you wanted to infuse, you would still need the prepare the pattern. Then it would need to be sealed to provide a smooth surface to take a mould from, then make the mould, trim the mould, all before you could even consider the infusion process. On balance this is quicker and for a one off a much easier way to go.
If you had a need for multiple parts or the method was strucurally too compromised for your needs, then a more traditional approach using a mould may well work better for you.
Hi Andrew, yes, it is possible to dissolve polystyrene with acetone but it's also a pretty nasty process. Acetone is, of course, a highly flammable solvent. You need quite a lot of it to dissolve the foam and the resulting plastic solvent sludge is messy and also incredibly flammable. However, in situations where the foam can't be extracting through normal mechanical means then this is an option, so long as you know what you're doing and mitigate risks.
Thanks for the feedback. Yes, that was definitely the idea with this one. We've done a lot of high-tech composites recently but there's still a huge amount of what people are really out there doing that's a lot more 'practical', like this. We like to encourage and help with it all.
LEAVE A COMMENT OR QUESTION
100% SECURE
PAYMENT METHODS
Easy Composites EU B.V., registered in the Netherlands 73601195. All content copyright (C) Easy Composites Ltd, 2025. All rights reserved.