Need any help or advice?![]() +44 (0)1782 454499
+44 (0)1782 454499
PRODUCTS USED IN THIS PROJECT
Although not necessarily an exhaustive list, the following tools and materials, supplied by Easy Composites, were used in this project.
The quantity shown below is the approximate amount used in the project rounded up to the nearest available kit size or quantity.
TOOLS & EQUIPMENT


PATTERN MAKING MATERIALS
MATERIALS & CONSUMABLES


VACUUM BAGGING CONSUMABLES

INFUSION EQUIPMENT & CONSUMABLES

REINFORCEMENTS

VIDEO TUTORIAL
Production of High Temperature Carbon Fibre Moulds Using Resin Infusion
In this composites training video, we demonstrate how to make high temperature carbon fibre moulds/tools, suitable for high temperature cure of prepregs and other laminates up to 160°C, using a resin infusion of Easy Composites' EL160 high temperature epoxy resin system.
Advantages to this process include reduced material costs compared to tooling prepregs, compatibility with a wide range of pattern materials, and the possibility of an ambient temperature initial cure for maximum dimensional accuracy.
WHAT YOU WILL LEARN
During this video you will learn the requirements and methods of creating a suitable pattern. Followed by this, the method of laying up the high temperature mould will be demonstrated including the various considerations specific to high temperature and infusion process. We also include a custom 'tackifier' to use instead of spray adhesives.
The infusion bagging stack and the infusion itself is also covered, followed by the correct cure and post cure processing.
Finally the trimming and finishing of the mould will be shown.
WHAT YOU WILL NEED
Materials and Equipment Needed to Complete the Project
Suitable Pattern - See section 2 below.
CR1 Easy Lease Chemical Release Agent. - Used to ensure the infused mould does not stick to the Pattern
Vacuum Bagging Gum Tape - Placed on pattern Flange to seal vacuum bag against.
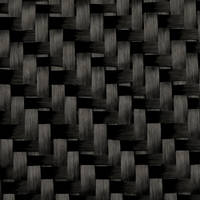
Carbon Fibre 2x2 Twill Weave 210g Woven Cloth - used on both the mould surfaces for a fine finish and ensure a balanced lay up.
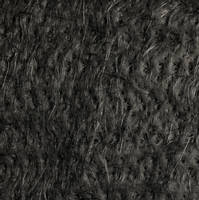
300g Carbon Fibre Non-Woven Mat - used in areas of tight corners and detail to help ensure no voids in those difficult areas.
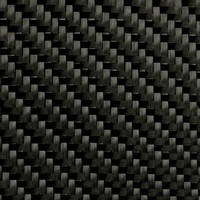
Carbon Fibre 2x2 Twill Weave 450g Woven Cloth - The main bulk reinforcement to add the strength and thickness to the mould.
ML3 Multi Layer Infusion Media - Combined Peel ply and infusion mesh properties in one material.
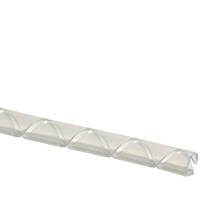
Resin Infusion Spiral - Helps distribute the resin from the feed line to the part.
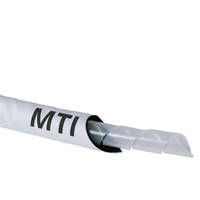
MTI® Hose - Microporous Vacuum Line - Helps the resin stop flowing at the edge of the part and avoids excess resin moving into the catch pot while the resin infuses elsewhere.
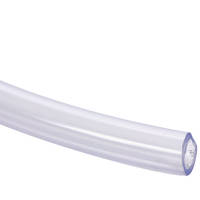
6mm PVC Vacuum Hose - Used to connect the resin feed and vacuum lines to the bag.
Resin Infusion Silicone Connector - Used to allow the hoses to breach the vacuum bag.
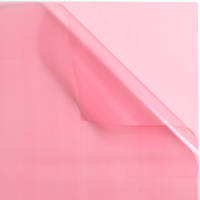
VB160 Vacuum Bagging Film - Creates the vacuum bag needed for the infusion.
SQUEEZEE Professional Infusion Line Clamp - used to clamp off vacuum and resin feed lines.
Vac Checker® Precision Digital Vacuum Gauge - used to help leak identification during the leak drop test.
EC4 Compact Composites Vacuum Pump - used to pull and hold vacuum on the bag during the resin infusion.
CP1 Resin Infusion Catch Pot - Used to prevent any resin making its way into the pump.
EL160 High Temp Epoxy Laminating Resin - The resin used to infuse the mould giving it the necessary high temperature capability.
Plastic Demoulding Wedges - Helps removal of ML3 infusion media and with removing the mould from the pattern.
Perma-Grit Wedge Sanding Block Large - used to neaten and smooth the rough cut edges of the mould.
Mirka P1200 Wet and Dry Abrasive Paper - For flatting the mould surface.
S120 Advanced Board & Mould Sealer - Restores the gloss finish to the mould.
STEP-BY-STEP GUIDE

1. Different Methods for Making High Temperature Moulds
High temperature moulds can be made in several different ways, each with their advantages and disadvantages.
Metal moulds can be used for high volume applications or where dimensional accuracy is not so critical. The main disadvantages are the cost of the billet and its machining and the fact that under high temperatures, the high CTE of the metal will effect the dimensional accuracy.
Tooling Pre-preg Carbon moulds are also commonly used and with the low CTE of the finished mould work well where dimensional accuracy is important. The main disadvantage is the requirement for the pattern to be temperature resistant for the initial cure of the pre-preg.
Hand Lay up of a high temperature mould typically involves a high temp gel coat and laminating resin usually laid up with carbon fibre. This is the most accessible method but its disadvantages include needing a level of skill to get a good quality void free laminate and the fact the gel coat layer can cause a slightly imbalanced layup which in some cases can cause mould distortion or warping.
Resin infused moulds have many of the advantages of tooling pre-pregs with a low CTE and high temperature resistance. They also have the ability to use lower temperature resistant pattern materials due to the low temperature cure meaning that you can use the cheaper Polyurethane based model boards and other pattern making materials unsuited for high temperature cures. A gelcoat should be avoided for dimensionally accurate parts to prevent the slight distortion or warping that may occur in a similar fashion with hand laid moulds.
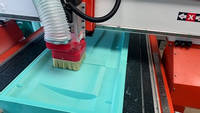
2. Suitable Pattern Making Materials
PU based Model boards are ideal for infused moulds as the material is cheaper than the epoxy tooling block and can be just as easily machined to a good finish.
In this case the pattern was made in Epoxy Tooling Board as it had already been used to make a tooling pre-preg based mould. Ideally it is necessary to have a bigger flange to help make the infusion lay up and bagging process easier.
The model board has been machined, then finished with S120 Advanced Board Sealer to seal the surface and give a high quality glossy finish to the Pattern. It is then treated with 6 coats of CR1 Easy Lease Chemical Release Agent to ensure a trouble free release of the finished mould from the pattern.
3. Laying up the Reinforcement
Before laying up the reinforcement, the gum tape has been laid around the flange to ensure it goes on a clean and fibre free surface ready for the infusion.
For this specific layup, it is perfectly possible to lay all the fibres up without the use of a Spray Tack Adhesive to hold the fibres in place. Traditional spray tack adhesives may leave surface marring so on the mould should be avoided where possible. It is possible to make the surface tacky using the EL160 High Temp Epoxy resin in 2 ways. Firstly brush on a very thin layer of the resin and allow it to part cure until it begins to get tacky in 2-3 hours. Secondly it is possible to make a DIY tackifier spray by mixing some of the resin then allowing it to sit until the end of its pot life just as it begins to gel. At this point add acetone at a ratio of 2 parts acetone to one part resin, mix then apply to the surface. The small spritzer spray bottles can be ideal for application. Within a few minutes, the spray mixture will be highly tacky and ready for the fabric placement.
The first layer of the mould uses a lighter weight 210g twill woven cloth. This gives both a smooth surface and offers great drapeability over mould curves and details. As this is a non-cosmetic application, it is perfectly acceptable to cut and overlap on areas of difficult detail.
Where there are areas of tricky and tight detail, a Carbon Fibre Non-Woven Matting is ideal to fill those areas and details that may become potential areas for voids or bridging. The non-woven matting can be cut and placed where needed thus smoothing out the detail for the subsequent layers of reinforcement.
The desired overall thickness of the mould will determine how much reinforcement will be needed to add the necessary strength to the mould. A typical mould like this would vary between 2 to 10mm in thickness with 2mm being a very small mould and 10mm being a large mould such as for a chassis or fuselage. In this case 5mm is about right for the mould that is being created.
In this case that means that 8 layers of the 450g Twill Woven Carbon Fibre is needed to achieve the desired thickness. As mould strength is generally not that critical, this can be an ideal opportunity to use up various offcuts and pieces of fabric you may not use for cosmetic parts. Also cheaper surplus and discount materials are ideal for mould making.
To finish off the laminate lay up, a final layer of 210g twill woven cloth is used. Although not so critical with this specific shape of mould, it is good practice to have a balanced lay up so that during the cure and post cure process there is little or no distortion or warping of the mould.
At this point, the excess edges of the material are trimmed off ready for applying the infusion bagging stack.
4. Infusion Stack and Consumables
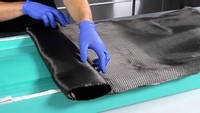
In many cases the infusion stack would use a traditional peel ply and infusion mesh. However in this case the ML3 Multi Layer Infusion media is to be used. This is, in effect, acting as both the peel ply and the mesh in one material. Its main advantages are quicker lay up and much easier tear down post infusion. Traditional peel ply and infusion mesh can be difficult to remove, especially in more complex shaped infusions. The ML3 is much easier to remove.
The ML3 will conform to moderate curves and detail but can be easily cut and overlapped where needed to make it conform. It is important to ensure that there are no gaps and all the fabric is covered.
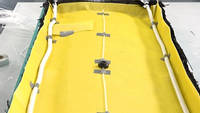
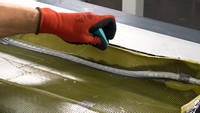
Next the infusion spiral and the resin infusion silicone connector are fixed in place. To minimise the distance of travel, the spiral is being located on the centre line of the part. Being a thick laminate and a mould, print through, although unlikely, would not be an issue in this case.
For the vacuum line, the MTI Hose is to be used on both sides of the mould to help ensure the resin flows where it needs to. The hose ensures that vacuum remains in the dry area of the parts helping maintain the resin flow until the laminate is fully wetted out.
At this stage, the VB160 Vacuum bagging film and additional gum tape pleats are applied to the set up to create a sealed bag for the infusion. Care is being taken to only remove a small amount of the backing paper from the gum tape at a time to minimise the chance of stray fibres dropping onto the tape.
The resin feed and vacuum lines are then inserted to the bag and the vacuum line clamped off. As the MTI hose is highly restrictive on air flow, the initial draw down of air out the bag and the leak test is conducted through the resin feed line. The set up will be reversed for the actual infusion. All that is now left is to do the leak test to ensure a fully sealed bag has been achieved.
5. Infusing the Mould
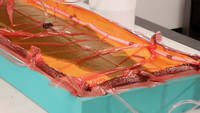
The Mould is now ready to be infused. The EL160 High Temp Epoxy Laminating resin is to be used in this case due to its high temperature properties needed for this mould. The EL160 will be capable of producing moulds that can be used up to 160C. If high temperature curing is not an issue, the same technique can be used with the standard IN2 Infusion Epoxy Resin.
The EL160 is a higher viscosity than a typical infusion resin so reducing the distance the resin has to flow, as with the set up on this mould, is necessary to ensure the mould infuses fully within the pot life of the resin. A second method would be to run the infusion at an elevated temperature by placing the whole mould into an oven at 40C. At that temperature the viscosity will be massively reduced and some quick infusion times can be achieved.
The EL160 is measured out and mixed just like any other resin system with care taken to ensure accurate measuring and thorough mixing. Once fully mixed, the resin feed line is opened and the resin infuses into the mould. Despite the higher viscosity, the careful planning of the resin feed and vacuum lines meant this mould fully infused in approximately 20 minutes. At this stage, the resin and vacuum lines can be clamped and the Initial Cure carried out.

6. Initial Cure
Due to the nature of the EL160 High Temperature epoxy, it is necessary to conduct the initial cure with an elevated temperature of 40°C. If the mould was allowed to cure solely at room temperature, the resin may be quite brittle meaning it could chip and crack during the demoulding process.
There are two basic ways of doing this cure, firstly allow the mould to cure for 24 hours at room temperature, then load the complete mould into an oven and cure at 40°C for a further 24 hours. Alternatively load the mould into an oven immediately after infusion and cure for 24 hours at 40°C.
7. Breakdown and Demould
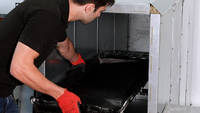
To check that the mould is fully cured, bend the resin feed line. The resin should feel very tough and resist the bending and should not crack or break. At this stage the mould is ready to be released from the pattern.
Breakdown the bagging stack by first pulling off the vacuum bagging film. Then remove the ML3 layer. This releases much easier than a traditional mesh and a good method is to simply drive a few soft wedges between the ML3 and the laminate to start the release process then pull it off.
To demould the mould, typically this may be quite difficult to release the stiff mould from the stiff pattern. However, the taper on the edges of the mould means that evenly driving some wedges around the perimeter between the pattern and mould will quickly release the mould.
8. Post-Curing the Mould
Now that the mould has been released, to realise the high temperature capability of the resin, it is necessary to carry out an elevated temperature post cure. In essence the mould needs to be gradually bought up in temperature in steps to the operating temperature of the mould. For example if the service temperature is to be 120°C, then the post cure should at least go to 120 or 130°C. To realise the maximum potential of the EL160 resin system, it can be post cured up to 160°C to give a 160°C service temperature.
The reason for the stepped post cure is to prevent excessive softening and potential distortion or warping of the mould during the post cure. Even with a stepped post cure, the resin will slightly soften, so it is important to ensure the mould is supported during the post cure. On planar flat surfaces like this mould, it can simply be laid on a flat surface during the post cure. Multi-part moulds should be bolted together to stabilise the shape and ensure the parts of the mould remain tightly fitting.
In most cases, the mould will be post cured off the pattern. This is due to differing CTE's of the pattern material and mould itself. The differing rates of expansion could cause twisting, distortion or warping of the mould.
9. Trim and Finishing of the High Temperature Mould
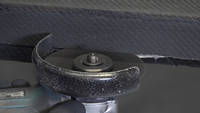
Once the post cure is complete, the mould can be trimmed and finished. The flanges are easily trimmed with a power tool then finished off with a sanding block and sand paper.
The mould could then be coated in release agent and put straight into service. However, in this case, there is a very slight texture on the mould surface from the porosity of the model board used as the pattern. This is sanded off with 1200 grit wet and dry sandpaper. It sands off easily and quickly being a positive of the surface porosity on the model board.
The mould is then cleaned with MC1 Mould Cleaner before being coated with 2 coats of S120 Advanced Board Sealer to restore the gloss finish. It is important to apply the S120 in a linear pattern and not double back until it is cured as this will ensure it has a nice even film layer.
Now that the mould surface is smooth and the gloss finish has been restored, the mould is ready to be put into service. The resin infusion has produced a high quality mould ideal for use in high temperature environments up to 160°C.
DISCUSSION (6)
Please share any questions or comments you may have about this video tutorial.
The CNC machine used is a FourSun branded machine.
You wouldn't use it with this process, the aim of this is that you don't need to us a gel coat.
Honestly, for a production composite mould, it’s definitely on the light side! Pick up a typical F1 mould, they’re around 8mm (16 plies). Also, the shape makes a difference; flatter moulds have less inherent stiffness so need more reinforcement. This mould could easily have used considerably more!
Great question, and one that we actually had ourselves! You'll notice that when we apply the 'tackifier' it's done so with a gentle wiping action. This technique seems to fine on the well prepared surface and we didn't notice any problems with releasing. If you were to be more aggressive with the application and scrub at the surface then indeed this may start to impact the release agent surface.
For a high temperature mould, it’s almost impossible to just use a hand laminating method without running into problems of internal voiding being exposed when the mould is taken to temperature. There are some techniques that can help to avoid these issues, but they’re not foolproof and so, as a rule, it’s much better to make high temp moulds using some sort of vacuum process. You’ll also get a much higher fibre-fraction, which will keep the CTE low, in line with the components the mould will be used to make.
The shape of this mould and its design is such that the fibres have not needed to be rotated. Also, not needing a high strength, there is little benefit to rotating some of the layers. Hence all the layers of 450g reinforcement are laid in a 0/90 degree orientation.
LEAVE A COMMENT OR QUESTION
PRODUCTS USED IN THIS PROJECT
Although not necessarily an exhaustive list, the following tools and materials, supplied by Easy Composites, were used in this project.
The quantity shown below is the approximate amount used in the project rounded up to the nearest available kit size or quantity.
TOOLS & EQUIPMENT
PATTERN MAKING MATERIALS
MATERIALS & CONSUMABLES
VACUUM BAGGING CONSUMABLES
INFUSION EQUIPMENT & CONSUMABLES
REINFORCEMENTS
DISCUSSION (6)
Please share any questions or comments you may have about this video tutorial.
The CNC machine used is a FourSun branded machine.
You wouldn't use it with this process, the aim of this is that you don't need to us a gel coat.
Honestly, for a production composite mould, it’s definitely on the light side! Pick up a typical F1 mould, they’re around 8mm (16 plies). Also, the shape makes a difference; flatter moulds have less inherent stiffness so need more reinforcement. This mould could easily have used considerably more!
Great question, and one that we actually had ourselves! You'll notice that when we apply the 'tackifier' it's done so with a gentle wiping action. This technique seems to fine on the well prepared surface and we didn't notice any problems with releasing. If you were to be more aggressive with the application and scrub at the surface then indeed this may start to impact the release agent surface.
For a high temperature mould, it’s almost impossible to just use a hand laminating method without running into problems of internal voiding being exposed when the mould is taken to temperature. There are some techniques that can help to avoid these issues, but they’re not foolproof and so, as a rule, it’s much better to make high temp moulds using some sort of vacuum process. You’ll also get a much higher fibre-fraction, which will keep the CTE low, in line with the components the mould will be used to make.
The shape of this mould and its design is such that the fibres have not needed to be rotated. Also, not needing a high strength, there is little benefit to rotating some of the layers. Hence all the layers of 450g reinforcement are laid in a 0/90 degree orientation.
LEAVE A COMMENT OR QUESTION
100% SECURE
PAYMENT METHODS
Easy Composites EU B.V., registered in the Netherlands 73601195. All content copyright (C) Easy Composites Ltd, 2025. All rights reserved.