Hulp of advies nodig?![]() +44 (0)1782 454499
+44 (0)1782 454499
PRODUCTEN DIE IN DIT PROJECT ZIJN GEBRUIKT
Hoewel het niet per se een uitputtende lijst is, werden de volgende gereedschappen en materialen, geleverd door Easy Composites, in dit project gebruikt.
De hieronder getoonde hoeveelheid is de geschatte hoeveelheid die in het project is gebruikt, afgerond naar de dichtstbijzijnde beschikbare kitgrootte of hoeveelheid.
VERSTERKINGEN
MATERIALEN & VERBRUIKSARTIKELEN
VIDEO-HANDLEIDING
Hoe Repareer je een Beschadigde Composiet Kano of Kajak
In deze eenvoudig te volgen videotutorial laten we ons aanbevolen proces zien voor het repareren van een kajak met lichte tot middelzware structurele schade aan koolstof/Kevlar.
Hetzelfde proces kan worden gebruikt voor de reparatie van lichte tot middelzware structurele schade aan elke composiet kano, kajak of kleine boot, inclusief die gemaakt van glasvezel, koolstofvezel, aramidevezel en diolen.
Om het vinden van de juiste producten gemakkelijk te maken, zijn alle materialen die in de video worden gebruikt online te koop en worden ze weergegeven in de 'boodschappenlijst' aan de rechterkant van de pagina.
OVERZICHT TUTORIAL
1. Verwijder losse of gebroken hars of vezel
De eerste stap is het verwijderen van gebroken, gescheurde of beschadigde gelcoat, vezel of hars uit het te repareren gebied. Dit doen we door het beschadigde materiaal voorzichtig weg te breken met een mes of beitel.
2. Gebied opschuren met grof schuurpapier
Voordat enige hars wordt aangebracht, is het essentieel om het te repareren gebied 'op te ruwen' met grof schuurpapier. Wij adviseren schuurpapier met korrel 120. Zorg ervoor dat u het gehele te repareren gebied opschuurt; elk gebied dat niet op deze manier is voorbereid, zal zeer moeilijk zijn voor de reparatie om zich aan te hechten.
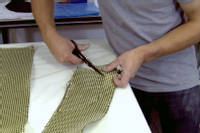
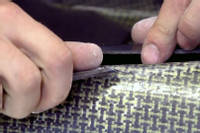
3. Versteviging op maat snijden voor reparatiepleisters
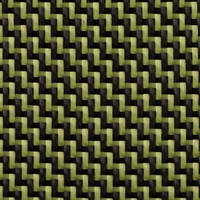
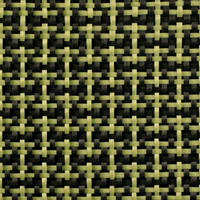
Bepaal de benodigde afmetingen van de reparatiepatches. Wij adviseren een composiet kajak, kano of boot te repareren met hetzelfde type versterking waarvan de boot is gemaakt. Dit ziet er niet alleen netter uit, maar het zal ook beter aansluiten bij de prestaties van het omringende materiaal; het zal op dezelfde manier uitzetten, krimpen en buigen. Voor koolstofvezel boten gebruikt u koolstofvezel patches, voor glasvezel boten glasvezel, enzovoort.
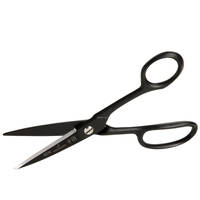
U zult het moeilijk vinden om koolstof/aramide hybride weefsels (zoals koolstof/Kevlar® of koolstof/Twaron®) te knippen met een normale schaar en het is bijna onmogelijk om uitsluitend aramide weefsels te knippen. Kevlar® scharen worden aanbevolen, vooral als u veel van dit type materiaal zult knippen.
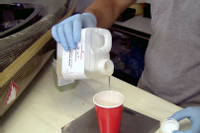
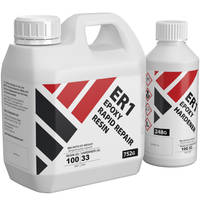
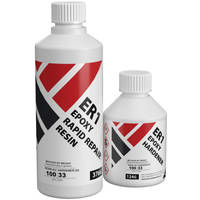
4. Epoxy reparatiehars grondig mengen met verharder
Om een reparatie als deze te laten slagen, is het erg belangrijk om de juiste hars te kiezen. Epoxyhars hecht veel beter aan elke composietboot en zorgt voor een veel sterkere reparatie, dus moet altijd worden gekozen boven polyester- of vinylesterhars voor reparatiewerkzaamheden. Easy Composites' Rapid Repair™ hars is een modern, hoogwaardig epoxy systeem dat speciaal is ontwikkeld vanwege zijn hoge hecht- en buigsterkte. Het bevochtigt geavanceerde verstevigingen (zoals Kevlar, koolstof, diolen, Dyneema® enz.) zeer goed en hardt in slechts enkele uren uit.
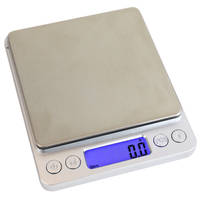
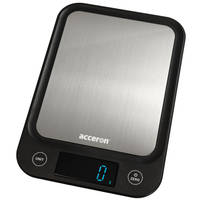
Zoals met alle epoxy's, zorg ervoor dat u de hars met de harder in de juiste verhouding mengt. Verhoudingen die door Easy Composites worden verstrekt, zijn delen per gewicht en niet delen per volume, dus u moet digitale weegschalen gebruiken om nauwkeurige verhoudingen te garanderen.
Meng de epoxy zeer grondig voordat u deze op de reparatie aanbrengt, want ongemengde hars zal niet uitharden en de reparatie aanzienlijk bederven.
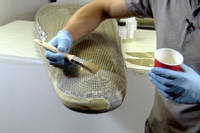
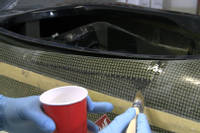
5. Breng een laag epoxyhars aan op het beschadigde gebied
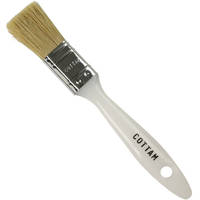
Breng met een lamineerkwast de gemengde epoxyhars rechtstreeks aan op het te repareren gebied. Gebruik de kwast om ervoor te zorgen dat de epoxy goed wordt ingewerkt in eventuele gescheurde of blootliggende gebieden.
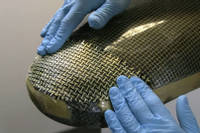
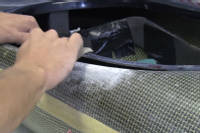
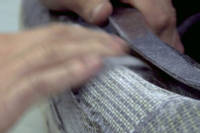
6. Breng wapening aan en impregneer met hars
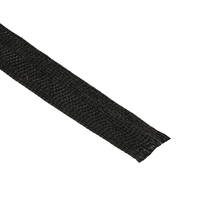
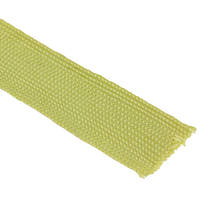
Plaats de wapening van koolstof/Kevlar en Kevlar platvlechtwerk op de natte hars. Gebruik de lamineerkwast om het stevig aan te drukken en impregneer het vervolgens grondig met extra epoxyhars.

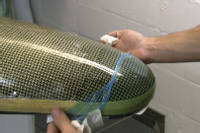
7. Span lossingsfolie over de reparatie
Zodra de reparatie op de romp is aangebracht, legt u een stuk ongeperforeerde lossingsfolie volledig over de reparatie. Begin aan één kant, plak de folie vast aan een droog gedeelte van de romp en plak het vervolgens, door de folie strak te trekken, vast aan de tegenoverliggende zijde van de reparatie. Herhaal dit proces afwisselend aan beide zijden totdat de lossingsfolie strak en kreukvrij over de gehele reparatie is gespannen.
Zodra de folie stevig op zijn plaats zit, kijkt u door de folie naar de reparatie en identificeert u eventuele luchtbellen. Gebruik uw vinger of een plastic spatel om eventuele ingesloten luchtbellen naar de rand van de reparatie te bewegen.
8. Volledig laten uitharden
Laat de hars volledig uitharden. Afhankelijk van de hars en de snelheid van de verharder die u gebruikt, kan dit variëren van enkele uren tot enkele dagen. Met onze Rapid Repair Epoxy zou de reparatie ongeveer 4-6 uur moeten duren om volledig uit te harden.
9. Na uitharding, verwijder lossingsfolie
Om de uitharding van de hars te controleren, test u een klein gebied op de boot waar de hars het dunst is. Als u de overgebleven hars in de pot controleert, zal deze altijd meer uitgehard zijn dan de hars op plaatsen op het onderdeel (hars die op één plaats is geconcentreerd, zal exotherm reageren en sneller uitharden dan dunnere hoeveelheden hars), daarom moet u een dun gebied van hars op het onderdeel controleren.
Zodra u tevreden bent dat de hars volledig is uitgehard, verwijdert u de peel-ply, die van de uitgeharde hars zal loslaten.
10. Strijk eventuele rimpels glad vóór de laatste toplaag
Eventuele rimpels in de hars kunnen optioneel worden 'gevlakt' met schuurpapier, zoals korrel 120 of 240. Als u zich geen zorgen maakt over de rimpels of als u er geen hebt (omdat de lossingsfolie een bijna perfecte afwerking heeft achtergelaten), sla dan deze stap over.
11. Aanbrengen van een laatste harslaag
Als u eventuele rimpels in uw reparaties wegschuurt, dan moet u deze gebieden overcoaten met een nieuwe laag epoxyhars om de vezels af te dichten en een glanzend, slijtvast oppervlak te creëren.
DISCUSSIE (9)
Deel al uw vragen of opmerkingen over deze videohandleiding.
EEN OPMERKING OF VRAAG ACHTERLATEN
PRODUCTEN DIE IN DIT PROJECT ZIJN GEBRUIKT
Hoewel het niet per se een uitputtende lijst is, werden de volgende gereedschappen en materialen, geleverd door Easy Composites, in dit project gebruikt.
De hieronder getoonde hoeveelheid is de geschatte hoeveelheid die in het project is gebruikt, afgerond naar de dichtstbijzijnde beschikbare kitgrootte of hoeveelheid.
VERSTERKINGEN
MATERIALEN & VERBRUIKSARTIKELEN
DISCUSSIE (9)
Deel al uw vragen of opmerkingen over deze videohandleiding.
EEN OPMERKING OF VRAAG ACHTERLATEN
100% VEILIG
BETAALMETHODEN
Easy Composites EU B.V., geregistreerd in Nederland 73601195. Alle inhoud auteursrecht (C) Easy Composites Ltd, 2025. Alle rechten voorbehouden.