Need any help or advice?![]() +44 (0)1782 454499
+44 (0)1782 454499
Downloads (2)
| High Temperature Epoxy Mould Kit - Instructions | ||
| Prepreg Carbon Fibre Evaluation Kit Instructions |
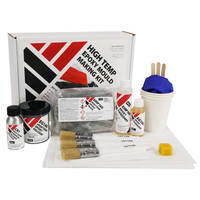
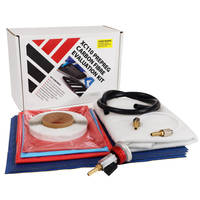
PRODUCTS USED IN THIS PROJECT
Although not necessarily an exhaustive list, the following tools and materials, supplied by Easy Composites, were used in this project.
The quantity shown below is the approximate amount used in the project rounded up to the nearest available kit size or quantity.
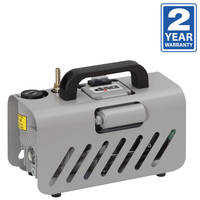
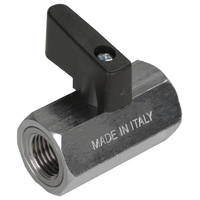
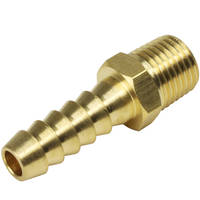
TOOLS & EQUIPMENT


MOULD MAKING MATERIALS

COMPONENT MATERIALS

VACUUM BAGGING CONSUMABLES

ANCILLARIES
STARTER KIT(S)
VIDEO TUTORIAL
Curing Prepreg Carbon Fibre Parts in a Regular Oven
This composites training tutorial covers the entire process, from start to finish, for making a carbon fibre copy of an existing part. The tutorial is intended for those new to composites, or experienced in composites but new to 'prepregs' and is intended to remove as many barriers as possible that may stand in the way of working with this material.
In the video we demonstrate how to duplicate a small existing component using our highly effective XC110 'out-of-autoclave' carbon fibre prepreg. The tutorial includes how to make a high temperature mould, suitable for prepreg use, using our High Temperature Epoxy Mould Making Kit, before using the mould to make the component itself using our Prepreg Carbon Fibre Evaluation Kit.
During the tutorial, we even demonstrate how prepregs can even be cured in a regular kitchen oven using the Oven Seal Vacuum Breach Line which is included in the prepreg kit.
STEP-BY-STEP GUIDE

1. Preparing the Pattern
The first stage is to create the barriers around the part. With pre-preg moulds, the finished flange only needs to be about 30mm width. To make the barrier, commonly an inert plastic such as polypropylene or polyethylene is ideal as it is easy to handle and cut and also resin releases easier from such plastics. In this case we are using polypropylene Fluted Sign Board to make the barriers.
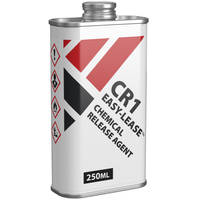
Firstly, using masking tape, templates are made and the barriers are cut. Hot melt flue is ideal for bonding into place. Extra care needs to be taken to secure it well as it needs to survive the moulding process. Next the EasyLease CR1 release agent is applied to the mould and flanges. Typically 6 coats are needed, allowing 15 minutes between coats and 1 hour after the final coat before moving on. A fresh piece of Lint free wipes should be used for each layer to avoid contamination of the release coating.
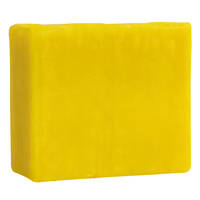
At this stage we must seal the part to the barriers. This is important to help stop resin bleeding under the edges causing the part to be mechanically locked into place. This is done using the Soft Yellow filleting wax. A small bead is pressed carefully into all the gaps and then a ball end filleting tool is used to smooth out and neaten the wax. Any excess is then removed to leave a neat sealed edge. The pattern is then ready for the moulding process itself.
2. Making the Mould
Due to the mould being used for pre-preg, it is essential it is made using high temperature materials to survive the pre-preg cure. The mould is being made using the materials in our High Temperature Epoxy Mould Making Kit.
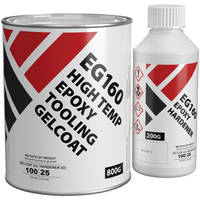
The first stage is to apply the EG160 High temperature gelcoat. This is done in two main stages and is what forms the hard polishable surface on the mould. The gelcoat needs to be measured accurately to cure properly so a set of digital scales should be used. A small batch totalling 75g is measured and then thoroughly mixed. It is important to ensure the bottom and sides of the cup are thoroughly scraped during the mixing process. A batch this size would typically need to be mixed for a minimum of 1 minute. The gelcoat is then brush applied onto the surface in a nice even thick coat about 0.5mm thick. The way to judge that is it is about the thickest you can apply it without it excessively sagging or running. Even out the thickness using a brush taking care to ensure it has not pooled in areas of the mould. If it is left excessively thick in places, it can get excessively hot during the cure causing problems. The gelcoat is then left for 2-3 hours periodically checking it to see if it is at the B stage. This is when the resin has just firmed up but is still very tacky. This is the ideal point for the second layer of gel to bond and cross link with the first. The second coat is weighed, mixed and applied in exactly the same way as the first coat. It is then left again to reach the B stage.
Now that the second coat is at B stage, it is time to add the main reinforcement for the mould. For this we use the EMP160 High temperature moulding paste. This is a very convenient and easy to use solution for smaller moulds like this. To ensure a void free interface between the gel and paste, a small batch of the EG160 Gelcoat is mixed up and brushed onto the surface thinly as a coupling coat. The Paste is then weighed out and thoroughly mixed to an even dough like consistency. A batch this sort of size would take about 2 minutes to thoroughly mix. Take care to work through the mix to remove any lumps until you have an even consistency. The paste can then be spread out about 10mm thick then divided into small 75mm tiles. Doing this helps avoid trapping air under the paste as it is laminated. Each tile of paste is then carefully applied to the pattern until the entire surface is covered. The surface is then smoothed and neatened up before being allowed to cure for a minimum of 24 hours.
EG/EMP160 can be cured to a demouldable state in 24hrs at 25C but at this stage can be brittle and prone to cracking during demoulding of more complex mould shapes. Therefore, in most cases, it is recommended to conduct the initial cure at 40C (whereby the cure time can be reduced to 12hrs). Conducting the initial cure at 40C is low enough to avoid distortion of the pattern whilst still curing the resin to an adequately non-brittle state to demould without risk of damage.
Recommended: 12hrs @ 40C
Alternative: 24hrs (min) @ 25C - Warning: Resin will be very brittle before post-cure

3. Timming & Finishing the Mould
Now that the mould is cured, it is time to remove the flanges and pattern part. With a good application of release agent, the barriers and pattern should remove with little force.
Now the mould can be trimmed and fettled and and any residue of filleting wax cleaned off the surface. Many common tools can be used, however in this case a sanding block and sand paper is used to neaten up the edges.
In this case we have a couple of very small defects caused by air bubbles trapped under the gel. These can be easily fixed by keying up the area, mixing a small batch of gelcoat then filling in the voids. Once cured, if needed, the areas can be sanded flat and polished.
4. Post Curing the Mould
If this mould was being used a room temperature, it would now be ready for use. However as we wish to use this with the XC110 Pre-preg system, we need to condition the mould so it can withstand up to 120°C. This is done using a process called a Post Cure. In simple terms this is a gradual oven cure up to a temperature just beyond the service temperature for the intended use of the mould. In this case we want the mould to be used at up to 120°C and thus the post cure will be conducted at up to 135°C. The Post Cure is conducted slowly to allow the resins to fully cross link as the temperature increases gradually. You do not want the temperature to increase too quickly as if you do, you can get surface print through and also the mould can warp and distort.

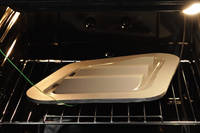
5. Using a Domestic Oven
Normally a post cure would be conducted in a professional bench top curing oven, however this video is all about introducing people to pre-preg so in most cases this will not be available to you and the only option would be a simple domestic oven. Although not ideal, it is possible to use a domestic oven to cure pre-preg and get usable results. Due to the thermostatic control on domestic ovens, you are not likely to get exactly the temperature you set. Therefore you will need to use a thermometer with a remote temperature probe to measure the temperature in the oven. This Uni-T Digital Thermocouple is the model we used but similar models should work just as well. The temperature probe itself is then located in the middle of the oven and the performance of the oven is then profiled to assess its performance. In this case there is a difference of around 10°C, which means we need to take this into account when choosing the set points of the oven. In this case we want to ensure that the peak temperature does not rise above 50°C so we would have to set it at 40°C.
Now that we have assessed the performance of the oven, we can place the mould in the centre of the oven and conduct the post cure. This is done in accordance with the post cure cycle in the EMP160 Technical Data Sheet. In this case we need to start at 50°C and hold it at that temperature for 2 hours before rolling it up in 12°C steps every 2 hours until we achieve 34°C. Once at that temperature, it is held there for a further 3 hours before being switched off and the oven and mould being allowed to cool back to room temperature. To finish off, apply 6 coats of CR1 Mould Release agent, as per the pattern, and the mould is now ready to use.
6. Laminating the Surface Ply
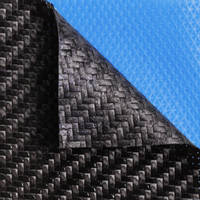
Now we are going to laminate the part itself. The materials used from now onwards can be found in our Prepreg Carbon Fibre Evaluation Kit, which is designed for those just starting out to make their first few small parts. The XC110 Pre-preg is specially designed to be processed out of autoclave under vacuum in an oven and thus would give much better surface results than a typical autoclave pre-preg processed in this way.
The first stage is to make accurate templates. The quickest and easiest way to do this is to use masking tape. The tape is marked with desired fibre direction to help alignment of the templates for cutting the fabric. The templates are transferred to card and then a small 5mm extension is added to provide and overlap for the different pieces. The templates are then used to mark out the cut lines on the pre-preg itself. The templates can be relatively tightly nested to minimise waste which can help offset the cost of the material. The pre-preg can then be cut easily using a sharp knife or good quality shears.
Although not critical, you would normally lay the pre-preg with the paper backing side down. Often you can leave the backing plastic in place as you apply the pre-preg which means the reverse as it leaves it tack free which can help with applications. However when you need it to drape better, remove the backing. The pre-preg is then carefully pressed into the mould paying special attention to the corners and details of the mould. This is done with a dibber tool and it is critical to avoid any bridging in the material. A light tap with the dibber tool can often highlight any bridging with a slightly duller sound. The ease and precision of applying pre-preg compared to normal dry fabrics makes it quicker to learn as well as making it a common choice in high end motorsport and aerospace.
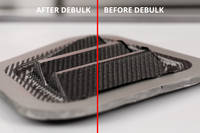
7. Debulking
A debulk helps to press and consolidate the material onto the mould surface and evacuate any air. Although not always essential on thin laminates, with the process already being slightly compromised by using a domestic oven, the debulk should help with improving the cosmetic finish.
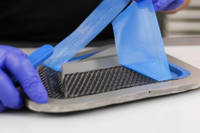
First step is to cover the part with the R120 Perforated release film, taking time to burnish it with a cloth to ensure that it gets into all the corners and detail. Creases in the film are not an issue as they provide an air path. Then a layer of breather cloth is applied to the part and finally a small envelope vacuum bag is made using the VB160 Bagging film. The bag is then sealed with the ST150 Gum Tape, the Through bag connector fitted and a vacuum pulled. The bag is slid and positioned as the vacuum is drawn to ensure there is no bridging. The bag is then held under vacuum for 20 minutes.
The bag is then carefully re-opened to allow it to be reused for the cure. The breather and release film are then also carefully removed. You should see the difference in consolidation at this point. Debulks are typically done after the first ply and thereafter every 3-4 plies for thicker laminates.
8. Laminating the Backing Ply
The backing ply is cut, positioned and laminated in the same way. Being heavier, it can be a bit more difficult to handle and get into those tight details but with the dibber tool it should be possible to get the layer tightly against the first.
Compared to wet lay up processes, using pre-preg to lay up a part like this is much cleaner, faster and able to be done with great accuracy and precision.
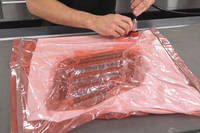
9. Vacuum Bagging the Part
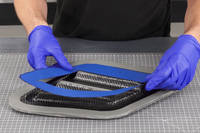
This time we are using an unperforated release film. It is applied in the same way as before and creases are not an issue. However be sure to avoid bridging. The vacuum bag used for debulking is reused for the cure by carefully cutting off the old seal and reapplying new gum tape.
The breather layer is then added. In this case it is under the mould so positioned in the bag and then the mould is sat on top of the breather. This allows the bag to follow contours better and achieves better results.
Vacuum is now applied to the bag. Care is taken to move and crease the bag into all the tight corners and details ensuring the bag is not under any tension or bridging over the details. Once full vacuum is applied, a leak test is conducted. The easiest way is to seal off the bag and leave it for 30 minutes, on return checking that the bag is still tightly and firmly held against the mould. if this is not the case then you will need to trace and fix any leaks or replace the bag.

10. Curing the Part
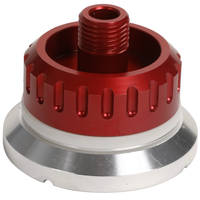
Now it is time to set up the Domestic oven for the cure. With pre-preg curing processes, it is essential to maintain vacuum during the cure. To avoid having to drill a hole into the oven, a special breach line is included in the Evaluation Kit. This consists of small diameter high temperature hose designed to breach the oven seal of a domestic oven. It can also be used on commercial ovens that are not equipped for vacuum use. It is simply connected Using a piece of 8mm silicone hose between the pump and breach line and again inside the oven to the bag.
Before curing, the bag should be held under vacuum for about an hour, effectively as a second debulk. Now the mould can be carefully placed in the oven and the curing process started. Cure of the XC110 Out of Autoclave pre-preg is done in 2 main stages - the initial cure and the post cure - which are done concurrently in one operation.
The initial cure is done at 70°C and is held at this for 4 hours. The temperature is then increased to 120°C and held for 1 hour. Normally you control the ramp rate of the temperature such as can be done on our OV301 Composites Curing Oven. However with a domestic oven we do not have that ability so have to accept that compromise. As before, the oven is switched on and roll the thermostat off at 60°C so we hit our target of 70°C. The nature of the thermostatic control means the oven will fluctuate between 60 and 70°C which is not ideal for resin flow but we have to accept it as a compromise. After 4 hours, the temperature is increased to 120°C and soaked for 1.5 hours. Normally this would be for an hour, but with the temperature fluctuating, this extra time ensures a proper cure. The oven can then be switched off and the mould allowed to cool to room temperature.

11. Demould & Trim
The cooled down mould can now be removed from the oven, the bag, breather and release film then removed. Often, due to the differing thermal expansion and contraction of the materials involved, the part will have already released itself from the mould as it has done in this case.
Straight from the mould, the good finish can easily be seen. The precise nature of pre-preg has allowed the clean crisp cut lines that would have been impossible with a dry fabric. On close inspection, it is possible to see a few tiny pinholes, which normally you would not expect to see with the XC110 system had the part been cured in optimal conditions. However these minor flaws could be overcome with a clear coat.
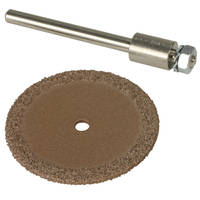
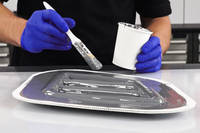
The part can then be trimmed and fettled to get the final finish. This can be done using a Dremel type tool and Perma-Grit cutting discs, files and sanding blocks. The finished part is then given a quick polish using Topfinish 2 Black polishing compound. For a first part the finish is great. In actual terms of time spend, the mould took approximately 2 hours of hands on time and the lay up of the part about 30 minutes.
DISCUSSION (3)
Please share any questions or comments you may have about this video tutorial.
Good question. We did think about this, but there should be no problem, neither the moulds or vacuum bags give off any significant (or practically detectable) quantity of vapour or fumes, as a precaution I would probably suggest cleaning the oven before using it again for food.
clothes-bag type vacuum pump doesn't generate the vacuum level needed for prepreg. They do work fine for basic techniques like 'wet-lay vacuum bagged' where actually you only want a low level of vacuum (those pumps make about 15% vacuum). For prepreg, you really need to be as high as possible. You don't have to have a fancy pump like our EC4 (in the vid), especially when you're just getting started, but you will need a proper vacuum pump.
The XC110 has an accumulative outlife of around 30 days at 20°C so as long the total time unfrozen doesn't exceed this then you shouldn't have any issues.
LEAVE A COMMENT OR QUESTION
PRODUCTS USED IN THIS PROJECT
Although not necessarily an exhaustive list, the following tools and materials, supplied by Easy Composites, were used in this project.
The quantity shown below is the approximate amount used in the project rounded up to the nearest available kit size or quantity.
TOOLS & EQUIPMENT
MOULD MAKING MATERIALS
COMPONENT MATERIALS
VACUUM BAGGING CONSUMABLES
ANCILLARIES
STARTER KIT(S)
DISCUSSION (3)
Please share any questions or comments you may have about this video tutorial.
Good question. We did think about this, but there should be no problem, neither the moulds or vacuum bags give off any significant (or practically detectable) quantity of vapour or fumes, as a precaution I would probably suggest cleaning the oven before using it again for food.
clothes-bag type vacuum pump doesn't generate the vacuum level needed for prepreg. They do work fine for basic techniques like 'wet-lay vacuum bagged' where actually you only want a low level of vacuum (those pumps make about 15% vacuum). For prepreg, you really need to be as high as possible. You don't have to have a fancy pump like our EC4 (in the vid), especially when you're just getting started, but you will need a proper vacuum pump.
The XC110 has an accumulative outlife of around 30 days at 20°C so as long the total time unfrozen doesn't exceed this then you shouldn't have any issues.
LEAVE A COMMENT OR QUESTION
100% SECURE
PAYMENT METHODS
Easy Composites EU B.V., registered in the Netherlands 73601195. All content copyright (C) Easy Composites Ltd, 2025. All rights reserved.