Need any help or advice?+44 (0)1782 454499

VIDEO TUTORIAL

Downloads (1)

Resin River Table Hand Book4 MB

USED IN THIS PROJECT

Although not necessarily an exhaustive list, the following tools and materials, supplied by Easy Composites, were used in this project.

The quantity shown below is the approximate amount used in the project rounded up to the nearest available kit size or quantity.

MATERIALS & CONSUMABLES
GlassCast 50 Clear Epoxy Casting Resin 5kg Kit Thumbnail
EP-G50-5GlassCast 50 Clear Epoxy Casting Resin 5kg Kit€92.10 /kit

Nitrile Gloves Thumbnail
NG[P]Nitrile Gloves* /each

Mirka Wet and Dry Combination Pack 50 Sheets Thumbnail
WPFCOMB-50Mirka Wet and Dry Combination Pack 50 Sheets€27.60 /pack

Small Paper Mixing Cups Thumbnail
SMCUPSmall Paper Mixing Cups€0.15 /each

Lint Free Solvent Application Wipes 50 Wipes Thumbnail
LFW-50Lint Free Solvent Application Wipes 50 Wipes€9.85 /pack

Long Mixing Sticks Pack of 25 Thumbnail
MIXL25Long Mixing Sticks Pack of 25€2.10 /pack

ET500 Rapid Clear Epoxy Adhesive 50ml Thumbnail
ET500-50ET500 Rapid Clear Epoxy Adhesive 50ml€13.90 /each

Polypropylene Sheet 1000 x 1000mm Thumbnail
PP-SHT-1Polypropylene Sheet 1000 x 1000mm€24.15 /sheet

Calibrated Mixing Cup 2240ml Thumbnail
CALMIXCUP2240Calibrated Mixing Cup 2240ml€0.90 /each

Flash/Release Tape (50mm) Thumbnail
FBRT-50Flash/Release Tape (50mm)€14.50 /roll

Set of 10 Translucent Tinting Pigments Thumbnail
PG-TR-PACK10Set of 10 Translucent Tinting Pigments€16.65 /set

Total €0.00
TOOLS & EQUIPMENT
Notched Resin Spreader Thumbnail
RS-N-2Notched Resin Spreader€2.05 /each

Microfibre Polishing Cloth Pack of 10 Thumbnail
MFC-10Microfibre Polishing Cloth Pack of 10€9.25 /pack

10kg High Capacity Digital Scales Thumbnail
SCALE10KG10kg High Capacity Digital Scales€13.50 /each

5L White Plastic Mixing Bucket with Lid Thumbnail
PMB-W-55L White Plastic Mixing Bucket with Lid€2.10 /each

Medium/Hard Orange Polishing Pad 150mm Thumbnail
PH-TE-MDHD-150Medium/Hard Orange Polishing Pad 150mm€9.60 /each

Notched Resin Spreader Thumbnail
RS-N-2Notched Resin Spreader€2.05 /each

Total €0.00

VIDEO TUTORIAL

How to Make a Live-Edge Epoxy Resin River Table

Download our free eBook 'The How to Make a Resin River Table Handbook'

Click to download the full version of the Resin River Table Handbook

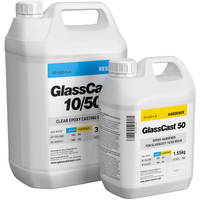
GlassCast® 50 is a new epoxy casting resin from the creators of the famous GlassCast® product. Glasscast 50 is perfect for projects requiring deep, water-clear, bubble-free castings and it's special formulation makes it the ideal product for use with wood - like the stunning resin river tables, knot filling and other furniture projects.

This step by step guide - consisting of the tutorial video and the free downloadable eBook will provide you with all the information you could ever need for making your own live-edge river table, including planning, pouring, finishing and caring for your table. It also includes handy pointers and best-practise tips. Here are the steps in brief:


TUTORIAL BREAKDOWN

Before you begin

1. Before you begin

To start your DIY resin river table project you will need to choose your wood, it needs to be as dry and flat as possible and the more interesting the wood the better for this type of project, however this will depend on your personal taste. If you don't have access to a professional workshop you can ask your wood supplier to plane the wood to your chosen thickness and cut it in half ready to create the river channel. You will need to have access to various tools and materials and it is very important that you work in controlled workshop conditions to achieve optimum results - like a dry heated workshop and room temperature GlassCast® 50 throughout the working and curing time.

Preparing and stabilising the wood

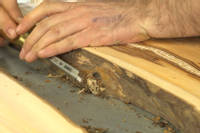
2. Preparing and stabilising the wood

For this conventional DIY live-edge resin river table the step by step guide assumes that the wood has a live-edge or waney-edge and is split down the middle then turned over and inverted so that with the gap for the river it forms an accurate rectangle. If the live-edge has bark or loose material on it this will need to be completely removed so that when the resin and wood meet they will form a strong chemical bond. The best way to do this is to remove the loose material with a chisel, then abrade the surface and remove any dirt/dust.

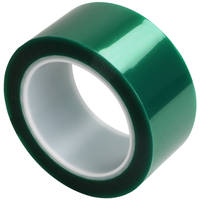
If your wood has any splits, cracks or knotholes on the underside these will need to be filled with a small batch of resin (those on the table-top can be filled when the main pour is done). You may need to top-up these small pours as the wood will soak up some of the resin. Flash/release tape is ideal for creating a temporary barrier if required as it won't stick to the cured resin, and the aim is to pour to slightly overfill the hole. Once fully cured use a hand-held sander to remove any high-spots.

Setting up resin barriers

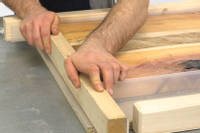
3. Setting up resin barriers

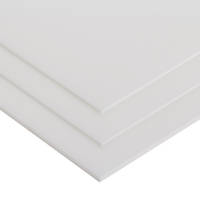
Due to the resin river being largely unsupported you will need to set up a barrier (both base and sides) around the wood, check that these are watertight and made from material that the GlassCast® 50 will not stick to. We used polypropylene sheet which gives a great smooth surface finish and used a hot-melt glue-gun to fix and seal the barriers. At this stage you will need to add additional support to the sides to support the barriers when the weight of the resin is poured in and plan the clamping that will be necessary to hold the planks in position and flat. When you are happy with the set-up remove the clamps and your wood from the container and you are ready to pour!

Preparing and pouring the resin

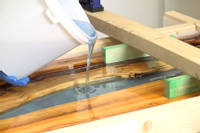
4. Preparing and pouring the resin

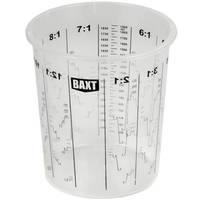
We recommend that you measure or weigh out the GlassCast® 50 resin for the entire project if you are adding colour or effects as this will ensure a consistent colour/effect. In the tutorial we added blue translucent tinting pigment - adding a few drops at a time until we reached our chosen colour, we used a tinting pigment so that the resin was still translucent but would look like a river. Then measure out the correct amount of GlassCast® 50 hardener for each pour (do not exceed 25mm depth in a single pour) and mix thoroughly before transferring to a second container and mixing again (this is also known as 'double-potting'). Then the following pours will be made:

  • Base Layer & Sealing Coat
  • Main Pour - Layer 1
  • Main Pour - Layer 2
  • Repeat as required

After each pour the resin must be allowed to reach the B-stage - this means that the resin has partially cured and started to become firm when touching the surface (with a gloved finger) you can make a mark but no resin sticks to your finger. Pouring on top of the layer below at it's B-stage will ensure a strong chemical bond - as though the pour was done as a single pour.

Remember, do not exceed the 25mm single pour depth and mix multiple smaller batches as required and use the double-potting method to ensure a thorough mix. The GlassCast® 50 is self-degassing but if you do find that you have any bubbles use a heat-gun or hairdryer on a low heat to help remove them.

Pouring a base/sealing layer before the main pour is the most important advice we can offer - it will completely seal all the faces of the wood and minimise air entrapment. Pour a layer into the barrier container and reposition the wood then using a brush apply a thin coat of resin all over the exposed edges and fill any knotholes or cracks as before. Then add the clamps and fasten into position. Once the B-stage has been reached pour Layer 1 of the main pour and repeat as necessary until the resin is just slightly proud of the river channel then leave to fully cure.

Finishing the surface

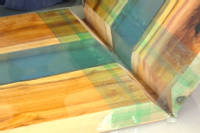
5. Finishing the surface

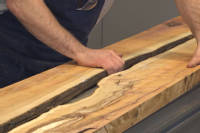
Once cured, remove the barriers and decide on the final finish you would like to achieve. The tutorial demonstrates a natural wood finish contrasting with a glossy high shine resin river. To achieve this you will need to completely flat the surface of the piece - there are different ways to achieve this depending on the equipment available to you. We used a router set up on a bridge and made multiple passes over the whole surface area. Then using a hand-held sander we worked through coarse to fine grits until a smooth finish was achieved.

The eBook also describes how to achieve a high-gloss finish all over - it really depends on your personal taste, you may even want to leave it with an opaque look after sanding.

Cutting and bonding the sides

6. Cutting and bonding the sides

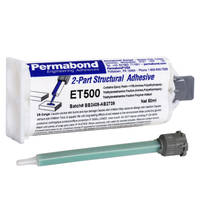
We wanted to create a coffee table with a waterfall effect using sides made from the piece of wood and resin rather than separate legs, to make it look like the river flows all through the top and sides. We created mitred joints using a 45° blade angle and brought the joints together using a clear epoxy adhesive - Permabond ET500 Using release tape to all sides of the joint to create a hinge then applying the adhesive and clamping at a 90° angle whilst the adhesive cures.

Finishing and polishing the wood and resin

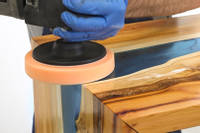
7. Finishing and polishing the wood and resin

Firstly it is important to seal the wood to protect it from the resin polishing process. Whether you use a stain, wax or oil is down to your personal preference - we used a clear danish oil and applied it with a lint-free wipe.

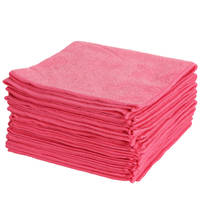
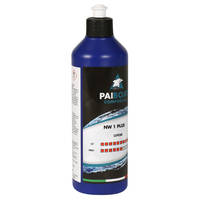
Finally we polished the resin river using Pai Cristal NW1 polishing compound and a hand-held polisher. Liberally apply the polishing compound to the resin and polish, topping up the compound as required until a full gloss is reached, then wipe down with a soft clean cloth.

After-care

8. After-care

Tips to care for and prolong the stunning appearance of your resin river table include:

  • Not placing hot objects directly onto the surface, make sure you use heat proof mats.
  • GlassCast® 50 has been designed to have the best UV stability of any epoxy resin on the market and will withstand years of indirect sunlight, but should be kept away from direct exposure to UV light.
  • Repairing scratches and marks - repeating the finishing and polishing steps it is possible to restore the surface to a high-gloss finish if it is damaged.

If you are interested in learning more about the product and alternative ideas go the GlassCast® 50 product page.


DISCUSSION (60)

Please share any questions or comments you may have about this video tutorial.


Matt Mele
I'm going to fill some knots and cracks in oak with some resin and metal powder. That is actual metal powder, not a pigment. What is the most powder I can mix with a given amount of resin?
Easy CompositesMatt
You're right to be thinking about this because the more metal powder you can get in the more genuinely metallic it will look. If you're measuring the metal powder in by weight then the maximum amount you can add will vary slightly between different metal powders, because their densities can be quite different. As a really rough estimate, you'll certainly be able to add the same weight of metal powder as you have resin - so into 1kg of resin you would add 1kg of metal powder, but you're likely to find that you can add more metal than that, especially for density metals like copper, brass and bronze. The absolute maximum would be about twice as much metal as resin but at this point the mix will be more like a thick slurry than a runny resin.

John Wines
Can you treat the wood with any oil, such as Cosmo top oil, before the epoxy?
Easy CompositesMatt
We would not recommend oiling the wood before applying the GlassCast epoxy. Once you use any oil on the wood then the epoxy will not soak into it and also will fail to bond to it. It's much better to use the epoxy on bare wood and then treat it afterwards.

jknnth
How much did it cost in resin in this project?
Easy CompositesMatt
We used 20kgs of resin which worked out at around £200(ex VAT) for the resin.

Allen
Is the polypropylene sheet reusable afterwards?
Easy CompositesMatt
Yes, the polypropylene sheet can be re-used indefinitely.

Patrick Guest
Can a hairdryer be used in place of the heat gun?
Easy CompositesMatt
Hair dryers can be used but ideally you would need one where the speed (amount of air movement) can be reduced, otherwise you often find that a hair dryer blows the resin around too much.

yehyaani
Can polyester resin be used in this kind of work?
Easy CompositesMatt
Generally speaking, polyester resin is not recommended for a number of reasons. One of the main problems is shrinkage - polyester resins shrink when they cure which causes the dimensions of the casting to change whilst it cures; this results in it pulling against the wood and then ultimately delaminating and breaking away from the wood. There might be some ways round this, using a combination of polyester resin which is allowed to shrink away from the wood and then using epoxy to bond the polyester river to the wood (once it's already shrunk) but generally you'll do much better using a proper product like the epoxy GlassCast 50.

Ernesto Guerno
KEY the surface? I'm not quite sure what that means.
Easy CompositesMatt
It means 'rough it up' using some abrasive paper so that the next layer of resin can bond to the previous layer.

mantas norvydas
What level of moisture content is acceptable for the wood?
Easy CompositesMatt
Ideally you need the moisture level of the wood to be below 10%.

Hamid Mostojabi
Does the polishing remove oil from the epoxy that left by cloth?
Easy CompositesMatt
In theory it would drag the oil onto the foam pad. However a quick wipe with a cloth prior to polishing removes any oil overspill from the resin.

Ky Fisher
How dose the resin age if in the sun every day? Dose it go milky?
Easy CompositesMatt
GlassCast has excellent UV stability and in indoor conditions we really wouldn't expect to see any noticeable change in the resin over time. Having said that, we still don't recommend GlassCast for high UV exposure applications (like outdoors), just to be on the safe side.

Milan Hendriks
Can that resin resist the power of shrinking and expanding wood ?
Easy CompositesMatt
Well, the resin itself would be OK. Where you need to worry is the bond between the resin and the wood; potentially if the wood expands or contracts enough then it's possible for the two to come apart. I've never seen this happen but if the wood became very wet and expanded or very dry and contracted (particularly if it started off with a high moisture content) then there is always the potential for a problem but under normal use there should not be any concerns.

Printing Stamps London
Hi, does the GlassCast scratch easily once the table is built? Thanks.
Easy CompositesMatt
GlassCast once fully cured is very durable and tough as resins go so is unlikely to scratch easily in normal use. Over time, depending on use, it may pick up minor scratches and scuffs, but these can be polished out easily.

LOW CLASS GAMER
Can I use different type of plastic sheet as the baseboard and barriers?
Easy CompositesMatt
Ideally it needs to be a plastic sheet that epoxy does not stick to. Examples include Polypropylene (as in video), nylon, HDPE, LDPE, Teflon and PTFE. Other plastics will likely need the use of a release agent to ensure the resin does not stick.

Brian Brian
Does anyone know if painter's tape will work the same as the flash tape?
Easy CompositesMatt
Epoxy will stick to painter's tape (masking tape). The 'Flash Release' tape we use in this video is a bit specialist and is used a lot in the composites industry; it's made of PET and is ideal for this application because of how strong it is and how well resin releases from it. If you're unable to get hold of the Flash Release tape then you could experiment with other plastic tapes; most packing tapes (brown tape) are polypropylene which resin would also release from without any difficulty.

Nick Hickson
Can you work out a volume using mixed units i.e. mm and metres like this?
Easy CompositesMatt
Well, technically you do need all units to be the same; however, this way gives an accurate answer without the requirement to add one extra step to the calculation to convert from m³ to litres and so is a bit of a cheeky shortcut. Another way to look at it is as two separate calculations; knowing that you need approximately 1kg to achieve 1mm coverage per square metre, first you calculate your square meterage - in the case of the video tutorial 1.9m x 0.12m = 0.228sq.m. To achieve the 40mm thickness, we know we need approximately 40kg per square metre and as such 0.228sq.m x 40kg/sq.m = 9.12kg. Remember this is an approximation and to account for some wastage in mixing cups, drips and spillages, etc. and to ensure there is going to be enough for the project, it was rounded by 10%.

thomas lagressa
If you use a dark wood stain instead of Danish oil could it discolor the epoxy?
Easy CompositesMatt
The epoxy once it has gone hard is extremely unlikely to be stained by the wood oil. Any slight colouring on the matt resin surface would just be traces of oil on the rough surface which would clean off or be removed during the polishing process.

Chris S
What would happen if you embedded some LED emitters in the wood before the pour?
Easy CompositesMatt
They would be permanently part of the install which could be awkward if one dies at a later date.

John Warwick
Great video an presentation, just wondering how strong are those 90 degree joins?
Easy CompositesMatt
The joins are strong enough that 2 people have sat on it, like a small bench, and there was no noticeable movement of the joints.

Jack Allan
Hi my room is only around 14-15 degrees, so is there any methods that can help, thanks
Easy CompositesMatt
Ideally you just need to warm it up - if you can't heat the whole room having an enclosure to surround the project (even a simple box) would help as you could position a greenhouse or oil filled radiator to maintain the temp. whilst the resin cures.

Sam Worman
Would the final product be waterproof? Would it be suitable for use in a spa as a bench?
Easy CompositesMatt
The resin itself when fully cured is water resistant, however it is not recommend for permanent immersion of soaking with water. So we would not recommend it for use as a bench in the bath itself but it might be ok outside the water. Steam over time may eventually cause issues on the wood, although that is very much down to how you treat and finish the wood rather than specifically a resin issue. Long term high humidity may eventually dull the resin finish but nothing that couldn't be polished back up.

Maximo Xavier
Hi, I want to make a book shelf. Is it possible to make a hole in the resin for screws? Will it work?
Easy CompositesMatt
You could drill into the epoxy resin and then screw into those 'pilot' holes however - because the resin is clear - you would see into where the screw holes are. I would think it would be better to bond (glue) the brackets onto the shelf.

Christine Harvey
I have a question can this resin be used in art projects mixed with pigment powders and acrylic paint?
Easy CompositesMatt
Yes, definitely. In fact we supply lots of artists working in resin pouring who are doing incredible things with GlassCast but usually they would use our GlassCast 3 product which is designed for thinner coatings and a glossier finish. You can use tints, powder pigments and metallic effects like PearlEx.

Jarek P
What is the widest a table like this can be? I mean how wide the resin river can be to be strong enough?
Easy CompositesMatt
Hi Jarek, the table could be very wide indeed. Epoxy is really tough plastic and really there would not be a limit to how wide the epoxy section could be, especially at these sort of thicknesses (20mm+). Certainly you could have a 'river' that was 50°Cm (20") or more in width, no problem. Of course you need to support the table correctly with your legs (or mitred sides like we do in this video).

Ark Angel
Does the epoxy resin work as glue holding the wood to itsself? Does the wood ever separate from the resin?
Easy CompositesMatt
The bond to the wood will be very strong indeed. Epoxy is used in demanding structural applications with wood, such as wooden boat hull construction. It would be almost unthinkable for the epoxy to delaminate from the wood but worth remembering that the strength of the joint would only be as strong as the wood itself which might not be too great if the wood is rotten or flaky etc.

Ark Angel
Why do you put a thin layer of resin on the bottom and top of the wood if you just going to sand it off ?
Easy CompositesMatt
It stops the wood from 'breathing' during the cure. When the wood breathes it can release air bubbles into the main body of the resin meaning that even though you (probably) choose to sand the bottom off, the main river would be spoiled by air bubbles that have come out of the bottom and got stuck in the main body of the visible river. The top is much less important to seal but we showed it because many customers choose to resin pour over the top of the wood and leave it with a resin finish, in which case ensuring that face is bubble free too would be important.

ryan bray
How important is it to keep the temperature at 20°C? I live in a very hot country and 20°C is not possible here.
Easy CompositesMatt
At higher temperatures, the risk of the resin having a runaway exotherm is higher, so to compensate you may need to pour thinner layers to ensure that doesn't happen.

Andrey Shindler
How come you don’t have bubbles as the air continues to escape from the wood even 20 minutes after pouring the resin ?
Easy CompositesMatt
This is the purpose of the sealing coat which is applied with a brush prior to the main pour; it prevent air from being displaced out of the wood and into the resin and is a very important step to ensure a bubble free finish.

Kimberley Young
Did you use a wood-stabilizing product before applying resin? I need to; what product do you recommend for this (pre-epoxy)?
Easy CompositesMatt
No, it was just properly seasoned and dried timber. However, as you can see in the video we do seal the wood on all faces with a thin layer of epoxy first.

Hanaa Zeid
Great video! What grits of sanders do you use, and do you apply anything on the wood before sanding it down or is the wood sanded dry?
Easy CompositesMatt
As we routed the surface, we worked from very coarse papers all the way up to 1500. We used Danish oil on the wood before giving the resin its final polish up.

David Smart
After you’ve made the mitred cuts do you ‘polish out’ the saw marks on the resin before you glue the cuts back together to make the legs?
Easy CompositesMatt
We did not sand the cuts at all. The adhesive is liquid enough that it fills in the marks on both surfaces leaving the clear see through joint as you could see in our video.

MySchizoBuddy
You don't get a real river look. How to get the layers progressively darker with depth. I have seen pictures of such a river table online.
Easy CompositesMatt
You would need to do multiple layered pours, each layer with a different tint of blue so that you get the darkening effect the deeper it is.

Dan Helfgott
For the polishing step at the end, would any polishing compound work and does it slightly abrade the wood surrounding the 'river' surface?
Easy CompositesMatt
Any polishing compound would do but some (like the NW1 we used in this video) will make MUCH lighter work of the job. NW1 is a 'diminishing compound' which means it starts with quite a coarse cutting action and then gets finer and finer all the way to a high gloss. It's also designed for hard plastics (like epoxy) so cuts a lot faster without building up too much heat in the resin, which is something you'd need to be careful of especially using compounds that are struggling to cut the epoxy. As for the surrounding wood, actually it didn't seem to cause any problems there are all. We did experiment with some of the green tape to protect the wood but in the end found it wasn't necessary - I think the Danish oil sealed the wood sufficiently to protect it.

Tod Anthony
Could plexiglass be used instead of the Polypropylene Sheet? Very novice here, Can you advise on good release agents? Waxes, tapes, etc ...
Easy CompositesMatt
Release agents on plexiglass can be quite tricky; wax is difficult to reliably get down onto plexiglass, PVA will fish-eye away and chemical release agents (such as Easy-Lease) can attack the acrylic. You could apply Flash Release Tape (listed on our site) over the plexiglass but that would be quite expensive and a hassle. It would probably be easier to pull a release film tight over the whole sheet (you'll find unperforated release film on our website) or to just swap the plexiglass for something else (like polypropylene sheet or real glass which would be much easier to treat with a chemical release agent). You would need a release agent to ensure the resin does not stick.

Jäger From GSG9
Can you make it so it’s not as translucent? I want to do this but just a small pour to get started and I don’t want it to be so translucent.
Easy CompositesMatt
Yes you can make it as opaque as you want. You can vary the amount of tinting pigments to get a darker or lighter shade. If you want it totally opaque, we also stock a range of epoxy compatible pigment dispersions that will give you an opaque colour.

DJ Miss Vixen
Hi, I am planning to make this in my friends workshop but it’s very cold in there and difficult to heat. Will this affect the outcome of the resin?
Easy CompositesMatt
Epoxy is very sensitive to temperature so we would really recommend doing whatever is necessary to ensure you are working as close to 20°C as possible both during pouring and throughout the cure. Lower temperatures mean the cure times are much longer, the resin is thicker and thus it is harder to self degas and also, it leaves it vulnerable to moisture damage especially if it is a cold semi-outdoor workshop.

MySchizoBuddy
Some viewers are mentioning that with high gloss finish, over time you end up with lots of micro scratches. Does your product suffer the same fate.
Easy CompositesMatt
Ultimately any surface, even glass, would end up with some surface scratches over time with wear. As clear casting resins go, GlassCast is the toughest we have found and if eventually you do get some surface scratches, they can be polished out restoring the high gloss finish.

Luke Whitelaw
just a thought, probably mentioned earlier in the comments.... why not use the polypropylene side for the finished surface? that would require much less work?
Easy CompositesMatt
You certainly could if you wanted a full resin top but we wanted the distinct difference in look and feel between the wood and the resin.

Abdalla Ghobj
Nice work! If i may ask, what is the difference between epoxy used for tables and the epoxy used for floor?? What type of colors should i use for epoxy tables??
Easy CompositesMatt
Hi Abdalla, This project uses a casting resin which works in deep sections whereby flooring epoxies, including our GlassCast3 are intended for thinner coatings of <5mm; the difference is that the GlassCast3 will cure faster than the GlassCast50 and also has a perfectly self-levelling property so no finishing work is required once the resin is cured. You can use any pigments which are suitable for Epoxy Resins including our range of Opaque/solid colour pigments, Neon and Translucent Pigments and Pearl Ex metallic pigments.

Triple070007
If you're going to cut the whole surface off with a router at the end, probably don't need to worry about any dust settling on top at the resin curing stage. :)
Easy CompositesMatt
This is true but there's always an outside chance that dust or dirt could sink down into the resin (below the surface that you're going to sand off) so it doesn't hurt to keep things tidy. Also, not everyone will route the surface flat, if you were leaving the whole table with a resin surface (and so you'd poured more resin over the whole surface) then you would probably be able to get away with just polishing the surface, in which case dust or dirt would be more of a problem.

Ryan m
So, mixing up a batch of tinted resin and hardener... It won't go off solid of stored in a sealed tub.? Also how would I clean my tools, brushes, mixing pots etc.?
Easy CompositesMatt
Hi Ryan, yes, it would set solid if you mixed tinted resin and hardener and left it in a sealed tub. In this tutorial we tint the resin but we only mix it with its hardener when we do each 'pour'. Any resin that's been mixed with hardener will cure, no matter how you store it (well, apart from freezing it perhaps). To clean your tools, cups etc. you can wipe them down with kitchen paper and then finally clean them off with a solvent such as meths, white spirit, acetone or alcohol.

Kevin Ball
This might sound like a dumb question, but wouldn't the wood blocks being clamped down on create imperfections in the table? Or would that be corrected after sanding/ using the router?
Easy CompositesMatt
Exactly as you've said, any slight marks from the clamping are erased because we then proceeded to route the whole surface of the table.

Jo-el van Bergen
I'm curious why you used epoxy adhesive instead of wood glue to connect the legs? It looks like the join ended up being quite think so it seems you might get a finer join with wood glue?
Easy CompositesMatt
Wood glue on its own would not have a bond anywhere near as well as the specialist structural adhesive used.

John Maclean
When you used the router to flatten the top face of the table, how much resin was left on the wood surface? Or did you take it all off so that the finishing oil could soak into the wood?
Easy CompositesMatt
We took the whole surface off the wood but some resin had soaked into the wood, especially in the week or porous areas, so that the wood ends up looking natural but actually being a slightly resin impregnated version which is more tough and durable.

Craig Duncan
Does the wood you use need to be dried or cured to a certain percentage? I am going to use walnut but it is only cured to about 25%. If I epoxy the entire table will it make a difference?
Easy CompositesMatt
ideally you want it as dry as possible. Most kiln dried woods are fine. 25% does not sound too excessive but keep an eye on humidity and if it is drying out any more as the more it dries, the more chance it may warp or distort.

Jack Allan
Hi in the list of products used it says you use a polypropylene sheet (100x100°Cm) , but your river table looks much bigger than that. So, did you use a bigger size if so can you link me some thanks.
Easy CompositesMatt
Hi Jack, yes, we used a larger sheet. We do stock sheets at 2m x 1m but they're difficult to ship so we don't list them on our website. If you contact us we can supply the full 2x1 sheet for mainland UK delivery. The other option is just 2 of the 1m2 sheets and then just tape them together. Since you'll often be machining the bottom anyway this usually isn't a problem.

justintime42001
I'm currently doing a similar table. My first coat of epoxy i let dry all the way, so now I'm going to have to do a light sanding on it before my next coat? If so, what grit sand paper should i use? Thanks
Easy CompositesMatt
Key the surface with 120 grit sandpaper, then once a even rough finish has been applied, clean off the sanding dust and you are good to go for another pour.

Viola Froidevaux
There are a lot of quite expensive heat guns to buy, is there one you can recommend? Also, how long does it take approximately until the resin is at stage B to pour the second layer. How can I find the right time?
Easy CompositesMatt
You don't need a particularly expensive heat gun as it is used only occasionally to aid degassing so really anything will do. To get to the B Stage will take between 12 and 24 hours depending on the ambient temperature and the size and depth of the river, so we recommend keeping a close eye on the resin so you don't miss this stage.

Kaja Klemenc
Looks great and the way you explain it it looks so much easier that it probably is! You're a great teacher and your art is awesome!! Do you have any problems with bubbles in resin? Do you have to use a pressure pot?
Easy CompositesMatt
They're not really an issue, no - So long as you have properly sealed the wood and if the resin itself is at or above 20°C it will self-release air very well. You can aid it with a Blow-torch or heat gun on a low setting (as in the video) but whilst a pressure pot or vacuum chamber would do no harm, they shouldn't be necessary.

MrSpike2450
I'm making a river table with GlassCast 50 and I want to put the Glasscast 3 over the top of the finished table. If i use 240 grit paper will I lose any of the depth of the river i.e. will the scratches disappear?
Easy CompositesMatt
No, it will be absolutely fine. I know it's pretty scary leaving your river with a scratched (example 240 grit) finish but when you pour the GlassCast 3 over the top all of the scratches will disappear and you should be able to see straight through again.

Shane Collett
I'm attempting this in a few days, I've ordered this stuff but after watching a few other videos it says I should be sealing the wood first? Do I need to do this step? I'm using old pallets, sanded down with a layer of coins/
Easy CompositesMatt
Yes for most resins we recommend sealing the surface with a brush coating of the resin as it prevents any air coming out of the wood in the later pours.

Gyula Kristo
Question: how strong is the bond between the wood pieces and the epoxy “river” middle? If you would put four legs in the four corners could it break along the middle? Would you need to add transversal supports between the legs?
Easy CompositesMatt
The bond is very strong. This is because we stripped the bark and loose material from the "live" edge and gave it a good key. The resin soaks slightly into the wood surface getting a very good bond.

Stumble
Nice table, but every time I see someone pour epoxy without putting the resin in a vacuum chamber it makes me want to cringe. Particularly for clear epoxy where a few trapped air bubbles could ruin an otherwise beautiful project.
Easy CompositesMatt
Hi Greg, maybe this depends on the resins you've been using. Hand-on-heart, if you pour a pot of GlassCast 50 into a container and let it cure with no degassing and no heat-gun you'll still end up with a bubble free casting. I can show you hundreds of samples from when we were developing the resin which demonstrate this. If you get a bubble in a river table project like this it will have come from the pouring, the wood or the interaction between the wood and the resin (micro air trapped on the surface) all of which wouldn't be helped by degassing the resin in advance - unless you have a 2m degassing chamber that you can fit the whole table in!

Brent Addie
I’m getting ready and gearing up to make my own resin kitchen table. However before I start dumping money into the supplies I was wondering how durable the epoxy is? Does is scratch easily? Do you think it would hold up to everyday use?
Easy CompositesMatt
We have many customers using tables made with GlassCast every day in their homes. The resin is very durable. If you do eventually pick up scratches they can be polished out quite easily restoring the original finish.

Tom Ward
I’m pouring in batches due to the river size. How can I ensure the same colour of my tints? Can I tint the resin in the large container before I mix with the hardener? Wondering if there is a problem in adding the tint days before I mix.
Easy CompositesMatt
Hi Tom, yes, exactly that. In fact that's what we do in this video - add the tint to the resin before you mix it with any hardener (basically, tint all of the resin in advance) and then use it just as you would if it wasn't tinted.

promoscow
Danish oil is composed by oil and some synthetic resin components. Because it will stick to the overall surface and to the resin river itself also, wouldn't turn its color to a yellow tone? I have to finish a (white)resin river table so this worries me.
Easy CompositesMatt
The Danish oil did not stick to the resin. Even if it did, the polishing process would have taken enough material off the surface to remove any traces of staining so I don't think this would be a concern.

Inspirational Tasks
When you pour the epoxy, does it produce heat? I tried a smaller epoxy project putting flower in it but I noticed that it heated up melting the seals I put on the corners. The third layer I made cracked and I noticed that bubbles came out from the flower.
Easy CompositesMatt
Yes, all epoxies give off heat during the cure (called exotherm); the more volume there is then the greater the heat generated. This means you need to choose the right kind of epoxy for your project. For example, using a faster-curing resin for a thick casting project is likely to need very thin pours or you'll quickly run into the type of problems you're describing. It sounds very much like you were pouring too much for the type of resin you were using. We would suggest GlassCast 50 resin and limit the depth of each layer to 25mm to begin with although up to 50mm is possible, subject to the right conditions.

justintime42001
Just finished pouring the top layer of epoxy, about one inch thick. The resin got very hot while curing and cured very quickly - within a few hours - but has left what looks like bubbles along the inside of the wood edge. Any thoughts... figured maybe i poured it too thick?
Easy CompositesMatt
25mm is the maximum recommended thickness per pour at 20°C. If it is warmer than that, then it may build up a bit more heat. Bubbles along the edge of the wood edge are usually where air has escaped from the wood as resin soaks in. This can be avoided by using a sealing coat at the start of the project.

chriscjenkin
The shape to the live edge on my wood is much much more uneven edged and knobbly that your yew so the 'river' between them is very wide at one point. Could I use another piece of elm in this wide river to make an island, and take up some of the resin. Would it be stable and secure?
Easy CompositesMatt
There is no problem having a very large river (or lake!). The resin is strong in its own right and as long as you follow all the usual principles and methods you see in the video then you should be fine. In terms of the legs used, that is more about the overall weight and size of the table.

BarryFromEastenders
I'm currently finishing a live edge kitchen table however there are some lines/grooves across the table which I've been told are sticker marks from the kiln. How can I fix this ? Do I have to sand whole table down to depth of groove or can I fill will epoxy or filler and then stain?
Easy CompositesMatt
Personal preference really. If you want it totally gone then sanding it off will achieve that.

spitalofatalo
In my first try I have filled the gap between the two pieces of wood with glass shards and epoxy resin. Now, to flatten the table I'd like to let it go through a thicknesser. Will this go through OK or might it damage the thicknesser?
Easy CompositesMatt
If the thickness you're aiming for will actually mean cutting through into the glass shards themselves then I think you could have a problem. Glass is very tough and wouldn't normally respond well to conventional woodworking tools like thicknessers, planes, sanders, polishers etc. My advise (if it's not too late) would be to ensure that the glass is below the depth that you'll thickness down to, rather than sticking up through that depth so that you're never actually trying to sand or polish actual glass.

LEAVE A COMMENT OR QUESTION

Note: Your name will be abbreviated and your email address will only be used to email you the answer directly

Downloads (1)

Resin River Table Hand Book4 MB

USED IN THIS PROJECT

Although not necessarily an exhaustive list, the following tools and materials, supplied by Easy Composites, were used in this project.

The quantity shown below is the approximate amount used in the project rounded up to the nearest available kit size or quantity.

MATERIALS & CONSUMABLES
GlassCast 50 Clear Epoxy Casting Resin 5kg Kit Thumbnail
EP-G50-5GlassCast 50 Clear Epoxy Casting Resin 5kg Kit€92.10 /kit

Nitrile Gloves Thumbnail
NG[P]Nitrile Gloves* /each

Mirka Wet and Dry Combination Pack 50 Sheets Thumbnail
WPFCOMB-50Mirka Wet and Dry Combination Pack 50 Sheets€27.60 /pack

Small Paper Mixing Cups Thumbnail
SMCUPSmall Paper Mixing Cups€0.15 /each

Lint Free Solvent Application Wipes 50 Wipes Thumbnail
LFW-50Lint Free Solvent Application Wipes 50 Wipes€9.85 /pack

Long Mixing Sticks Pack of 25 Thumbnail
MIXL25Long Mixing Sticks Pack of 25€2.10 /pack

ET500 Rapid Clear Epoxy Adhesive 50ml Thumbnail
ET500-50ET500 Rapid Clear Epoxy Adhesive 50ml€13.90 /each

Polypropylene Sheet 1000 x 1000mm Thumbnail
PP-SHT-1Polypropylene Sheet 1000 x 1000mm€24.15 /sheet

Calibrated Mixing Cup 2240ml Thumbnail
CALMIXCUP2240Calibrated Mixing Cup 2240ml€0.90 /each

Flash/Release Tape (50mm) Thumbnail
FBRT-50Flash/Release Tape (50mm)€14.50 /roll

Set of 10 Translucent Tinting Pigments Thumbnail
PG-TR-PACK10Set of 10 Translucent Tinting Pigments€16.65 /set

Total €0.00
TOOLS & EQUIPMENT
Notched Resin Spreader Thumbnail
RS-N-2Notched Resin Spreader€2.05 /each

Microfibre Polishing Cloth Pack of 10 Thumbnail
MFC-10Microfibre Polishing Cloth Pack of 10€9.25 /pack

10kg High Capacity Digital Scales Thumbnail
SCALE10KG10kg High Capacity Digital Scales€13.50 /each

5L White Plastic Mixing Bucket with Lid Thumbnail
PMB-W-55L White Plastic Mixing Bucket with Lid€2.10 /each

Medium/Hard Orange Polishing Pad 150mm Thumbnail
PH-TE-MDHD-150Medium/Hard Orange Polishing Pad 150mm€9.60 /each

Notched Resin Spreader Thumbnail
RS-N-2Notched Resin Spreader€2.05 /each

Total €0.00

DISCUSSION (60)

Please share any questions or comments you may have about this video tutorial.


Matt Mele
I'm going to fill some knots and cracks in oak with some resin and metal powder. That is actual metal powder, not a pigment. What is the most powder I can mix with a given amount of resin?
Easy CompositesMatt
You're right to be thinking about this because the more metal powder you can get in the more genuinely metallic it will look. If you're measuring the metal powder in by weight then the maximum amount you can add will vary slightly between different metal powders, because their densities can be quite different. As a really rough estimate, you'll certainly be able to add the same weight of metal powder as you have resin - so into 1kg of resin you would add 1kg of metal powder, but you're likely to find that you can add more metal than that, especially for density metals like copper, brass and bronze. The absolute maximum would be about twice as much metal as resin but at this point the mix will be more like a thick slurry than a runny resin.

John Wines
Can you treat the wood with any oil, such as Cosmo top oil, before the epoxy?
Easy CompositesMatt
We would not recommend oiling the wood before applying the GlassCast epoxy. Once you use any oil on the wood then the epoxy will not soak into it and also will fail to bond to it. It's much better to use the epoxy on bare wood and then treat it afterwards.

jknnth
How much did it cost in resin in this project?
Easy CompositesMatt
We used 20kgs of resin which worked out at around £200(ex VAT) for the resin.

Allen
Is the polypropylene sheet reusable afterwards?
Easy CompositesMatt
Yes, the polypropylene sheet can be re-used indefinitely.

Patrick Guest
Can a hairdryer be used in place of the heat gun?
Easy CompositesMatt
Hair dryers can be used but ideally you would need one where the speed (amount of air movement) can be reduced, otherwise you often find that a hair dryer blows the resin around too much.

yehyaani
Can polyester resin be used in this kind of work?
Easy CompositesMatt
Generally speaking, polyester resin is not recommended for a number of reasons. One of the main problems is shrinkage - polyester resins shrink when they cure which causes the dimensions of the casting to change whilst it cures; this results in it pulling against the wood and then ultimately delaminating and breaking away from the wood. There might be some ways round this, using a combination of polyester resin which is allowed to shrink away from the wood and then using epoxy to bond the polyester river to the wood (once it's already shrunk) but generally you'll do much better using a proper product like the epoxy GlassCast 50.

Ernesto Guerno
KEY the surface? I'm not quite sure what that means.
Easy CompositesMatt
It means 'rough it up' using some abrasive paper so that the next layer of resin can bond to the previous layer.

mantas norvydas
What level of moisture content is acceptable for the wood?
Easy CompositesMatt
Ideally you need the moisture level of the wood to be below 10%.

Hamid Mostojabi
Does the polishing remove oil from the epoxy that left by cloth?
Easy CompositesMatt
In theory it would drag the oil onto the foam pad. However a quick wipe with a cloth prior to polishing removes any oil overspill from the resin.

Ky Fisher
How dose the resin age if in the sun every day? Dose it go milky?
Easy CompositesMatt
GlassCast has excellent UV stability and in indoor conditions we really wouldn't expect to see any noticeable change in the resin over time. Having said that, we still don't recommend GlassCast for high UV exposure applications (like outdoors), just to be on the safe side.

Milan Hendriks
Can that resin resist the power of shrinking and expanding wood ?
Easy CompositesMatt
Well, the resin itself would be OK. Where you need to worry is the bond between the resin and the wood; potentially if the wood expands or contracts enough then it's possible for the two to come apart. I've never seen this happen but if the wood became very wet and expanded or very dry and contracted (particularly if it started off with a high moisture content) then there is always the potential for a problem but under normal use there should not be any concerns.

Printing Stamps London
Hi, does the GlassCast scratch easily once the table is built? Thanks.
Easy CompositesMatt
GlassCast once fully cured is very durable and tough as resins go so is unlikely to scratch easily in normal use. Over time, depending on use, it may pick up minor scratches and scuffs, but these can be polished out easily.

LOW CLASS GAMER
Can I use different type of plastic sheet as the baseboard and barriers?
Easy CompositesMatt
Ideally it needs to be a plastic sheet that epoxy does not stick to. Examples include Polypropylene (as in video), nylon, HDPE, LDPE, Teflon and PTFE. Other plastics will likely need the use of a release agent to ensure the resin does not stick.

Brian Brian
Does anyone know if painter's tape will work the same as the flash tape?
Easy CompositesMatt
Epoxy will stick to painter's tape (masking tape). The 'Flash Release' tape we use in this video is a bit specialist and is used a lot in the composites industry; it's made of PET and is ideal for this application because of how strong it is and how well resin releases from it. If you're unable to get hold of the Flash Release tape then you could experiment with other plastic tapes; most packing tapes (brown tape) are polypropylene which resin would also release from without any difficulty.

Nick Hickson
Can you work out a volume using mixed units i.e. mm and metres like this?
Easy CompositesMatt
Well, technically you do need all units to be the same; however, this way gives an accurate answer without the requirement to add one extra step to the calculation to convert from m³ to litres and so is a bit of a cheeky shortcut. Another way to look at it is as two separate calculations; knowing that you need approximately 1kg to achieve 1mm coverage per square metre, first you calculate your square meterage - in the case of the video tutorial 1.9m x 0.12m = 0.228sq.m. To achieve the 40mm thickness, we know we need approximately 40kg per square metre and as such 0.228sq.m x 40kg/sq.m = 9.12kg. Remember this is an approximation and to account for some wastage in mixing cups, drips and spillages, etc. and to ensure there is going to be enough for the project, it was rounded by 10%.

thomas lagressa
If you use a dark wood stain instead of Danish oil could it discolor the epoxy?
Easy CompositesMatt
The epoxy once it has gone hard is extremely unlikely to be stained by the wood oil. Any slight colouring on the matt resin surface would just be traces of oil on the rough surface which would clean off or be removed during the polishing process.

Chris S
What would happen if you embedded some LED emitters in the wood before the pour?
Easy CompositesMatt
They would be permanently part of the install which could be awkward if one dies at a later date.

John Warwick
Great video an presentation, just wondering how strong are those 90 degree joins?
Easy CompositesMatt
The joins are strong enough that 2 people have sat on it, like a small bench, and there was no noticeable movement of the joints.

Jack Allan
Hi my room is only around 14-15 degrees, so is there any methods that can help, thanks
Easy CompositesMatt
Ideally you just need to warm it up - if you can't heat the whole room having an enclosure to surround the project (even a simple box) would help as you could position a greenhouse or oil filled radiator to maintain the temp. whilst the resin cures.

Sam Worman
Would the final product be waterproof? Would it be suitable for use in a spa as a bench?
Easy CompositesMatt
The resin itself when fully cured is water resistant, however it is not recommend for permanent immersion of soaking with water. So we would not recommend it for use as a bench in the bath itself but it might be ok outside the water. Steam over time may eventually cause issues on the wood, although that is very much down to how you treat and finish the wood rather than specifically a resin issue. Long term high humidity may eventually dull the resin finish but nothing that couldn't be polished back up.

Maximo Xavier
Hi, I want to make a book shelf. Is it possible to make a hole in the resin for screws? Will it work?
Easy CompositesMatt
You could drill into the epoxy resin and then screw into those 'pilot' holes however - because the resin is clear - you would see into where the screw holes are. I would think it would be better to bond (glue) the brackets onto the shelf.

Christine Harvey
I have a question can this resin be used in art projects mixed with pigment powders and acrylic paint?
Easy CompositesMatt
Yes, definitely. In fact we supply lots of artists working in resin pouring who are doing incredible things with GlassCast but usually they would use our GlassCast 3 product which is designed for thinner coatings and a glossier finish. You can use tints, powder pigments and metallic effects like PearlEx.

Jarek P
What is the widest a table like this can be? I mean how wide the resin river can be to be strong enough?
Easy CompositesMatt
Hi Jarek, the table could be very wide indeed. Epoxy is really tough plastic and really there would not be a limit to how wide the epoxy section could be, especially at these sort of thicknesses (20mm+). Certainly you could have a 'river' that was 50°Cm (20") or more in width, no problem. Of course you need to support the table correctly with your legs (or mitred sides like we do in this video).

Ark Angel
Does the epoxy resin work as glue holding the wood to itsself? Does the wood ever separate from the resin?
Easy CompositesMatt
The bond to the wood will be very strong indeed. Epoxy is used in demanding structural applications with wood, such as wooden boat hull construction. It would be almost unthinkable for the epoxy to delaminate from the wood but worth remembering that the strength of the joint would only be as strong as the wood itself which might not be too great if the wood is rotten or flaky etc.

Ark Angel
Why do you put a thin layer of resin on the bottom and top of the wood if you just going to sand it off ?
Easy CompositesMatt
It stops the wood from 'breathing' during the cure. When the wood breathes it can release air bubbles into the main body of the resin meaning that even though you (probably) choose to sand the bottom off, the main river would be spoiled by air bubbles that have come out of the bottom and got stuck in the main body of the visible river. The top is much less important to seal but we showed it because many customers choose to resin pour over the top of the wood and leave it with a resin finish, in which case ensuring that face is bubble free too would be important.

ryan bray
How important is it to keep the temperature at 20°C? I live in a very hot country and 20°C is not possible here.
Easy CompositesMatt
At higher temperatures, the risk of the resin having a runaway exotherm is higher, so to compensate you may need to pour thinner layers to ensure that doesn't happen.

Andrey Shindler
How come you don’t have bubbles as the air continues to escape from the wood even 20 minutes after pouring the resin ?
Easy CompositesMatt
This is the purpose of the sealing coat which is applied with a brush prior to the main pour; it prevent air from being displaced out of the wood and into the resin and is a very important step to ensure a bubble free finish.

Kimberley Young
Did you use a wood-stabilizing product before applying resin? I need to; what product do you recommend for this (pre-epoxy)?
Easy CompositesMatt
No, it was just properly seasoned and dried timber. However, as you can see in the video we do seal the wood on all faces with a thin layer of epoxy first.

Hanaa Zeid
Great video! What grits of sanders do you use, and do you apply anything on the wood before sanding it down or is the wood sanded dry?
Easy CompositesMatt
As we routed the surface, we worked from very coarse papers all the way up to 1500. We used Danish oil on the wood before giving the resin its final polish up.

David Smart
After you’ve made the mitred cuts do you ‘polish out’ the saw marks on the resin before you glue the cuts back together to make the legs?
Easy CompositesMatt
We did not sand the cuts at all. The adhesive is liquid enough that it fills in the marks on both surfaces leaving the clear see through joint as you could see in our video.

MySchizoBuddy
You don't get a real river look. How to get the layers progressively darker with depth. I have seen pictures of such a river table online.
Easy CompositesMatt
You would need to do multiple layered pours, each layer with a different tint of blue so that you get the darkening effect the deeper it is.

Dan Helfgott
For the polishing step at the end, would any polishing compound work and does it slightly abrade the wood surrounding the 'river' surface?
Easy CompositesMatt
Any polishing compound would do but some (like the NW1 we used in this video) will make MUCH lighter work of the job. NW1 is a 'diminishing compound' which means it starts with quite a coarse cutting action and then gets finer and finer all the way to a high gloss. It's also designed for hard plastics (like epoxy) so cuts a lot faster without building up too much heat in the resin, which is something you'd need to be careful of especially using compounds that are struggling to cut the epoxy. As for the surrounding wood, actually it didn't seem to cause any problems there are all. We did experiment with some of the green tape to protect the wood but in the end found it wasn't necessary - I think the Danish oil sealed the wood sufficiently to protect it.

Tod Anthony
Could plexiglass be used instead of the Polypropylene Sheet? Very novice here, Can you advise on good release agents? Waxes, tapes, etc ...
Easy CompositesMatt
Release agents on plexiglass can be quite tricky; wax is difficult to reliably get down onto plexiglass, PVA will fish-eye away and chemical release agents (such as Easy-Lease) can attack the acrylic. You could apply Flash Release Tape (listed on our site) over the plexiglass but that would be quite expensive and a hassle. It would probably be easier to pull a release film tight over the whole sheet (you'll find unperforated release film on our website) or to just swap the plexiglass for something else (like polypropylene sheet or real glass which would be much easier to treat with a chemical release agent). You would need a release agent to ensure the resin does not stick.

Jäger From GSG9
Can you make it so it’s not as translucent? I want to do this but just a small pour to get started and I don’t want it to be so translucent.
Easy CompositesMatt
Yes you can make it as opaque as you want. You can vary the amount of tinting pigments to get a darker or lighter shade. If you want it totally opaque, we also stock a range of epoxy compatible pigment dispersions that will give you an opaque colour.

DJ Miss Vixen
Hi, I am planning to make this in my friends workshop but it’s very cold in there and difficult to heat. Will this affect the outcome of the resin?
Easy CompositesMatt
Epoxy is very sensitive to temperature so we would really recommend doing whatever is necessary to ensure you are working as close to 20°C as possible both during pouring and throughout the cure. Lower temperatures mean the cure times are much longer, the resin is thicker and thus it is harder to self degas and also, it leaves it vulnerable to moisture damage especially if it is a cold semi-outdoor workshop.

MySchizoBuddy
Some viewers are mentioning that with high gloss finish, over time you end up with lots of micro scratches. Does your product suffer the same fate.
Easy CompositesMatt
Ultimately any surface, even glass, would end up with some surface scratches over time with wear. As clear casting resins go, GlassCast is the toughest we have found and if eventually you do get some surface scratches, they can be polished out restoring the high gloss finish.

Luke Whitelaw
just a thought, probably mentioned earlier in the comments.... why not use the polypropylene side for the finished surface? that would require much less work?
Easy CompositesMatt
You certainly could if you wanted a full resin top but we wanted the distinct difference in look and feel between the wood and the resin.

Abdalla Ghobj
Nice work! If i may ask, what is the difference between epoxy used for tables and the epoxy used for floor?? What type of colors should i use for epoxy tables??
Easy CompositesMatt
Hi Abdalla, This project uses a casting resin which works in deep sections whereby flooring epoxies, including our GlassCast3 are intended for thinner coatings of <5mm; the difference is that the GlassCast3 will cure faster than the GlassCast50 and also has a perfectly self-levelling property so no finishing work is required once the resin is cured. You can use any pigments which are suitable for Epoxy Resins including our range of Opaque/solid colour pigments, Neon and Translucent Pigments and Pearl Ex metallic pigments.

Triple070007
If you're going to cut the whole surface off with a router at the end, probably don't need to worry about any dust settling on top at the resin curing stage. :)
Easy CompositesMatt
This is true but there's always an outside chance that dust or dirt could sink down into the resin (below the surface that you're going to sand off) so it doesn't hurt to keep things tidy. Also, not everyone will route the surface flat, if you were leaving the whole table with a resin surface (and so you'd poured more resin over the whole surface) then you would probably be able to get away with just polishing the surface, in which case dust or dirt would be more of a problem.

Ryan m
So, mixing up a batch of tinted resin and hardener... It won't go off solid of stored in a sealed tub.? Also how would I clean my tools, brushes, mixing pots etc.?
Easy CompositesMatt
Hi Ryan, yes, it would set solid if you mixed tinted resin and hardener and left it in a sealed tub. In this tutorial we tint the resin but we only mix it with its hardener when we do each 'pour'. Any resin that's been mixed with hardener will cure, no matter how you store it (well, apart from freezing it perhaps). To clean your tools, cups etc. you can wipe them down with kitchen paper and then finally clean them off with a solvent such as meths, white spirit, acetone or alcohol.

Kevin Ball
This might sound like a dumb question, but wouldn't the wood blocks being clamped down on create imperfections in the table? Or would that be corrected after sanding/ using the router?
Easy CompositesMatt
Exactly as you've said, any slight marks from the clamping are erased because we then proceeded to route the whole surface of the table.

Jo-el van Bergen
I'm curious why you used epoxy adhesive instead of wood glue to connect the legs? It looks like the join ended up being quite think so it seems you might get a finer join with wood glue?
Easy CompositesMatt
Wood glue on its own would not have a bond anywhere near as well as the specialist structural adhesive used.

John Maclean
When you used the router to flatten the top face of the table, how much resin was left on the wood surface? Or did you take it all off so that the finishing oil could soak into the wood?
Easy CompositesMatt
We took the whole surface off the wood but some resin had soaked into the wood, especially in the week or porous areas, so that the wood ends up looking natural but actually being a slightly resin impregnated version which is more tough and durable.

Craig Duncan
Does the wood you use need to be dried or cured to a certain percentage? I am going to use walnut but it is only cured to about 25%. If I epoxy the entire table will it make a difference?
Easy CompositesMatt
ideally you want it as dry as possible. Most kiln dried woods are fine. 25% does not sound too excessive but keep an eye on humidity and if it is drying out any more as the more it dries, the more chance it may warp or distort.

Jack Allan
Hi in the list of products used it says you use a polypropylene sheet (100x100°Cm) , but your river table looks much bigger than that. So, did you use a bigger size if so can you link me some thanks.
Easy CompositesMatt
Hi Jack, yes, we used a larger sheet. We do stock sheets at 2m x 1m but they're difficult to ship so we don't list them on our website. If you contact us we can supply the full 2x1 sheet for mainland UK delivery. The other option is just 2 of the 1m2 sheets and then just tape them together. Since you'll often be machining the bottom anyway this usually isn't a problem.

justintime42001
I'm currently doing a similar table. My first coat of epoxy i let dry all the way, so now I'm going to have to do a light sanding on it before my next coat? If so, what grit sand paper should i use? Thanks
Easy CompositesMatt
Key the surface with 120 grit sandpaper, then once a even rough finish has been applied, clean off the sanding dust and you are good to go for another pour.

Viola Froidevaux
There are a lot of quite expensive heat guns to buy, is there one you can recommend? Also, how long does it take approximately until the resin is at stage B to pour the second layer. How can I find the right time?
Easy CompositesMatt
You don't need a particularly expensive heat gun as it is used only occasionally to aid degassing so really anything will do. To get to the B Stage will take between 12 and 24 hours depending on the ambient temperature and the size and depth of the river, so we recommend keeping a close eye on the resin so you don't miss this stage.

Kaja Klemenc
Looks great and the way you explain it it looks so much easier that it probably is! You're a great teacher and your art is awesome!! Do you have any problems with bubbles in resin? Do you have to use a pressure pot?
Easy CompositesMatt
They're not really an issue, no - So long as you have properly sealed the wood and if the resin itself is at or above 20°C it will self-release air very well. You can aid it with a Blow-torch or heat gun on a low setting (as in the video) but whilst a pressure pot or vacuum chamber would do no harm, they shouldn't be necessary.

MrSpike2450
I'm making a river table with GlassCast 50 and I want to put the Glasscast 3 over the top of the finished table. If i use 240 grit paper will I lose any of the depth of the river i.e. will the scratches disappear?
Easy CompositesMatt
No, it will be absolutely fine. I know it's pretty scary leaving your river with a scratched (example 240 grit) finish but when you pour the GlassCast 3 over the top all of the scratches will disappear and you should be able to see straight through again.

Shane Collett
I'm attempting this in a few days, I've ordered this stuff but after watching a few other videos it says I should be sealing the wood first? Do I need to do this step? I'm using old pallets, sanded down with a layer of coins/
Easy CompositesMatt
Yes for most resins we recommend sealing the surface with a brush coating of the resin as it prevents any air coming out of the wood in the later pours.

Gyula Kristo
Question: how strong is the bond between the wood pieces and the epoxy “river” middle? If you would put four legs in the four corners could it break along the middle? Would you need to add transversal supports between the legs?
Easy CompositesMatt
The bond is very strong. This is because we stripped the bark and loose material from the "live" edge and gave it a good key. The resin soaks slightly into the wood surface getting a very good bond.

Stumble
Nice table, but every time I see someone pour epoxy without putting the resin in a vacuum chamber it makes me want to cringe. Particularly for clear epoxy where a few trapped air bubbles could ruin an otherwise beautiful project.
Easy CompositesMatt
Hi Greg, maybe this depends on the resins you've been using. Hand-on-heart, if you pour a pot of GlassCast 50 into a container and let it cure with no degassing and no heat-gun you'll still end up with a bubble free casting. I can show you hundreds of samples from when we were developing the resin which demonstrate this. If you get a bubble in a river table project like this it will have come from the pouring, the wood or the interaction between the wood and the resin (micro air trapped on the surface) all of which wouldn't be helped by degassing the resin in advance - unless you have a 2m degassing chamber that you can fit the whole table in!

Brent Addie
I’m getting ready and gearing up to make my own resin kitchen table. However before I start dumping money into the supplies I was wondering how durable the epoxy is? Does is scratch easily? Do you think it would hold up to everyday use?
Easy CompositesMatt
We have many customers using tables made with GlassCast every day in their homes. The resin is very durable. If you do eventually pick up scratches they can be polished out quite easily restoring the original finish.

Tom Ward
I’m pouring in batches due to the river size. How can I ensure the same colour of my tints? Can I tint the resin in the large container before I mix with the hardener? Wondering if there is a problem in adding the tint days before I mix.
Easy CompositesMatt
Hi Tom, yes, exactly that. In fact that's what we do in this video - add the tint to the resin before you mix it with any hardener (basically, tint all of the resin in advance) and then use it just as you would if it wasn't tinted.

promoscow
Danish oil is composed by oil and some synthetic resin components. Because it will stick to the overall surface and to the resin river itself also, wouldn't turn its color to a yellow tone? I have to finish a (white)resin river table so this worries me.
Easy CompositesMatt
The Danish oil did not stick to the resin. Even if it did, the polishing process would have taken enough material off the surface to remove any traces of staining so I don't think this would be a concern.

Inspirational Tasks
When you pour the epoxy, does it produce heat? I tried a smaller epoxy project putting flower in it but I noticed that it heated up melting the seals I put on the corners. The third layer I made cracked and I noticed that bubbles came out from the flower.
Easy CompositesMatt
Yes, all epoxies give off heat during the cure (called exotherm); the more volume there is then the greater the heat generated. This means you need to choose the right kind of epoxy for your project. For example, using a faster-curing resin for a thick casting project is likely to need very thin pours or you'll quickly run into the type of problems you're describing. It sounds very much like you were pouring too much for the type of resin you were using. We would suggest GlassCast 50 resin and limit the depth of each layer to 25mm to begin with although up to 50mm is possible, subject to the right conditions.

justintime42001
Just finished pouring the top layer of epoxy, about one inch thick. The resin got very hot while curing and cured very quickly - within a few hours - but has left what looks like bubbles along the inside of the wood edge. Any thoughts... figured maybe i poured it too thick?
Easy CompositesMatt
25mm is the maximum recommended thickness per pour at 20°C. If it is warmer than that, then it may build up a bit more heat. Bubbles along the edge of the wood edge are usually where air has escaped from the wood as resin soaks in. This can be avoided by using a sealing coat at the start of the project.

chriscjenkin
The shape to the live edge on my wood is much much more uneven edged and knobbly that your yew so the 'river' between them is very wide at one point. Could I use another piece of elm in this wide river to make an island, and take up some of the resin. Would it be stable and secure?
Easy CompositesMatt
There is no problem having a very large river (or lake!). The resin is strong in its own right and as long as you follow all the usual principles and methods you see in the video then you should be fine. In terms of the legs used, that is more about the overall weight and size of the table.

BarryFromEastenders
I'm currently finishing a live edge kitchen table however there are some lines/grooves across the table which I've been told are sticker marks from the kiln. How can I fix this ? Do I have to sand whole table down to depth of groove or can I fill will epoxy or filler and then stain?
Easy CompositesMatt
Personal preference really. If you want it totally gone then sanding it off will achieve that.

spitalofatalo
In my first try I have filled the gap between the two pieces of wood with glass shards and epoxy resin. Now, to flatten the table I'd like to let it go through a thicknesser. Will this go through OK or might it damage the thicknesser?
Easy CompositesMatt
If the thickness you're aiming for will actually mean cutting through into the glass shards themselves then I think you could have a problem. Glass is very tough and wouldn't normally respond well to conventional woodworking tools like thicknessers, planes, sanders, polishers etc. My advise (if it's not too late) would be to ensure that the glass is below the depth that you'll thickness down to, rather than sticking up through that depth so that you're never actually trying to sand or polish actual glass.

LEAVE A COMMENT OR QUESTION

Note: Your name will be abbreviated and your email address will only be used to email you the answer directly

100% SECURE

    Secured by Digicert Payment processing by Adyen

PAYMENT METHODS

    Mastercard logo Visa logo Maestro logo Ideal logo Carte Bancaire logo Giropay logo Bancontact logo PayPal logo Bank transfer logo

Easy Composites EU B.V., registered in the Netherlands 73601195. All content copyright (C) Easy Composites Ltd, 2024. All rights reserved.