Hulp of advies nodig?![]() +44 (0)1782 454499
+44 (0)1782 454499
PRODUCTEN DIE IN DIT PROJECT ZIJN GEBRUIKT
Hoewel het niet per se een uitputtende lijst is, werden de volgende gereedschappen en materialen, geleverd door Easy Composites, in dit project gebruikt.
De hieronder getoonde hoeveelheid is de geschatte hoeveelheid die in het project is gebruikt, afgerond naar de dichtstbijzijnde beschikbare kitgrootte of hoeveelheid.
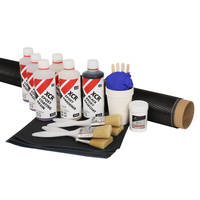
MATERIALEN & VERBRUIKSARTIKELEN
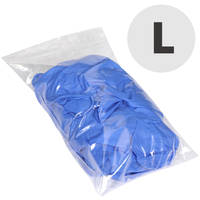
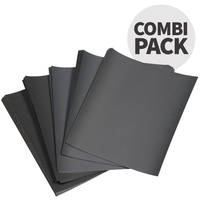
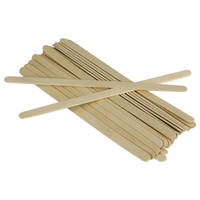

GEREEDSCHAP & APPARATUUR
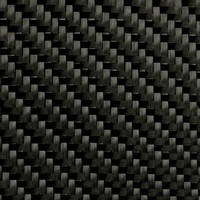
VERSTERKINGEN
VIDEO-HANDLEIDING
Bestaande Onderdelen met Koolstofvezel Bedekken - Koolstofvezel Skinning
Stap-voor-stap video-tutorial over hoe je koolstofvezelbekleding aanbrengt, als aanvulling op onze XCR Koolstofvezel Bekledings Starterkit. In de tutorial gebruiken we de kit om een laag echt koolstofvezel aan te brengen op een gebroken houten geweerkolf. Het bekleden van de kolf met koolstofvezel geeft de kolf niet alleen een prachtige nieuwe koolstofvezelafwerking, het voegt ook aanzienlijke sterkte toe aan het onderdeel.
Download de bijbehorende XCR Koolstofvezel Bekledingsset Instructies PDF die deze videotutorial begeleiden.
Voordat u met een bekledingsproject begint, zorg ervoor dat u deze videotutorial bekijkt, de instructiegids leest en de timing voor uw bekledingsproject plant – timing is cruciaal!
OVERZICHT TUTORIAL
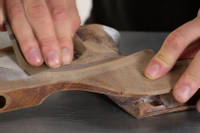
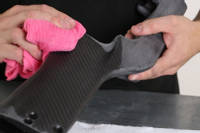
1. Maak het oppervlak van het onderdeel ruw
Als het onderdeel vettig of bijzonder vuil is, was het dan in zeepwater en droog het grondig voordat u verdergaat. Ruw het oppervlak van het onderdeel zo grondig mogelijk op met schuurpapier met korrel 120. Besteed bijzondere aandacht bij het bekleden van kunststof onderdelen (zoals ABS interieurdelen) om ervoor te zorgen dat het gehele oppervlak grondig is opgeschuurd met het schuurpapier.
Na het opruwen van het oppervlak van het onderdeel, verwijdert u alle stofresten met een microvezeldoek of kleefdoek.
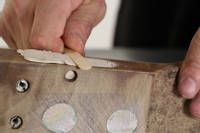
2. Dicht gaten af of vul ze op
In veel gevallen zal uw onderdeel geen gebieden hebben die moeten worden afgedekt voorafgaand aan het bekleden, maar als dit wel het geval is, moet u dit nu doen met boetseerklei (Plasticine). We raden het gebruik van composiet-fileerwas hiervoor niet aan, omdat de was als lossingsmiddel kan werken op omliggende gebieden, wat de hechting tussen de basecoat en het onderdeel beïnvloedt.
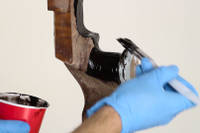
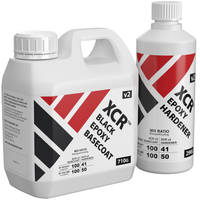
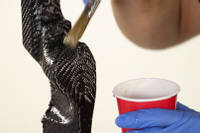
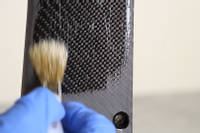
3. Meng en breng de grondlaag aan
Meng een hoeveelheid grondlaag die geschikt is voor de grootte van het onderdeel dat u gaat bekleden. Om u te helpen de juiste hoeveelheid grondlaag te bepalen, heeft u ongeveer 330g grondlaag (en verharder gecombineerd) nodig om 1m² oppervlak te bedekken - dit betekent dat als u de gehele 0.3m² koolstofweefsel gebruikt dat in de kleine bekledingskit zit, u ongeveer 100g grondlaag zou willen mengen; als u de helft van dit weefsel zou gebruiken, dan zou u slechts 50g gemengde grondlaag nodig hebben.
Bij twijfel; meng te weinig – u kunt altijd meer basislaag aanmaken. Hetzelfde geldt voor de heldere hars die in latere stadia wordt gebruikt. Raadpleeg de tabel aan het begin van deze handleiding voor handige mengverhoudingen. Voordat u de basislaag uitgiet, dient u de fles grondig te schudden om eventueel bezonken pigment te verspreiden.
Breng de grondlaag aan over het gehele oppervlak van het te bekleden onderdeel. Probeer de laag zo glad en gelijkmatig mogelijk aan te brengen. U zult merken dat het zware zwarte pigment dat in de grondlaag wordt gebruikt, voldoende is om de kleur van het onderliggende onderdeel te verbergen, maar in extreme omstandigheden kan het voorkomen dat na het aanbrengen van de grondlaag de kleur van het onderdeel nog steeds zichtbaar is. In deze situatie dient u ongeveer 2 uur (bij 20°C) te wachten totdat de eerste laag grondlaag begint uit te harden, voordat u een tweede laag grondlaag aanbrengt en verdergaat.
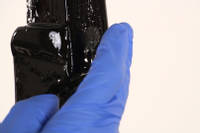
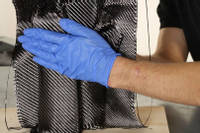
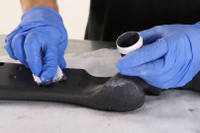
4. Wachten tot de grondlaag de ideale kleefkracht bereikt
De timing van deze volgende stap is zeer kritiek. U moet wachten tot de basislaag begint uit te harden (zodat deze is begonnen te verdikken en niet langer 'nat' is), maar niet toestaan dat het te ver uithardt, zodat het zijn 'kleefkracht' verliest. Bij 20°C ligt dit punt ergens tussen 2-3 uur, maar u moet blijven controleren. Gebruik een gehandschoende vinger om de basislaag te 'deppen' - het moet kleverig aanvoelen en indrukbaar zijn, maar een lichte aanraking met uw vinger mag geen hars meenemen. Uw vinger een tijdje op de hars houden (niet aan te raden in kritieke gebieden) zal in dit stadium waarschijnlijk nog steeds wat hars meenemen.
Wanneer de grondlaag op dit ideale kleefniveau is, moet u onmiddellijk doorgaan naar de volgende stap. Als u merkt dat u het ideale kleefniveau hebt gemist en dat de grondlaag niet langer kleverig is, is het vaak mogelijk om een deel van de kleverigheid te herstellen door de grondlaag voorzichtig te verwarmen met een heteluchtpistool, dit mag echter alleen als laatste redmiddel worden gebruikt.
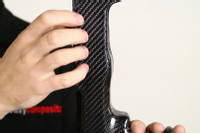
5. Koolstofweefsel aanbrengen op de basislaag
Ervan uitgaande dat de basislaag het ideale kleefniveau heeft (vorige sectie), zou het de perfecte kleefkracht moeten bieden voor het koolstofvezelweefsel om te hechten. De beste manier om het koolstofweefsel op het onderdeel te leggen, varieert per vorm, maar een goede algemene regel is om te beginnen bij de belangrijkste oppervlakken (vaak de grootste of meest zichtbare) en van daaruit verder te werken.
Als uw onderdeel openingen heeft (zoals uitsparingen voor instrumentenwijzerplaten), dan is het meestal het beste om het carbon direct over de opening te leggen en deze pas te openen nadat de eerste laag heldere hars is aangebracht. Hetzelfde geldt voor de randen van uw onderdeel, waarbij het meestal het beste is om het carbon recht over de randen van uw onderdeel te laten hangen en deze pas terug te snijden nadat de eerste heldere harslaag is aangebracht. Het is zelden raadzaam om het carbon rondom naar de achterkant van een onderdeel te wikkelen, omdat dit vaak kan leiden tot ballonvorming of holtes aan de afgesneden rand van een onderdeel.
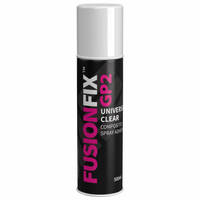
Voor complexe onderdelen moet u mogelijk overwegen het oppervlak in meerdere secties af te werken. Met vaardigheid kunnen dergelijke verbindingslijnen zeer discreet worden gerealiseerd, vooral wanneer ze op hoeken worden geplaatst waar ze bijna onzichtbaar kunnen zijn. Als u nette verbindingslijnen op uw onderdeel wilt realiseren, dan is een epoxy-compatibele spuitlijm zoals Easy Composites’ FusionFix™ vereist.
Laten uitharden. Voordat u verdergaat, laat u de grondlaag nog minstens 2 uur uitharden. Het is prima om het project nu zo lang te laten liggen als u wilt voordat u verdergaat.
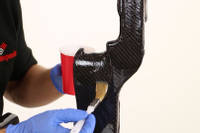
6. Meng en breng de eerste transparante laag aan
Voordat u de 1e laag heldere XCR Coating Hars aanbrengt, controleer uw onderdeel op losse of uitstekende koolstofvezels. Indien aanwezig, verwijder of knip deze dan weg, zodat randen en verbindingen redelijk netjes zijn voordat u verdergaat.
Voor de 1e harslaag moet u iets meer hars mengen dan u voor de volgende lagen nodig heeft, omdat er een beetje extra hars nodig is om de droge koolstofvezel te bevochtigen. Doorgaans heeft u voor deze fase ongeveer dezelfde hoeveelheid hars nodig als voor de grondlaag van het onderdeel.
Volg de 3:1 mengverhouding zo nauwkeurig mogelijk, weeg een geschikte hoeveelheid hars en harder af en meng zorgvuldig en grondig. Breng een gelijkmatige laag aan over het gehele oppervlak van het onderdeel, en zorg ervoor dat u de droge koolstofvezel volledig doordrenkt. U streeft er nooit naar om met één enkele applicatie een dikke harslaag te bereiken; in plaats daarvan wordt de dikte opgebouwd met behulp van meerdere dunne lagen. Als u merkt dat er overtollige hars van uw onderdeel afloopt, kan dit erop wijzen dat u de hars te dik probeert aan te brengen; verticale oppervlakken zullen echter altijd resulteren in een zekere mate van afloop.
Voordat u verdergaat, laat de eerste heldere laag minstens 8 uur uitharden totdat deze volledig is uitgehard. U kunt het project nu gerust zo lang laten liggen als u wilt voordat u verdergaat.
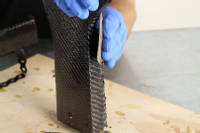
7. Di-nibben en opruwen van het oppervlak (korrel 120)
Zodra de 1e harslaag is uitgehard tot een hard, schuurbaar oppervlak, gebruikt u een stuk schuurpapier van 120 grit om eventuele oneffenheden (vaak veroorzaakt door losse vezels aan de rand van verbindingslijnen die omhoog staan), druppels of andere hoge punten te verwijderen.
Vervolgens moet u het hele oppervlak van het onderdeel opruwen met meer 120 korrel schuurpapier, zodat de volgende harslaag eraan kan hechten. Hoewel u in dit stadium wat licht kunt 'vlakken' (om hoge of lage plekken in de hars te verwijderen), moet u voorzichtig zijn om niet door te schuren tot aan de koolstofvezel. Als u ziet dat het schuurstof zwart wordt, moet u onmiddellijk stoppen.
U kunt nu direct doorgaan naar de volgende stap, of het project in dit stadium laten zolang u wilt.
8. Meng en breng drie extra transparante lagen aan
De hoofddikte van de heldere hars moet nu worden opgebouwd door nog 3 lagen heldere XCR Coating Hars op het oppervlak van het onderdeel aan te brengen, waarbij elke harslaag gedeeltelijk moet uitharden voordat de volgende laag wordt aangebracht.
Het juiste moment om de volgende harslaag aan te brengen is wanneer de vorige laag is begonnen met uitharden, maar nog steeds wat kleverigheid heeft, wat u met een gehandschoende vinger kunt testen op dezelfde manier als bij de grondlaag. Bij 20°C betekent dit ongeveer 2 uur wachten tussen elke laag heldere hars.
U mag de vorige harslaag NIET verder laten uitharden dan het 'kleverige' stadium voordat u de volgende harslaag aanbrengt. Als u dit wel doet, zal de nieuwe harslaag niet goed kunnen hechten aan de vorige laag en kan deze delamineren. U zult ook merken dat de nieuwe harslaag zichtbaar 'visogen' zal vertonen en zich van de vorige laag zal terugtrekken als deze niet langer in het kleverige stadium is.
Als u per ongeluk een harslaag te ver laat uitharden, zodat deze niet langer in het ‘kleefstadium’ is, dan dient u niet te proberen de volgende harslaag aan te brengen zonder eerst de vorige laag een gevorderd uithardingsstadium (ongeveer 8 uur) te laten bereiken en vervolgens het oppervlak overal op te ruwen met schuurpapier van korrel 120.
9. Laten uitharden
Nadat u de 3e heldere XCR-laag in deze sessie hebt aangebracht (wat de 4e laag in totaal zou zijn), moet het onderdeel volledig uitharden, wat bij 20°C minstens 8 uur zou duren, maar het kan in dit stadium zo lang blijven als u wilt.
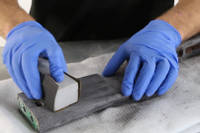
10. Vlak het oppervlak (120 - 240 grit)
Zodra de heldere harslagen zijn uitgehard tot een volledig harde afwerking, zal er nu voldoende harstikte zijn om het oppervlak goed te kunnen vlakken.
Vlak maken is het proces van het opschuren van het oppervlak van het onderdeel om eventuele ribbels of 'wiebelingen' van het oppervlak te verwijderen. De standaard van het vlak maken is essentieel voor hoe professioneel het oppervlak van het afgewerkte onderdeel zal zijn, dus neem de tijd voor deze fase en probeer het oppervlak zo vlak mogelijk te krijgen.
Begin met het gebruik van schuurpapier met korrel 120 en droogschuren. Het wordt aangeraden om het schuurpapier rond een zachte maar vlakke pad (zoals een stuk schuim) te wikkelen tijdens het schuren om een vlakke afwerking te helpen bereiken. Dit geldt ook voor de fijnere korrels schuurpapier wanneer u hiermee verdergaat.
In sommige omstandigheden kan het voorkomen dat u het oppervlak niet goed vlak kunt schuren zonder door te breken naar het onderliggende carbon. Als deze situatie zich voordoet, moet u stoppen met schuren, alle sporen van schuurstof verwijderen en één of meer extra lagen hars aanbrengen door terug te keren naar en verder te gaan vanaf Stap 10.
Zodra u tevreden bent met de vlakheid van het oppervlak met behulp van het 120 korrel schuurpapier, gaat u verder met het 240 korrel schuurpapier. Ook in dit stadium wordt aangeraden om nat te schuren. Zorg ervoor dat alle krassen van het 120 korrel schuurpapier zijn verwijderd door het 240 korrel schuurpapier voordat u doorgaat naar de volgende stap.
11. Het onderdeel grondig reinigen
Voordat de laatste laag heldere hars wordt aangebracht, is het zeer belangrijk om al het schuurstof van het oppervlak van het onderdeel te verwijderen, omdat stof dat op het oppervlak achterblijft wanneer de laatste harslaag wordt aangebracht, de hars kan verontreinigen en zichtbaar zal zijn in de uiteindelijke afwerking. Dit kan worden bereikt met behulp van een kleefdoek, microvezeldoek of door het onderdeel te wassen in licht zeepwater. Zorg er in alle gevallen voor dat het onderdeel volledig droog is voordat u verdergaat.
12. Breng de definitieve blanke XCR-laag aan
Het is nu tijd om de laatste laag transparante XCR-hars aan te brengen. Meng en breng de hars op precies dezelfde manier aan als de vorige transparante XCR-lagen.
De laatste harscoat hoeft slechts zeer dun te worden aangebracht, bijna als het aanbrengen van een vernis of lak op het onderdeel. Het gladde oppervlak eronder zou het mogelijk moeten maken om een gladde, egale hoogglansafwerking te bereiken die er zelfs vóór het schuren en polijsten al goed uitziet.
Aangezien dit de laatste laag is, is het belangrijker dan ooit om ervoor te zorgen dat u de hars nauwkeurig afweegt en grondig mengt. Elke onjuist gemengde hars zal resulteren in plakkerige of streperige plekken op het uiteindelijke oppervlak van het onderdeel. Het onderdeel moet nu worden gelaten om een gevorderde uithardingsstaat te bereiken. Bij 20°C duurt dit minstens 8 uur, maar hoe langer u het laat, hoe beter, aangezien dit het onderdeel in staat stelt meer van zijn uiteindelijke hardheid te ontwikkelen.
13. Optionele na-uitharding
Als de onderdelen die u bekleedt tijdens gebruik waarschijnlijk worden blootgesteld aan verhoogde temperaturen, is het raadzaam om het beklede onderdeel na te harden om een volledige uitharding te bereiken en ook de temperatuurstabiliteit van de uitgeharde hars te verhogen. Als u dit niet doet, bestaat het risico dat wanneer de onderdelen aan deze hogere temperaturen worden blootgesteld, de hars zacht kan worden en lichtelijk 'inzakken', waardoor de textuur van het koolstofweefsel naar het oppervlak 'doordrukt'.
Voorbeelden van omgevingen met verhoogde temperatuur zijn exterieurpanelen van voertuigen en interieurbekleding van voertuigen, die beide temperaturen van meer dan 70°C kunnen bereiken wanneer ze worden blootgesteld aan hete zomerzon. Om een bekleed onderdeel te nacuren, moet het gedurende ten minste 6 uur in een oven op 60°C worden geplaatst en vervolgens worden afgekoeld.
14. Vlak (400 - 1200 grit) en polijsten
De laatste stap in het proces is het schuren en polijsten van het uiteindelijke harsoppervlak tot een volle glans. Begin met schuurpapier met korrel 400 en nat-schuur het oppervlak tot een vlakke, gladde afwerking. Zodra u tevreden bent dat er geen hoge of lage plekken zijn, veegt u het oppervlak schoon, ververst u het water en gaat u verder met de volgende korrel. Ga verder met schuurpapier met korrel 800 en vervolgens 1200, waarbij u ervoor zorgt dat u het oppervlak schoonveegt en het water ververst tussen elke korrel. Zorg ervoor dat er geen krassen van de vorige korrel meer zichtbaar zijn voordat u verdergaat met de volgende korrel. Zodra u klaar bent met schuren met het 1200-korrel papier, veegt u grondig schoon.
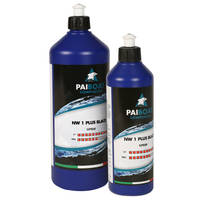
De NW1 Zwarte Super Slijppasta, inbegrepen bij de Bekledings Starterkit en ook afzonderlijk verkrijgbaar bij Easy Composites, moet worden gebruikt om het beklede onderdeel te polijsten van een gladde maar satijnglanzende afwerking met korrel 1200 tot een volledige hoogglans. De NW1 pasta kan met de hand of met een polijstpad en een elektrische polijstmachine worden gebruikt. Waar beschikbaar, zal een elektrische polijstmachine waarschijnlijk veel sneller zijn dan handmatig polijsten.
DISCUSSIE (33)
Deel al uw vragen of opmerkingen over deze videohandleiding.
EEN OPMERKING OF VRAAG ACHTERLATEN
PRODUCTEN DIE IN DIT PROJECT ZIJN GEBRUIKT
Hoewel het niet per se een uitputtende lijst is, werden de volgende gereedschappen en materialen, geleverd door Easy Composites, in dit project gebruikt.
De hieronder getoonde hoeveelheid is de geschatte hoeveelheid die in het project is gebruikt, afgerond naar de dichtstbijzijnde beschikbare kitgrootte of hoeveelheid.
MATERIALEN & VERBRUIKSARTIKELEN
GEREEDSCHAP & APPARATUUR
VERSTERKINGEN
DISCUSSIE (33)
Deel al uw vragen of opmerkingen over deze videohandleiding.
EEN OPMERKING OF VRAAG ACHTERLATEN
100% VEILIG
BETAALMETHODEN
Easy Composites EU B.V., geregistreerd in Nederland 73601195. Alle inhoud auteursrecht (C) Easy Composites Ltd, 2025. Alle rechten voorbehouden.