Need any help or advice?![]() +44 (0)1782 454499
+44 (0)1782 454499
PRODUCTS USED IN THIS PROJECT
Although not necessarily an exhaustive list, the following tools and materials, supplied by Easy Composites, were used in this project.
The quantity shown below is the approximate amount used in the project rounded up to the nearest available kit size or quantity.
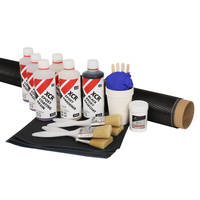
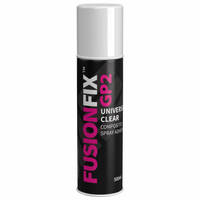
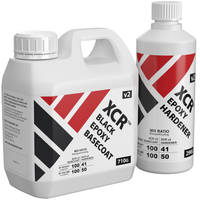
MATERIALS & CONSUMABLES
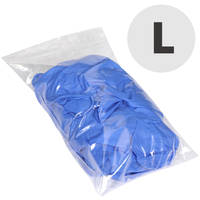
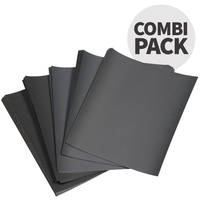
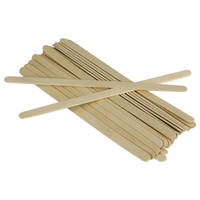

TOOLS & EQUIPMENT


REINFORCEMENTS
VIDEO TUTORIAL
How to Cover Existing Parts in Carbon Fibre - Carbon Fibre Skinning
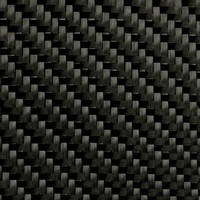
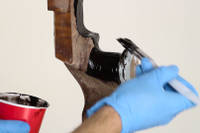
Step-by step how to do carbon fibre skinning video tutorial to accompany our XCR Carbon Fibre Skinning Starter Kit. In the tutorial we use the kit to 'skin' a layer of genuine carbon fibre onto a broken wooden rifle stock. Skinning the stock with carbon fibre not only gives the stock a stunning new carbon fibre finish, it also adds significant strength to the part.
Download the companion XCR Carbon Fibre Skinning Kit Instructions PDF which accompany this video tutorial.
Before you start any skinning project, be sure to watch this video tutorial, read the instruction guide and plan the timing for your skinning project - timing is the key!
TUTORIAL BREAKDOWN
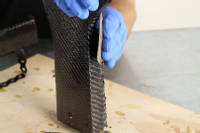
1. Key the surface of the part
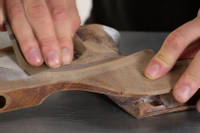
If the part is greasy or particularly dirty, wash it in soapy water and dry it thoroughly before proceeding. Key the surface of the part as thoroughly as possible using 120 grit abrasive paper. Pay particular attention when skinning plastic parts (such as ABS interior trim parts) to make sure the entire surface is thoroughly scratched with the abrasive paper.
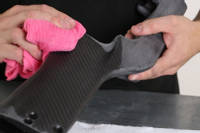
After keying the surface of the part, remove all traces of dust using a microfibre cloth or tack-rack.
2. Blank-off or fill any holes
In many cases, your part won’t have any areas which need blanking off prior to skinning but if it does, you should do this now using modelling clay (Plasticine). We don’t suggest using composites filleting wax for this purpose because the wax may act as a release agent on surrounding areas, affecting the bond between the basecoat and the part.
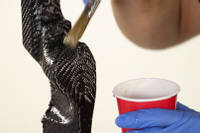
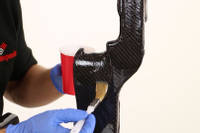
3. Mix and apply basecoat
Mix a quantity of basecoat suitable for the size of the part that you are going to skin. To help you to work out the correct amount of basecoat, you’ll need about 330g of basecoat (and hardener combined) to cover 1sqm of surface - this means that if you are using the whole of the 0.3sqm of carbon fabric included in the small skinning kit you would want to mix up around 100g of basecoat; if you used half this much fabric then you would only need 50g of mixed basecoat.
If in doubt; mix too little - you can always mix up more basecoat. The same applies to the clear resin used in later stages. Use the table at the start of this guide for some handy mix ratio quantities. Before you pour the basecoat, be sure to shake the bottle thoroughly to disperse any pigment which may have settled in the bottle.
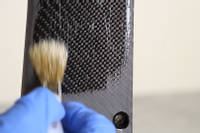
Apply the basecoat over the entire surface of the part to be skinning. Aim to apply the layer as smoothly and evenly as possible. You should find that the heavy black pigment used in the basecoat is enough to black-out the colour of the underlying part but in extreme circumstances you may find that after basecoating the colour of the part can still be seen. In this situation, you should wait around 2hrs (at 20°C) for the first layer of basecoat to begin to cure before applying a second application of basecoat, before continuing.
4. Wait for basecoat to reach ideal tack
The timing of this next step is very critical. You need to wait for the basecoat to begin to cure (so that it has started to thicken and is no longer ‘wet’) but not allow it to cure too far so that it loses its ‘tack’. At 20°C this point is somewhere between 2-3hrs, but you need to keep checking. Use a gloved finger to ‘dab’ the basecoat - it should feel tacky and should be depress-able but a light touch with your finger should not bring any resin away. Holding your finger on the resin for a little while (not advisable in any critical areas) will still probably bring some resin away at this stage.
When the basecoat is at this ideal tack level you must proceed immediately with to the next step. If you find you have missed the ideal tack level and that the basecoat is not longer tacky, it is often possible to restore some of the tackiness by gently heating the basecoat with a hot-air gun, however this should only be used as a last resort.
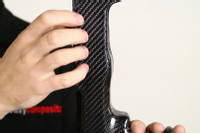
5. Stick carbon fabric onto basecoat
Providing that the basecoat is at the ideal tack level (previous section), it should provide the perfect tackiness for the carbon fibre fabric to stick too. The best way to lay the carbon fabric onto the part will vary from shape to shape but a good general rule is to start from the most important surfaces (often the largest or most visible one) and then work out from there.
If you part has apertures (such as recessed for instrument dials) then it is usually best to lay the carbon straight over the aperture and then open it out only after the first layer of clear resin has been applied. The same applies to the edges of your part where it is usually best to lay the carbon hanging straight over the edges of your part and then cut them back only after the first clear layer of resin has been applied. It is rarely advisable to wrap the carbon round onto the back back of a part because this can often cause ballooning or voiding at the trimmed edge of a part.
For complex parts you may need to consider completing the surface in multiple sections. With skill, join lines like this can be achieved very discreetly, especially when positioned on corners where they can be almost impossible to see. If you do need to achieve neat join-lines on your part then an epoxy compatible spray adhesive such as Easy Composites’ FusionFix™ is required.
Allow to Cure. Before proceeding, allow the basecoat to cure further for at least 2hrs. It’s perfectly fine to leave the project now for as long as you like before continuing.
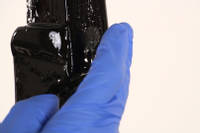
6. Mix and apply the first clear layer
Before applying the 1st layer of clear XCR Coating Resin, check over your part for any stray or loose fibres of carbon fibre. If there are any, remove or snip them so that edges and joins are reasonably tidy before proceeding.
For the 1st layer of resin you will need to mix slightly more resin that you will need for subsequent layers because it will use a little extra resin to wet-out the dry carbon fibre. Typically, you’ll need about the same amount of resin for this stage as you needed to basecoat the part.
Following the 3:1 mix ratio as accurately as possible, weigh out an appropriate amount of resin and hardener and mix carefully and thoroughly. Apply an even coat over the whole surface of the part, making sure you fully wetout the dry carbon fibre. You are never aiming to achieve a thick coat of resin with any single application; instead, thickness is built up using a number of thin layers. If you find excess amounts of resin draining off your part then this might indicate that you’re trying to apply the resin too thickly however vertical surfaces will always result in a certain amount of run-off.
Before proceeding, allow the first clear coat to cure for at least 8hrs until fully hardened. It’s perfectly safe to leave the project now for as long as you like before continuing.
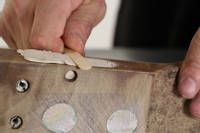
7. Di-nib and key the surface (120 grit)
Once the 1st coat of resin has cured to a hard, sand-able finish, use a piece of 120 grit abrasive paper to remove any nibs (often caused by loose fibres at the edge of join-lines standing up), drips or other high spots.
Next you’ll need to key the whole surface of the part with more 120 grit paper so that the next layer of resin can bond to it. Whilst you can do some light ‘flatting’ at this stage (to remove high or low spots in the resin) be careful not to break through to the carbon fibre. If you see the sanding dust turn black then you should stop right away.
You can now go straight on to the next step, or leave the project at this stage for as long as you like.
8. Mix and apply three additional clear layers
The main thickness of clear resin should now be built-up by applying 3 more layers of clear XCR Coating Resin to the surface of the part, allowing each layer of resin to partially cure before applying the next layer.
The right time to add the next layer of resin is when the previous layer has started to firm-up but still has some tack to it which you can test with a gloved finger in the same way as for the basecoat. At 20°C this will mean waiting approximately 2hrs between each layer of clear resin.
You must NOT allow the previous layer of resin to cure past the ‘tack’ stage before applying the next layer of resin. If you do, the new layer of resin will not be able to bond properly to the previous layer and could delaminate. You will also find that the new layer of resin will visibly ‘fish-eye’ away from the previous layer if it is no longer at the tack stage.
If you do accidentally allow a layer of resin to cure too far so that it is no longer at the ‘tack stage’ then you should not attempt to apply the next layer of resin without first allowing the previous layer to reach an advanced stage of cure (around 8hrs) and then keying the surface all over using 120 grit abrasive paper.
9. Allow to cure
Once you have applied the 3rd clear xcr coat in this session (which would be the 4th coat in total) the part should be left to fully cure which at 20°C would take at least 8hrs but it could be left as long as you like at this stage.
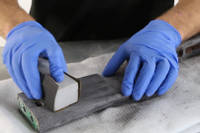
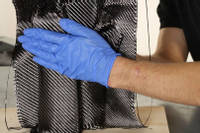
10. Flat the surface (120 - 240 grit)
Once the clear layers of resin have cured to a fully hard finish there will now be enough thickness of resin to allow the surface to be properly flatted.
Flatting is the process of rubbing down the surface of the part to remove any ripple or ‘wobble’ from the surface. The standard of flatting is key to how professional the surface of the finished part will be so take your time on this stage and try to get the surface as flat as possible.
Start by using the 120 grit abrasive paper and dry-sanding. It is suggested to wrap the abrasive paper around a soft but flat pad (such as a piece of foam) when sanding to help achieve a flat finish. This also applies to the finer grades of abrasive paper when you progress to them.
In some circumstances, you may find that you are unable to properly flat the surface without breaking through to the carbon underneath. If this situation arises, you should stop flatting, remove any traces of sanding dust and apply one or more additional layers of resin by returning to and continuing from Step 10.
Once you are happy with the flatness of the surface using the 120 grit paper, progress to the 240 grit paper. Again it is suggested to wet-sand at this stage. Ensure that all scratches from the 120 grit paper have been removed by the 240 grit paper before proceeding to the next step.
11. Thoroughly clean the part
Before applying the final coat of clear resin it is very important to remove all sanding dust from the surface of the part because any dust that remains on the surface when the final coat of resin is added can contaminate the resin and will visible in the final finish. This can be achieved using a tack-rag, microfibre cloth or by washing the part in mildly soapy water. All all cases, ensure the part is fully dried before proceeding.
12. Apply final clear coat of XCR
It’s now time to apply the final layer of clear XCR resin. Mix and apply the resin in just the same way as previous clear XCR layers.
The final layer of resin only needs to be applied very thinly, almost like applying a varnish or lacquer to the part. The smooth surface underneath should make it possible to achieve a smooth, level gloss finish which looks good even before it is flatted and polished.
Since this is the final layer, it is more important than ever to ensure that you accurately weigh and thoroughly mix the resin. Any improperly mixed resin will result in tacky or streaky patches on the final surface of the part. The part should now be left to reach an advanced state of cure. At 20°C this will take at least 8hrs but the longer you leave it the better as this will allow the part to develop more of its final hardness.

13. Optional post-cure
If the parts you are skinning are likely to be exposed to elevated temperatures in use then it is advisable to post-cure the skinned part in order to achieve a full cure and also increase the temperature stability of the cured resin. If you don’t do this, there is a risk that when the parts are exposed to these higher temperatures the resin may soften and ‘sink’ slightly, causing the texture of the carbon fabric to ‘print through’ to the surface.
Examples of elevated temperature environments would include exterior vehicle panels and interior vehicle trim, both of which can reach temperatures over 70°C when exposed to hot summer sun. To ‘post cure’ a skinned part it should be placed in an oven at 60°C for at least 6hrs and then be allowed to cool.
14. Flat (400 - 1200 grit) and polish
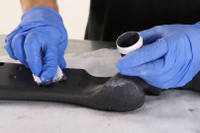
The final step in the process is to flat and polish the final resin surface to a full gloss. Starting with the 400 grit abrasive paper, wet-sand the surface to a flat smooth finish. Once you are happy there are no high or low-spots, wipe down the surface, change the water and move on to the next grit. Proceed to the 800 and then 1200 grit abrasive papers, ensuring you wipe down and change the water between each grit. Ensure that no scratches from the previous grit are still visible before you move on to the next grit. Once you have finished flatting with the 1200 grit paper, wipe down thoroughly.
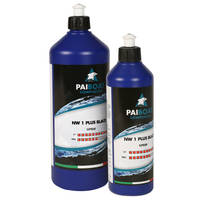
The NW1 Black Super Cutting Compound included with the Skinning Starter Kit and also available separately from Easy Composites should be used to polish the skinned part from a smooth but satin-finish 1200 grit finish up to a full gloss. The NW1 compound can be used by hand or with a polishing pad and power polisher. Where available, a power polisher is likely to be much quicker than hand polishing.
DISCUSSION (33)
Please share any questions or comments you may have about this video tutorial.
LEAVE A COMMENT OR QUESTION
PRODUCTS USED IN THIS PROJECT
Although not necessarily an exhaustive list, the following tools and materials, supplied by Easy Composites, were used in this project.
The quantity shown below is the approximate amount used in the project rounded up to the nearest available kit size or quantity.
MATERIALS & CONSUMABLES
TOOLS & EQUIPMENT
REINFORCEMENTS
DISCUSSION (33)
Please share any questions or comments you may have about this video tutorial.
LEAVE A COMMENT OR QUESTION
100% SECURE
PAYMENT METHODS
Easy Composites EU B.V., registered in the Netherlands 73601195. All content copyright (C) Easy Composites Ltd, 2025. All rights reserved.