Need any help or advice?![]() +44 (0)1782 454499
+44 (0)1782 454499
VIDEOS IN THIS SERIES
This video is part 2 of a 5 part series: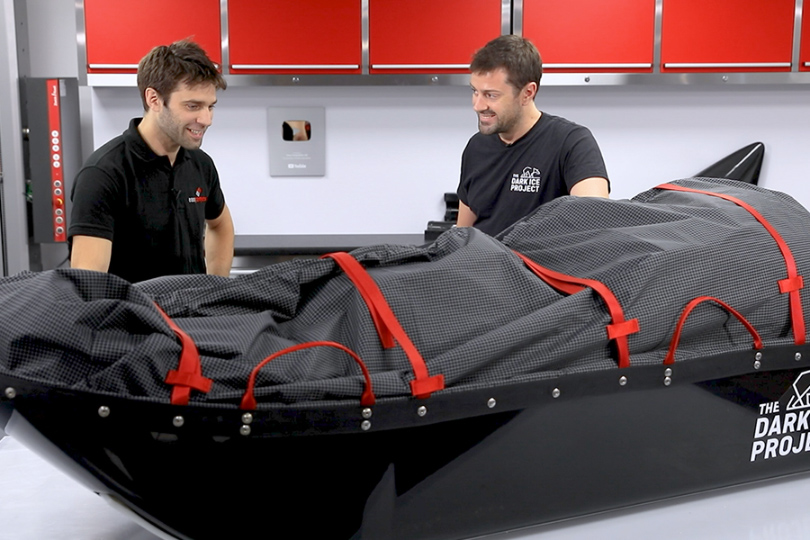
PRODUCTS USED IN THIS PROJECT
Although not necessarily an exhaustive list, the following tools and materials, supplied by Easy Composites, were used in this project.
The quantity shown below is the approximate amount used in the project rounded up to the nearest available kit size or quantity.
MATERIALS & CONSUMABLES


VIDEO TUTORIAL
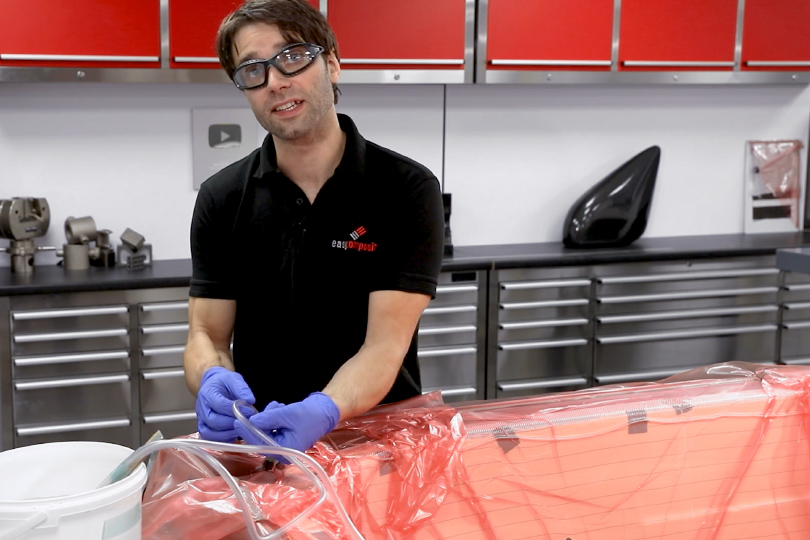
How to Make Large Composite Patterns by Hand
WHAT YOU WILL LEARN
- How to create profile templates for a pattern
- How to assemble, foam fill and shape the pattern
- How to coat the pattern to a high surface finish ready to produce a mould
In this video tutorial we work from a CAD model to produce accurate profile templates, fill contoured areas with polyurethane foam then shape and finish the pattern ready to be used to produce a mould.
This tutorial can be followed whether you are working from a CAD design and using CNC machining or conventional drawings and manually shaping the profiles.
INTRODUCTION
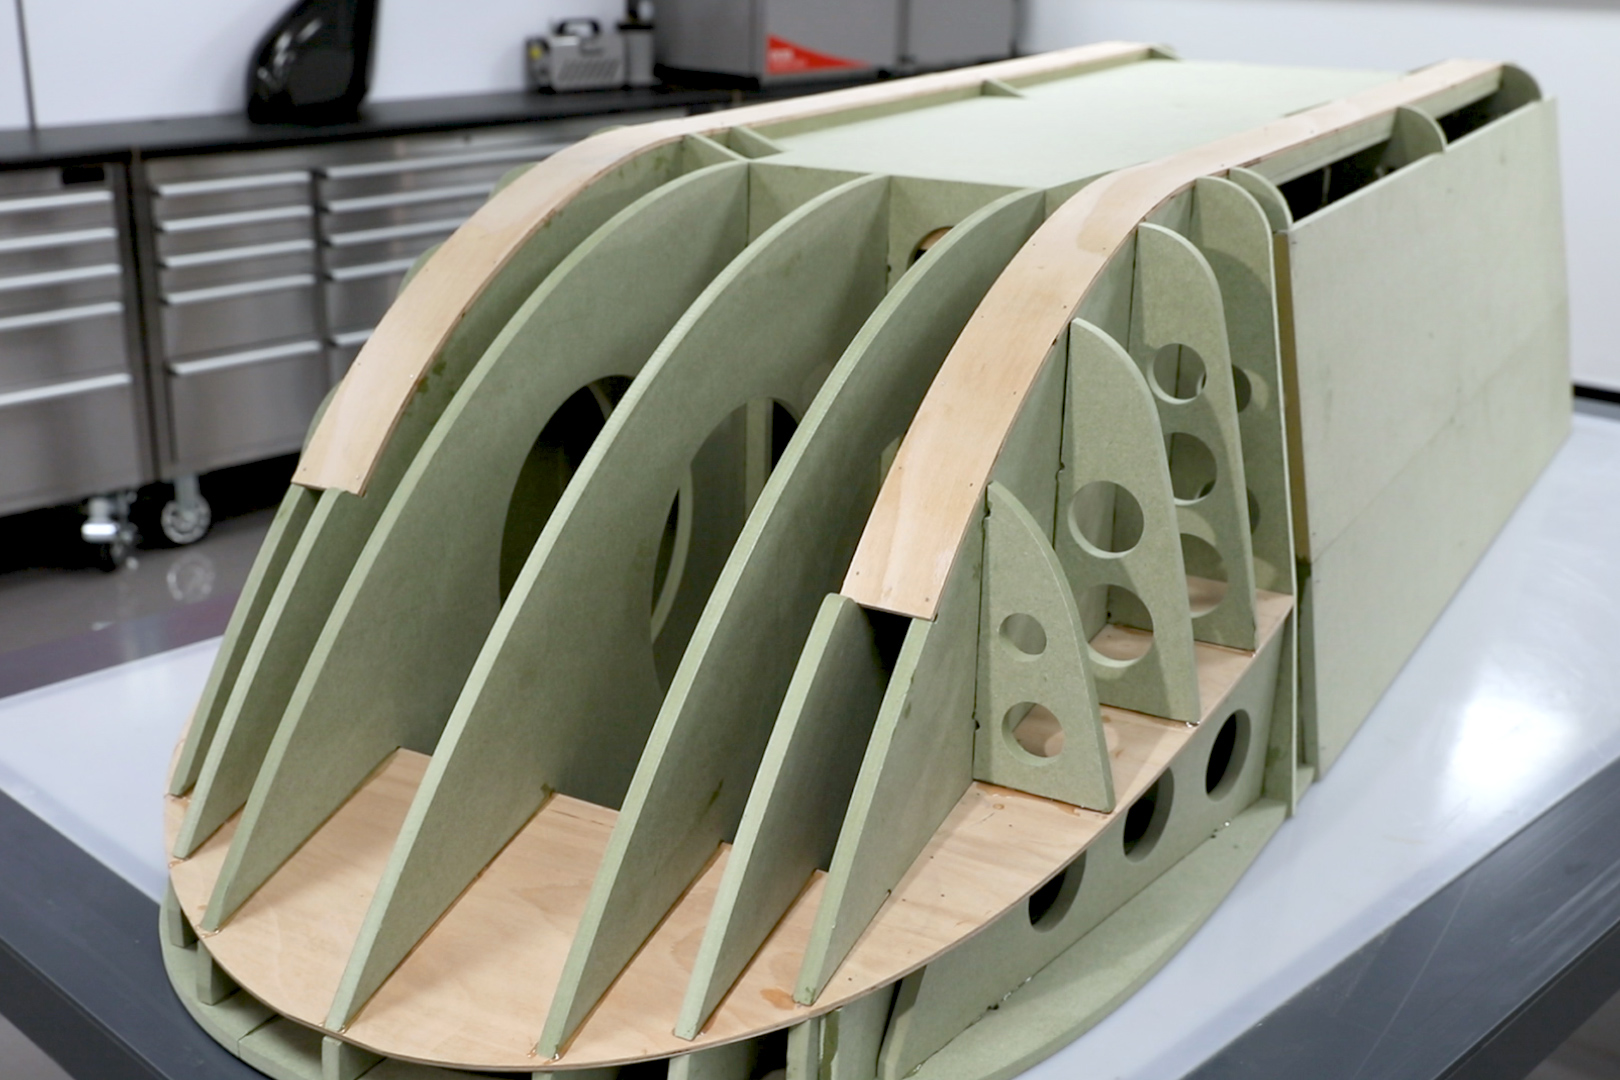
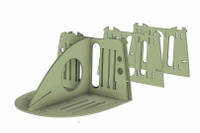
There are many different ways that patterns can be produced ranging from simple hand shaping by eye in materials such as wood and foam through to 5 axis CNC machining epoxy or polyurethane modelboard, in this tutorial we will be focusing on a hybrid method of CNC machining profile templates to use as a precise guide to hand shape polyurethane foam, the techniques used would work equally well without CNC machining by printing and hand profiling the same templates.
We will be taking section profiles from a CAD model to create these guide templates that will be machined from MDF board, these templates will provide accurate references to key features and also provide all of the flat areas of the pattern to final dimension, areas where there are single or compound curves will be filled with polyurethane foam between these guide templates and then be shaped by hand to the final form. Once the form has been created the surface will be coated with specialist pattern coatings Pattern Coat Primer and Pattern Coat High Gloss before being flatted and polished to the final pattern finish.
Material Compatibility
There are a number of materials that can be used in pattern making it is important to ensure that the main construction materials will be compatible with the pattern coating system and that the final pattern coating is suitable for use with your intended mould making system.
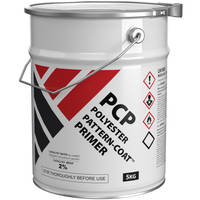
The pattern produced in this tutorial is to be used to produce a mould using the unimould system, The Unimould tooling system is room temperature curing and is compatible with most resin systems that are likely to be used for pattern coating such as polyester, polyurethane vinylester and epoxy, however some paint systems can be attacked by the styrene in the Unimould Tooling Gelcoat particularly 1k paints like you would find in a typical ‘rattle-can’ spray paint so we would strongly advice against using a rattle-can spray as a pattern coat, certain properly cured 2k paint systems can be used but testing the compatibility is essential before use. In this case we will be using the well proven PatternCoat™ coatings to prepare the surface.
The next compatibility question is that with the chosen pattern coating system and the pattern construction materials, as we are using the PatternCoat Primer and High Gloss we need to ensure that the pattern material will be compatible with this, the easiest mistake to make here is to us a polystyrene from instead of the polyurethane that we use in this tutorial, if you do this the foam will dissolve as soon as the PatternCoat is applied! This is because the Pattern Coat systems are based on polyester resin which contains styrene, it is this styrene that will dissolve the foam. Apart from this, most other common materials - such as woods model boards and foams - will be compatible. In the case of plastics good keying and abrasion will be required for the PattenCoat to bond, again if in any doubt test for compatibility!
Materials and equipment needed
Pattern Shaping Materials
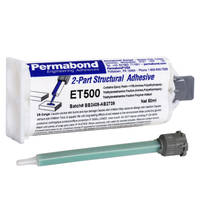
To shape the pattern itself you will need a suitable material to create the profiles, common materials for larger pattern are MDF or plywood, for smaller patterns PVC75 foam core material is often a great choice as it is easily cut with a knife but it still more resistant to sanding than polyurethane foam during the shaping stage, an example of using PVC75 for profiling can be found in our airbox tutorial. The profiles should be bonded together using a suitable adhesive such as our ET500 epoxy.
After the profiles have been made you will need a material to fill the gaps between the profiles, whilst many materials can be used for this our Polyurethane foams are an excellent choice due to there chemical resistance and very easy hand shaping, we have 2 densities in this type of foam, the low density foam is lower cost and offers the fastest shaping where as the high density foam will make more accurate and detailed shaping possible so it best suited to patterns with tighter dimensional tolerance. Generally polystyrene insulation foams are not well suited to pattern making as they are difficult to shape accurately and will dissolve when coated with polyester pattern coatings. These foams can be bonded into the profiles with and expanding polyurethane adhesive, this can normally be sourced from a hardware store a common brand you will find is Gorilla Glue.
Automotive car body-filler is used to fill any gaps between the foam blocks and the profiles and the cells of the foam.
Pattern Shaping Tools
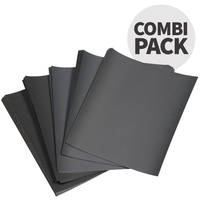
To cut the profiles by hand this is normally done with a jigsaw cutter when working with woods or a knife if working with PVC foam, a selection of files and sanding tools will also be required to refine the cuts.
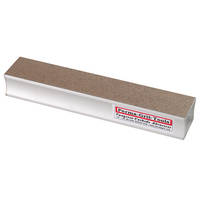
For shaping the foam regular wood working handsaws will make light work of removing the bulk of the material, this can then be sanded into he final form using sand paper and sanding blocks, the Permagrit SB280 sanding blocks are a very useful tool for this job.
Pattern Coating Materials
The pattern will be coated with at 2-4 coats of Pattern Coat Primer. Each coat will use around 500g per square meter. The number of coats will depend on the accuracy and quality of the underlying pattern it will become apparent on the first sanding if more coats are required as you may ‘break-through’ to the underlying foam, if this happens you will need to recoat.
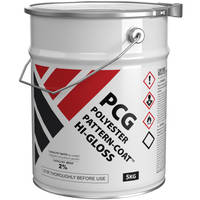
After priming you can optionally use the Pattern Coat Gloss this will typically be applied at approximately 300g per square meter. Both the Pattern Coat Primer and Pattern Coat Gloss need to be catalysed with 2% MEKP.
TUTORIAL BREAKDOWN
1. Choose the reference profile locations
Before you begin with the physical construction careful consideration need to be made as to which profiles will be the most useful in providing accurate references when is comes to shaping. These profiles will usually consist of a centre-line and then additional profiles wherever there is a distinct feature, a critical geometry or sharp change in profile, you should aim to have as few profiles as possible whilst still representing the key dimensions too many profiles can not only increase the initial design and assembly time but also increase the time in the final shaping so a suitable balance should be chosen.
If your pattern has flat areas these should be ‘boarded out’ so the profiles should also be designed to support these flat panels appropriately.
PROJECT BREAKDOWN
1. Cut the reference profiles
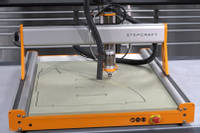
To cut the profiles using hand tools the first stage is to mark-out the profiles onto the material, this may be a case of hand drawing the profiles to measurement or, if you are working from a CAD design, the profiles can be printed onto paper and affixed to the board with spray-glue. The profiling will typically be done using a jigsaw cutter, it is best to over-size the cut by around 1mm, leaving the final refinement to be done with a sanding block.
If you are cutting with a CNC router or laser cutter then normal cutting methods should be used for your machine.
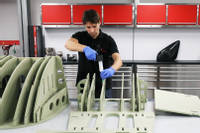
2. Assemble the framework
The gaps between the profiles can now be filled with foam. First blanks of foam should be cut to size so that they fit between the profiles and roughly follow the final shape of the pattern, the foam needs to project beyond the profiles to ensure that the entire final surface will be covered in foam. To bond the polyurethane foam blanks into the frame-work it is best to use an expanding polyurethane wood glue, in this project we are using the brand Gorilla Glue but others are available, you should be able to source this adhesive from most hardware stores. This type of PU adhesive uses moisture from the air to cure so to speed it up and increase the foaming you can mist the surfaces with water from a spritzer bottle.
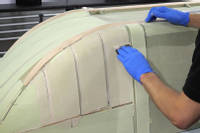
Once the adhesive has cured the blocks can be shaped to the underlying framework, the first roughing stages can be done using a handsaw and then followed by sanding either by hand or using an orbital sander, care must be taken not to remove too much material during both of these stages as low spots would have to be later filled with body-filler which is subsequently more difficult to sand evenly into shape. In compound (double) curved areas the form of the pattern need to be followed by eye to keep the smooth transitions between profiles.
3. Fill the profiles with polyurethane foam blocks
EL2 Epoxy Laminating Resin is an excellent choice for hand layup of carbon fibre parts, including cosmetic finish parts, because it combines excellent mechanical properties with very good clarity and natural UV stability. It also offers fast wet-out of reinforcement and minimal air bubbles.
EL2 should be accurately measured and thoroughly mixed according to the instructions. Once mixed, the pot-life of the resin is around 10 mins and so you should start laminating immediately.
4. Skim with car body filler
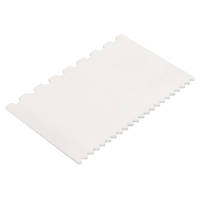
After shaping the foam you will be left with slight gaps between the profiles of the framework and the polyurethane foam, these can bee filled with standard polyester car body-filler, when doing the filling make sure to only fill the gap and not leave a high-spot as high-spots in body filler will take a lot of effort to sand down. Once the gaps have been filled the foam can then be skimmed with the filler, the purpose of this stage is to fill the open cells of the foam so that the pattern coatings will have a consistent substrate.
When skimming the foam, the filler should be pasted oven the surface and them immediately scraped away back down to the top of foam leaving only the cells filled. A common mistake when doing this step is to leave a thick layer of filler over the surface, this would later prove to be very difficult to shape so it’s best to work in small batches and ensure that the excess is removed as you work over the surface. After the filler has cured any slight high-spots should be knocked off with a sanding block.
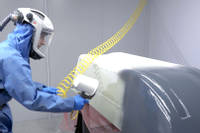
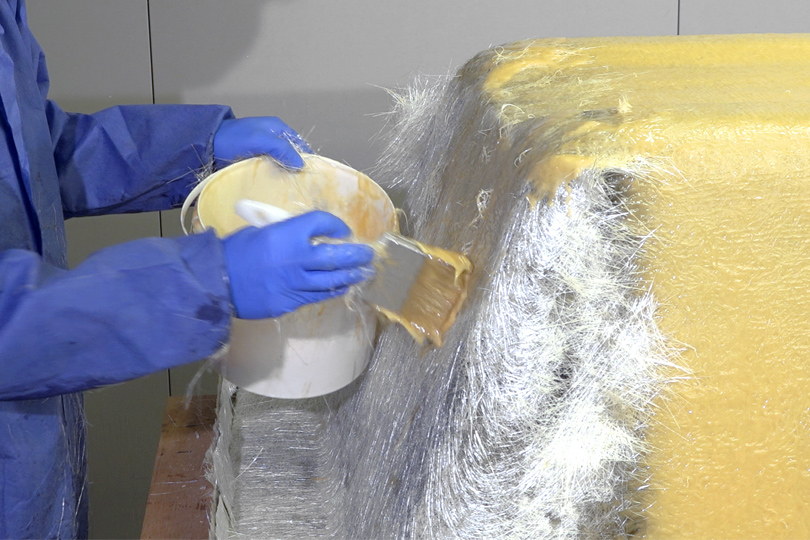
5. Coat with PatternCoat™ Primer
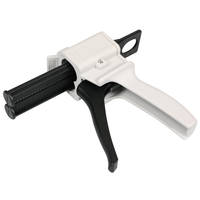
In this project we are using PatternCoat Primer which is a high build and easy sanding pattern coat, it is based on a polyester resin system and therefore needs to be catalysed with MEKP at 2%, after a thorough mix it can be brushed or sprayed. In this project we have chosen to spray the primer, this is a fast and even way to apply the PatternCoat but it’s perfectly possible to achieve excellent results with brush application, it just might take a few minutes longer to flat it down but for smaller patterns brushing is often the best choice when the setup and clean-down for spraying is factored.
Due to the high viscosity of the primer a cup gun is the spray gun of choice, although it doesn’t offer the fine levels and control and finish of a HVLP it rapidly builds a thick coat and is very easy to clean. Each application of primer is done at around 500g per square meter.
After the first coat has been left to cure for around 4-6hrs you will notice with the uniform colour that a few imperfections like scratches pinholes and low spots will become noticeable, these can be easily filled with some body-filler, after addressing these imperfections the entire pattern can be flatted down to remove any high spots before applying the second coat, again this can be done easily by hand with 120grit sand paper or using a DA (dual action) power sander.
After dusting down the second coat can be applied, this is simply a repeat of the first but should now leave a surface that is more level and with no low spots.
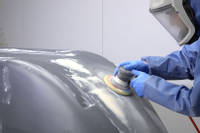
6. Sand primer flat
After the second coat has cured the patter can be completely sanded flat to remove any orange peel effect and minor irregularities using 240grit abrasive. Compared to conventional resins and gelcoats the pattern coat primer is almost like chalk and flats incredibly quickly and doesn’t choke or clog the abrasives.
If you don’t require a gloss finish It is possible to pull a mould straight from the primer if you work through the abrasives to around 1200 grit but in this project we want a full gloss mould so with be coated with the Pattern-Coat Hi Gloss straight from the 240grit abrasive.
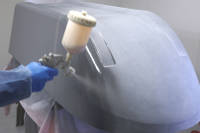
7. Coat with PatternCoat™ Hi Gloss
The pattern coat gloss is again polyester based so will require catalysing with MEKP, although brushing is perfectly possible we have again chosen to spray this materials, as this is a lower viscosity than the primer a conventional HVLP spray-gun with a large 2.5mm nozzle can be used, this will leave a better finish than would be achieved with a cup gun, don’t worry if you don’t have spray facilities as just like the primer this gloss coat can be very effectively applied by brush and will self-level very well.
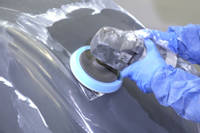
8. Flat and polish to the final finish
With the gloss coat left for 12hrs to fully cure it can be flatted and polished, starting with 400grit the entire surface is flatted to remove and orange peel and nibs left by the spraying, the first stages of flatting are best done dry as it will be easier to identify the un-sanded and therefore glossy areas, after the surface has been fully flatted with 400grit abrasive we then move onto an 800grit pad before changing over to wet sanding by hand at 1200grit, the compound curved areas are done with the paper alone and then for the flat areas and single curvatures it is wrapped around a block to maintain a perfectly flat face. Once the 1200grit flatting is complete the pattern is cleaned down, the water is replaced and the process is repeated with 1500grit, whenever you change through to a finer grade of abrasive it is really important to do this cleaning and water change as it ensures that to don’t simply rub around particles of the previous grade causing scratches.
From the 1500grit we can continue with the final polish, for this we are using the NW1 polishing compound which is specifically designed for composite resins, unless your pattern is very small this is definably best done with a foam pad on a polishing machine, but if you have the perseverance it is possible to do entirely by hand.
Unlike many compounds the NW1 does not need water and does not quickly dry out, this polishing process is essentially the same as polishing car paint and you should make sure to keep the pad moving and not focus on a small area to avoid over-heating the surface, it’s good practice to periodically check the surface with your hand to ensure that it’s staying cool. This particular compound is self-diminishing so the more you work it the finer it gets and should be able to take you to a full mirror polish in one step, once buffed the last residue of the compound can be wiped away with a microfibre cloth which should reveal a mirror like polish on your finished pattern!
DISCUSSION (7)
Please share any questions or comments you may have about this video tutorial.
For the tooling? - I.e. making the pattern/moulds? If you're making a composite component (carbon, Kevlar, fibreglass etc.) they're you're almost certainly going to want a composite mould to make it in. It would be pretty-much unheard of to make a mould from sheet metal and wouldn't really be suitable if you did do it. If, on the other hand, you want a sheet-metal part then making a composite pattern wouldn't really make sense.
If you're talking more widely about the comparison between composite vehicle panels and metal vehicle panels then the advantages are pretty-much all with composite panels, in terms of weight/stiffness etc, enabling you to make a lighter vehicle if it was made with a carbon fibre body compared to an aluminium or steel body, but the costs, especially in mass production, would be much higher for a composite body.
Most often, it's just down to aesthetics; a smooth, shiny component looks like a well made and well finished component. Also, components will release much better from a smooth glossy mould whereas they will tend to 'grip' into a poorly finished one.
We're just using conventional polyester car body filler, we don't sell this product because it's so widely available. Look out for brands like 'Bondo' or 'U-Pol' etc. You can get it from most paint shops, motor-factors, DIY stores, or online from Amazon etc.
Hi, and thanks for your comments and support! The finished product will actually be made out of Kevlar this time; the priorities for the sledges are stiffness but - above all - impact resistance and resilience and you can't beat Kevlar for that! Next episode is the mould, then material evaluation, then finally resin infusion of the Kevlar sledges.
For a component this size, and using a range of reinforcements, resin infusion is an ideal is choice. There’s no reason why prepreg couldn’t be used but we’ve done a lot of prepreg videos recently and so wanted to revisit infusion which is another superb way of making high-end parts. Rest assured, there will be more prepreg videos in the future though.
Well, that sounds like a seriously handy function for this type of work. Since 123D was Autodesk, I wonder if anything like that made it over to 360. We've not found it, if it did!
LEAVE A COMMENT OR QUESTION
PRODUCTS USED IN THIS PROJECT
Although not necessarily an exhaustive list, the following tools and materials, supplied by Easy Composites, were used in this project.
The quantity shown below is the approximate amount used in the project rounded up to the nearest available kit size or quantity.
MATERIALS & CONSUMABLES
DISCUSSION (7)
Please share any questions or comments you may have about this video tutorial.
For the tooling? - I.e. making the pattern/moulds? If you're making a composite component (carbon, Kevlar, fibreglass etc.) they're you're almost certainly going to want a composite mould to make it in. It would be pretty-much unheard of to make a mould from sheet metal and wouldn't really be suitable if you did do it. If, on the other hand, you want a sheet-metal part then making a composite pattern wouldn't really make sense.
If you're talking more widely about the comparison between composite vehicle panels and metal vehicle panels then the advantages are pretty-much all with composite panels, in terms of weight/stiffness etc, enabling you to make a lighter vehicle if it was made with a carbon fibre body compared to an aluminium or steel body, but the costs, especially in mass production, would be much higher for a composite body.
Most often, it's just down to aesthetics; a smooth, shiny component looks like a well made and well finished component. Also, components will release much better from a smooth glossy mould whereas they will tend to 'grip' into a poorly finished one.
We're just using conventional polyester car body filler, we don't sell this product because it's so widely available. Look out for brands like 'Bondo' or 'U-Pol' etc. You can get it from most paint shops, motor-factors, DIY stores, or online from Amazon etc.
Hi, and thanks for your comments and support! The finished product will actually be made out of Kevlar this time; the priorities for the sledges are stiffness but - above all - impact resistance and resilience and you can't beat Kevlar for that! Next episode is the mould, then material evaluation, then finally resin infusion of the Kevlar sledges.
For a component this size, and using a range of reinforcements, resin infusion is an ideal is choice. There’s no reason why prepreg couldn’t be used but we’ve done a lot of prepreg videos recently and so wanted to revisit infusion which is another superb way of making high-end parts. Rest assured, there will be more prepreg videos in the future though.
Well, that sounds like a seriously handy function for this type of work. Since 123D was Autodesk, I wonder if anything like that made it over to 360. We've not found it, if it did!
LEAVE A COMMENT OR QUESTION
100% SECURE
PAYMENT METHODS
Easy Composites EU B.V., registered in the Netherlands 73601195. All content copyright (C) Easy Composites Ltd, 2025. All rights reserved.