Hulp of advies nodig?![]() +44 (0)1782 454499
+44 (0)1782 454499
VIDEO'S IN DEZE SERIE
Deze video is deel 1 van een 2-delige serie: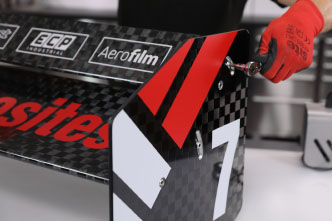
PRODUCTEN DIE IN DIT PROJECT ZIJN GEBRUIKT
Hoewel het niet per se een uitputtende lijst is, werden de volgende gereedschappen en materialen, geleverd door Easy Composites, in dit project gebruikt.
De hieronder getoonde hoeveelheid is de geschatte hoeveelheid die in het project is gebruikt, afgerond naar de dichtstbijzijnde beschikbare kitgrootte of hoeveelheid.
MATERIALEN & VERBRUIKSARTIKELEN
GEREEDSCHAP & APPARATUUR
VACUÜMZAKBENODIGDHEDEN

HULPMATERIALEN
VERSTERKINGEN
VIDEO-HANDLEIDING
Vormloze Motorsportvleugelconstructie
In deze instructievideo behandelen we een malvrije methode voor het creëren van een aerodynamische achtervleugelconstructie, ideaal voor motorsporttoepassingen op midden- tot laag niveau. Hierbij wordt een XPS-polystyreenkern en Mylar-folie gebruikt om het gladde oppervlak te creëren. Het maken van structurele eindplaten en inzetstukken wordt ook behandeld.
INTRODUCTIE
Vleugels die neerwaartse druk genereren, zijn een essentieel onderdeel van veel motorsportvoertuigen. Deze video demonstreert hoe u een effectieve aerodynamische achtervleugel kunt maken met behulp van een eenvoudige malvrije constructiemethode.
High-end autosport zoals F1 en massaal geproduceerde vleugels zullen over het algemeen nog steeds een gegoten constructiemethode gebruiken, dus deze mal-loze techniek is ideaal voor autosport op clubniveau, Time Attack, Formula Student en andere vergelijkbare autosportdisciplines waar een lichte maar sterke methode voor het maken van een eenmalige of kleine serie vleugel de voorkeur heeft.
Hoewel de schuimkern en inzetstukken die tijdens deze video zijn gemaakt met CNC-machines zijn gesneden, konden ze gemakkelijk genoeg zonder CNC-apparatuur worden gesneden, waardoor deze methode van vleugelconstructie toegankelijk blijft.
WAT U GAAT LEREN
De volgende belangrijke onderwerpen worden behandeld in deze videotutorial:
- Hoe de Vleugelkern te Profileren met Behulp van een Hete Draadsnijder.
- Het Creëren van Geschikte Verstevigingspunten en Inzetstukken.
- Hoe de Koolstofvezel op de Kern te Lamineren en Vacuüm te Verpakken met Behulp van Mylar.
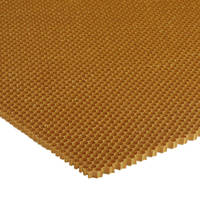
- Hoe Lichtgewicht Eindplaten te Produceren met Behulp van Nomex Honingraat.
WAT U NODIG HEEFT
Materialen en Apparatuur Die Nodig Zijn om het Project te Voltooien
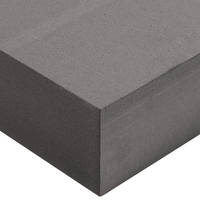
XPS Polystyreen Schuim - Op maat te snijden voor de vleugelkern. Gekozen vanwege de gladde afwerking, het lichte gewicht en de mogelijkheid om met een hete draad te snijden.
Hete Draadsnijder - Om de vleugelprofielen in de gewenste vorm te snijden. Dit kan worden gedaan met een eenvoudige handboogdraadsnijder of een geavanceerdere meerassige CNC-hete draadsnijder.
Aluminium plaat of profiel - Voor het vervaardigen van inzetstukken en harde punten. Aluminium wordt gebruikt vanwege zijn goede allround sterkte, gemakkelijke bewerkbaarheid en relatief lage gewicht in vergelijking met andere metalen.
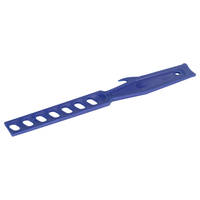
Afplakband - Helpt de rand van het Spread Touw-weefsel te binden om te voorkomen dat het uit elkaar valt.
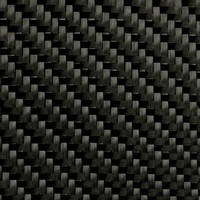
88g Spread Touw Koolstofvezel Weefsel - Produceert een gladde en hoogwaardige cosmetische afwerking als de oppervlaktelaag van het weefsel op de vleugel.
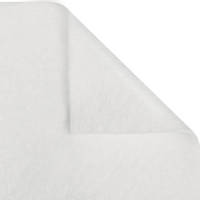
Papierrol - Om de eerste laag wapening te scheiden wanneer deze wordt opgerold voor gebruik.
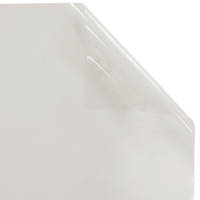
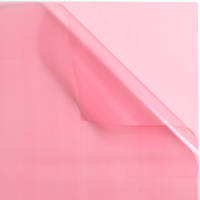
Mylar Lossingsfolie - Deze folie is essentieel voor het verkrijgen van een glad oppervlak voor de vleugel en is met zijn dikte, flexibele eigenschappen en gemakkelijke lossing ideaal om tijdens de productie om de vleugel te wikkelen.
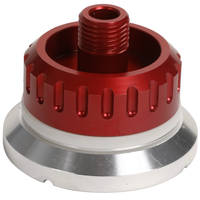
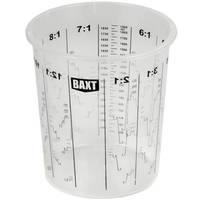
Vacuümdrukregelaar - Verlaagt het vacuümniveau tot het benodigde 20% vacuüm bij de productie van de vleugeleindplaten.
Spread Touw Plaat met Hoge Sterkte - Eenvoudig te gebruiken en op maat te snijden plaat voor het maken van de huiden voor eindplaten.
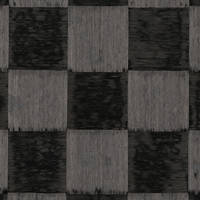
Nomex Honingraat 5mm - Lichtgewicht en sterke Structurele Kern voor het maken van de eindplaten.
STAP-VOOR-STAP HANDLEIDING
1. Hoe de Vleugel te Profileren met Behulp van een Hete Draadsnijder
Het kernmateriaal dat voor deze vleugel wordt gebruikt, is XPS of geëxtrudeerd polystyreen, dat een gladde afwerking heeft wanneer het wordt gesneden, in plaats van het geëxpandeerde polystyreen. Het heeft ook betere mechanische prestaties.
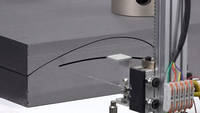
Hoewel het XPS met de hand gesneden kon worden, is de nauwkeurigheid vrij laag. De meest efficiënte manier is om een handboog hete draadsnijder te gebruiken, wat goede en nauwkeurige vleugelprofielen zal opleveren. In dit geval gebruiken we een 4-assige CNC hete draadsnijder die we al beschikbaar hadden. Hoewel we voor deze profielen alleen de 2-assige functie gebruiken.
Een belangrijk punt bij elke hete draadsnijder is om niet te snel te snijden. Als er te snel wordt gesneden, zal de draad slepen en dit kan het snijprofiel vervormen. De snelheid moet zo worden ingesteld dat het schuim net voor de draad smelt, waarbij de draad het schuim niet raakt. Als ruwe richtlijn werden deze profielen gesneden met een snelheid van 200mm per minuut. Eenmaal gesneden kunnen de profielen uit het schuimblok worden gehaald, klaar om de vleugel te maken.
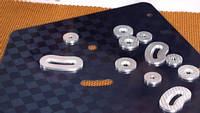
2. Creëren en Monteren van de Hardpoints en Inserts
Om de vleugel te monteren, is het essentieel om inserts of bevestigingspunten te hebben, aangezien het composiet en schuim de belastingen niet adequaat zouden opvangen. Om deze te maken, is 8mm aluminiumplaat CNC-gefreesd in vorm, hoewel het met de meeste gangbare werktuigmachines gesneden zou kunnen worden als CNC niet beschikbaar was, en zelfs in MDF gemaakt voor eenvoudige toepassingen.
De gesneden inzetstukken worden geschuurd en vervolgens gereinigd met aceton om te ontvetten, voordat ze met de Permabond ET500 Lijm aan de schuimharding worden gehecht. Deze wordt gebruikt om de schuimdelen aan elkaar te hechten. Er moet zorgvuldig worden gehandeld om kieren of richels te voorkomen, aangezien deze op het vleugeloppervlak kunnen afdrukken. In dit stadium kunnen eventuele kieren eenvoudig met de lijm worden opgevuld.
3. Materialen Voorbereiden voor de Vleugelconstructie
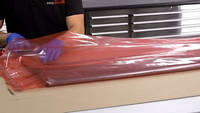
Mylar-folie zal cruciaal zijn voor dit proces. Het is antikleef en heeft, in de hier gebruikte dikte van 125 micron, de juiste balans tussen flexibiliteit en oppervlakteafwerking voor de vleugeltoepassing. De Mylar moet nauwkeurig op lengte worden gemeten ten opzichte van de kern. De reden hiervoor zal duidelijker worden naarmate de vleugel wordt geproduceerd. In de andere richting wordt de Mylar 50mm te groot gesneden om een overlap aan de achterrand te creëren.
Een envelop-vacuümzak zal worden gebruikt om de vleugel te consolideren en te comprimeren terwijl deze uithardt. Deze moet in dit stadium van tevoren worden voorbereid, waarbij één zijde open wordt gelaten om de vleugel in te brengen. De andere zijden kunnen worden afgedicht met gumtape en de doorvoerconnector kan vooraf worden geïnstalleerd.
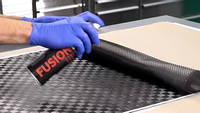
De versterking wordt nu voorbereid door deze op maat te snijden, klaar voor gebruik. De cosmetische oppervlaktelaag is onze 88g Spread Touw koolstofvezel die zowel een zeer vlakke afwerking als een verbluffende cosmetische uitstraling heeft. Spread Touw-stoffen zijn echter zeer kwetsbaar zodra ze gesneden zijn en rafelen gemakkelijk bij hantering. Om dit probleem te voorkomen, wordt afplakband aangebracht op alle snijlijnen om het geheel bij elkaar te houden. De stof is ongeveer 20mm overmaats in beide richtingen. De rest van de versterking bestaat uit 3 lagen van het 210g kepergeweven koolstofvezeldoek.
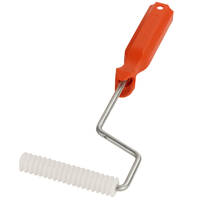
Om de Spread Tow vezel nog verder te stabiliseren, wordt het weefsel bespoten met Fusion Fix Spray Tack Lijm en wordt één laag van het rugweefsel voorzichtig over de Spread Tow gerold om deze te stabiliseren. Een kunststof geribbelde roller wordt gebruikt om ervoor te zorgen dat de twee lagen goed geconsolideerd zijn. Het weefsel kan vervolgens worden opgerold met een papieren scheidingslaag, klaar voor gebruik.
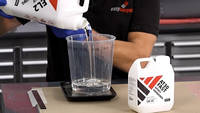
4. Het afmeten en mengen van de hars
Voor dit project is de ideale hars de EL2 Epoxy Laminating Resin. Deze heeft de juiste balans tussen een gemiddelde viscositeit en goede mechanische prestaties voor dit proces. Om de juiste hoeveelheid hars te bepalen, weegt u eerst de totale hoeveelheid voorgesneden vezelversterking.
Vanwege de hars die nodig is op de Mylar-folie en het feit dat overtollige hars wordt uitgeperst, wordt er meer hars gebruikt dan typisch zou zijn voor een natte lamineerproces. Neem het hierboven gemeten cijfer en verdubbel het, zodat tweemaal de hoeveelheid hars als het gewicht van de vezel wordt gebruikt.
Zoals bij alle composieten, is het belangrijk om de hars zorgvuldig af te wegen volgens de mengverhouding op de flessen en vervolgens grondig te mengen voor gebruik. Het wordt aanbevolen om enkele minuten in één emmer te mengen, voordat u het in een tweede schone emmer giet en opnieuw mengt.
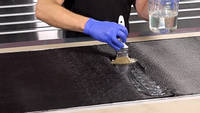
5. Hars aanbrengen en de wapening lamineren
In dit stadium wordt ongeveer een derde van de hars op de Mylar-folie gegoten en uitgespreid tot een egale laag. De eerste laag wapening wordt vervolgens zorgvuldig op de hars gelegd en de kunststof lamellenroller wordt over het oppervlak gebruikt. Door op deze manier heen en weer te werken met de kunststof lamellenroller zal de hars de vezels helpen bevochtigen en zich door de wapening heen werken. Dit resulteert doorgaans in een beter geconsolideerd materiaal en minder ingesloten lucht dan wanneer men van achteren werkt.
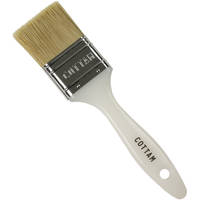
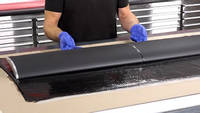
Zodra het oppervlak volledig is gerold, kan er meer hars worden aangebracht en het proces worden herhaald voor de resterende lagen wapening. Het is belangrijk dat de harslaag gelijkmatig over het gehele oppervlak wordt verspreid. De laatste laag moet, eenmaal volledig gerold, er vrij nat uitzien. Deze overtollige hars zal helpen bij het aanbrengen van de kern op de wapening, waardoor deze, en de Mylar, naar behoefte kunnen schuiven en bewegen. Hoewel rollers bij uitstek geschikt zijn voor dit proces, kunnen spatels of een zorgvuldig gebruikte kwast hetzelfde effect creëren.
6. De Kern Plaatsen en in Mylar Wikkelen
Nu de wapening volledig is bevochtigd, kan de kern zorgvuldig op de wapening worden geplaatst. De Mylar-folie wordt vervolgens om de kern gewikkeld en de positie van de kern kan worden aangepast om deze mooi centraal te krijgen. Het is normaal dat de Mylar en het weefsel in dit stadium vrij los lijken te zitten tegen de kern. De Mylar wordt vervolgens afgeveegd om overtollige hars te verwijderen en de vleugel wordt in de vacuümzak geplaatst.
7. De Vleugel Vacuümzakken
De vleugel wordt nu zorgvuldig in de voorbereide vacuümzak geplaatst. De vleugel moet zo worden gepositioneerd dat de voorrand tegen de vouw in de vacuümfolie wordt gedrukt. De folie kan vervolgens worden strakgetrokken en gladgestreken over het vleugeloppervlak om overtollige folie en vouwen te verwijderen.
Een strook zwaar ademend materiaal wordt vervolgens over de achterrand van de vleugel geplaatst en de gumtape kan nu worden afgedicht. Er kan nu vacuüm worden getrokken in de zak.
Het is belangrijk om het vacuüm geleidelijk en langzaam te trekken en regelmatig te stoppen om vouwen uit de Mylar-folie te verwijderen en overtollige hars te verwijderen door de oppervlakken van de vleugel zorgvuldig af te strijken. Een ideaal hulpmiddel om als wisser te dienen, is een stuk schuim met wat ademend doek over de rand.
Zodra de overtollige hars is verwijderd en de Mylar vlak en kreukvrij ligt, kan volledig vacuüm worden toegepast en de zak worden achtergelaten om uit te harden. Het moet zo worden neergelegd dat de achterrand rechtstreeks vanuit het profiel doorloopt.
Het tweede element wordt op exact dezelfde manier geproduceerd als het eerste. Deze opbouw is geoptimaliseerd voor eenvoud en zou op vele manieren kunnen worden verbeterd. De eerste methode zou de opname van liggers in de kern van de vleugel zijn. Dit betekent dat de huid dunner kan zijn en zo het gewicht vermindert. Een eenvoudige methode is om het schuim verticaal te snijden en een voorgefabriceerd stuk koolstofplaat in te lijmen. Het kan verder worden verbeterd met het gebruik van eindkappen en ribben.
Verdere verbeteringen kunnen worden aangebracht in de opbouw zelf. Een eenvoudige 0- en 90-graden opbouw is niet de meest efficiënte en zou kunnen worden verbeterd met een zorgvuldigere laminaatorientatie en opbouw.
8. Het Voorbereiden Van de Materialen voor de Eindplaat
Aangezien de eindplaten de belasting van de vleugel naar het chassis overbrengen, moeten ze op een zeer sterke manier worden geconstrueerd. Idealiter is voor dergelijke toepassingen een sandwichpaneelconstructiemethode ideaal. In dit voorbeeld worden 2 lagen van een 1mm Spread Touw carbon fiber plaat aan weerszijden van een 5mm Nomex Honingraat kernmateriaal geplaatst.
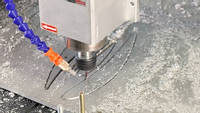
De koolstofplaat wordt op maat gesneden met behulp van onze CNC-freesmachine, hoewel dit ook handmatig gedaan zou kunnen worden als deze niet beschikbaar was. Het koolstof snijdt zeer schoon, zonder verdere afwerking. Een 1.6mm hardmetalen frees is het snijgereedschap dat wordt gebruikt, omdat deze de koolstofplaat snel en gemakkelijk snijdt. Volledige stofafzuiging moet worden gebruikt om het gevaar van stof in de lucht te verminderen en te minimaliseren.
In dit stadium moeten de inserts worden gemaakt. Overal waar bevestigingsmiddelen door de eindplaat gaan, zijn er hoge drukkrachten die de kern kunnen pletten en beschadigen. De inserts, meestal gemaakt van aluminium, zullen de belasting verspreiden en dit pletten voorkomen. Deze inserts zijn machinaal bewerkt uit aluminium en gesneden met CNC. Voor eenvoudige toepassingen zouden deze zelfs van MDF kunnen worden gemaakt.
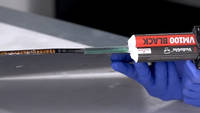
Het hechtvlak van de inserts wordt opgeruwd met schuurpapier en de inserts worden gereinigd en ontvet. Ze kunnen vervolgens op de koolstofplaat worden gelijmd met behulp van de VM100 Zwarte Lijm. De peel ply-textuur aan de achterzijde van de koolstofplaat is ideaal om aan te hechten en heeft dus geen verdere voorbereiding nodig.
Bij het direct verlijmen van aluminium op koolstofvezel is het belangrijk om te overwegen of galvanische corrosie waarschijnlijk een probleem zal zijn voor de specifieke toepassing. In dit geval betreft het een droog opgeslagen raceauto en is dit dus geen probleem, dus er hoeven geen maatregelen te worden genomen. Echter, voor sommige andere toepassingen zoals maritiem of luchtvaart, is het belangrijk om het aluminium van het koolstof te isoleren. Dit wordt het gemakkelijkst gedaan door een dunne laag glasvezel ertussen te lamineren.
De Nomex Honingraat kan nu voorzichtig op maat worden gesneden met een scalpel. De rand van de Nomex wordt iets korter gesneden dan de rand van de eindplaat om een kleine opening te laten die kan worden opgevuld om de paneelrand af te dichten. Het uitsnijden rond de inserts is ook een gemakkelijke taak, met de mogelijkheid om de honingraat zijwaarts enigszins te vervormen om een strakke pasvorm tegen de inserts te krijgen.
9. Het aan Elkaar Lijmen Van de Eindplaten
In dit stadium zijn de eindplaatcomponenten klaar om aan elkaar te worden gehecht om het uiteindelijke afgewerkte onderdeel te maken. Hiervoor wordt de ER1 Epoxy Rapid Repair hars als lijm gebruikt. Dit komt door de uitstekende mechanische prestaties en relatief snelle uithardingstijd. Om het geschikt te maken voor gebruik, is het noodzakelijk het harssysteem te verdikken tot een lijmconsistentie met behulp van Fumed Silica Thixotropic poeder.
De hars wordt zoals gewoonlijk afgemeten en vervolgens wordt het pyrogeen silica geleidelijk aan de hars toegevoegd om deze te verdikken. Het doel is om het te verdikken tot de consistentie van een typische gelcoat. Zodra dit is bereikt, kan de harder worden toegevoegd en de hars grondig worden gemengd voor gebruik.
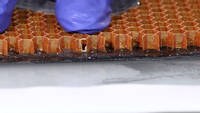
De hars wordt vervolgens gelijkmatig over beide carbonplaten verdeeld in een hoeveelheid van ongeveer 500g per vierkante meter. Een gekartelde spreider werkt hier goed voor, of zelfs een borstel op kleinere stukken zoals dit. De Nomex Honingraat wordt vervolgens op het carbon geplaatst en zijwaarts in beide richtingen geschoven. Dit is om de hars in staat te stellen een afgeronde rand te vormen op de honingraatpapier zijwanden om het hechtingsoppervlak aanzienlijk te vergroten.
In dit stadium worden de eindplaten vacuüm verpakt om een gelijkmatige kracht op het paneel uit te oefenen. Een MDF-spreider wordt gebruikt om ervoor te zorgen dat de randen van het paneel niet vervormen waar een opening in de honingraat is. In dit geval is het belangrijk om alleen een gedeeltelijk vacuüm te gebruiken via een vacuümregelaar. Als een volledig vacuüm zou worden gebruikt, kan dit problemen veroorzaken doordat alle hars uit de rand van de panelen wordt geperst en het probleem van de lijm die overmatig bubbelt of schuimt terwijl de lucht ontsnapt. Om deze reden is slechts ongeveer 20% vacuüm nodig. Het gebruik van een vacuümregelaar maakt het mogelijk om dit eenvoudig op het ideale niveau in te stellen. De eindplaten kunnen vervolgens 6 uur onder vacuüm uitharden voordat ze uit de zak worden gehaald.
10. De Randen van de Eindplaten Afdichten
Nu de eindplaten zijn uitgehard, kunnen ze uit de zakken worden verwijderd. Om de rand af te dichten, knijpt u VM100 Zwarte lijm in de rand. Het heeft een snelle uithardingstijd, hoge viscositeit en is gemakkelijk te schuren, wat het ideaal maakt voor deze toepassing.
Zodra de rand is opgevuld, kan deze worden geëgaliseerd met de platte kant van een spatel en vervolgens worden uitgehard. Eenmaal uitgehard kunnen de randen glad worden geschuurd om ze af te werken. Door het schuren tot 800 grit te brengen, krijgt de rand een mooie, egale en nette afwerking.
11. Definitieve Vleugelafwerking en Montage
In dit stadium moeten de vleugelelementen volledig uitgehard zijn en kunnen ze uit de vacuümzak worden ontvormd. De lossende eigenschappen van het Mylar komen hier tot uiting, aangezien het gemakkelijk van het vleugeloppervlak afpelt en de gladde, glanzende afwerking van de vleugel blootlegt.
De randen en uiteinden van de vleugel kunnen nu worden opgeruimd, klaar voor montage, en eventuele gaten kunnen worden getapt om schroefdraad toe te voegen. De blauwe folie kan van de eindplaten worden verwijderd en eventuele stickers en emblemen kunnen worden aangebracht. De vleugelelementen worden vervolgens eenvoudig aan elkaar geschroefd om de voltooide vleugel met dubbele elementen te vormen.
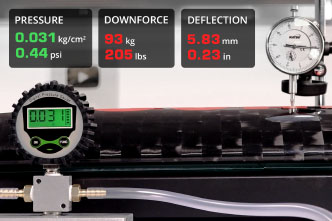
Nu ziet u de afgewerkte vleugel en de kwaliteit straalt ervan af. Het gebruik van een lichte schuimkern en koolstofvezel betekent dat het totale gewicht van deze vleugel slechts 3,5 kg bedraagt en dat deze meer dan sterk genoeg is voor de hoeveelheid neerwaartse druk die hij kan produceren. We hebben een video gemaakt die laat zien hoe sterk deze vleugel is door middel van destructieve tests!
De eindplaten hebben een hoge productkwaliteit en de VM100 laat vooral een mooie rand achter. Het Mylar geeft de vleugelelementen een zeer hoogglans afwerking. Het belangrijkste compromis van deze methode van vleugelconstructie is de oppervlaktevlakheid die met de Mylar-folie kan worden bereikt. Er zal waarschijnlijk altijd een zekere mate van rimpeling op het vleugeloppervlak zijn, hoewel dit geen invloed zal hebben op de werkelijke prestaties van de vleugel. Ook zal een dergelijke methode leiden tot een iets zwaardere vleugel door de grotere hoeveelheid gebruikte hars. Per saldo is het echter nog steeds een zeer goede methode voor het produceren van een eenmalige of kleine serie vleugels.
DISCUSSIE (25)
Deel al uw vragen of opmerkingen over deze videohandleiding.
Dezelfde methode zou moeten werken zolang uw kern sterk genoeg is, experimenteer bijvoorbeeld met geprinte infill enz. Voor een complexe vorm zult u vrijwel zeker problemen krijgen met vouwen als u een enkel stuk mylar gebruikt, omdat het niet gemakkelijk uitrekt of zich aanpast aan complexe krommingen. Mogelijk moet u knippen en overlappen om vouwen te verwijderen en rekening houden met een beetje nabewerking.
Het is nuttig om te weten dat het goed werkte voor uw toepassing met dikker Mylar. De versteviging die in de video werd getoond, was een eenvoudige lay-up die goed werkte, maar verder verfijnd kon worden zoals vermeld, dus de extra verstevigingsstrip rond de voorrand is een goede manier om de lay-up voor de zweefvlieger te optimaliseren.
U heeft uiteraard 100% gelijk. We noemen dit inderdaad als een tekortkoming van deze methode (evenals oppervlaktegolving), maar de eenvoud van deze methode en het gemak voor eenmalige toepassingen betekent dat de voordelen voor veel mensen ruimschoots opwegen tegen de gewichtsstraf. Veel FSAE- en vergelijkbare teams hebben te maken met krappe budgetten, krappe ontwikkelingstijden en daarom is het compromis in gewicht soms de moeite waard.
Als u goed kijkt, ziet u de ademdoek over de achterrand en ook onder de Through Bag Connector. Dat is voldoende luchtpad om ingesloten lucht uit het laminaat te laten ontsnappen.
Dat is zeer chassisspecifiek, vandaar dat we het hier niet hebben behandeld.
In theorie zou je koolstofvezel rond de meeste kernmaterialen kunnen wikkelen, maar het is niet noodzakelijkerwijs de meest efficiënte manier om het onderdeel te maken, maar als je vorm het gebruik van dat materiaal dicteert, dan zou het moeten werken.
Het hangt ervan af of het vleugelontwerp parallel is (of complexere samengestelde vormen heeft), en ook of het matrijsontwerp toegang tot de uiteinden biedt (d.w.z. de mallen zijn open aan de uiteinden). Als het parallel en open is, kunt u de boven- en onderkant oplamineren, ze vervolgens 'nat' samenbrengen en voorzichtig extra natte versteviging over de verbinding aanbrengen. Als u geen toegang heeft via de uiteinden, moet u de twee helften meestal afzonderlijk maken en ze daarna aan elkaar lijmen.
De tape wordt niet verwijderd. Aangezien de stof zeer licht overmaats is gemaakt, worden de randen met de tape aan het einde van de vleugelproductie afgesneden.
Er zijn geen 'rimpels' omdat de Mylar niet gevouwen of gekreukt is, maar er zijn wel golvingen/onregelmatigheden, die we eerlijk behandelen in de samenvatting, inclusief het pannen van de camera langs de vleugel om de golvingen te tonen.
Zweefvliegtuigen zijn een goed onderwerp om veel interessante en belangrijke concepten te demonstreren, net als elke vliegtuigvleugel. Met de gloeidraad wordt het hele profiel in één keer gesneden; de nauwkeurigheid van de boven- en onderkant moet zeer goed zijn (meer dan voldoende voor dit proces); we zien een tolerantie van minder dan 0.5mm.
Het is opgesteld als een generieke vleugel in plaats van iets specifieks. De specifieke profielen die werden gebruikt waren echter 'Eppler423' voor het hoofdelement en 'NACA4412' voor het secundaire element.
Als je het hebt over de golvingen/onregelmatigheden in het oppervlak, dan heeft dit meer te maken met de wapening die aan de buitenkant wordt toegevoegd (en de variërende hoeveelheden hars) dan met inconsistentie/onregelmatigheid van de kern, dus ik denk niet dat de golving verbeterd zou kunnen worden door een 3D-geprinte kern en het zou moeilijk zijn om een kern te printen die ook maar in de buurt komt van de lage dichtheid van XPS (wat ongeveer 25kg/m3 is of (ook bekend als een dichtheid van 0.025)).
Hoi Keith, ja, het biedt een veel beter uitgangspunt wat betreft de oppervlakteafwerking. Het is zeker niet perfect, zoals we in de video hebben besproken, maar voor veel toepassingen is het meer dan goed genoeg en betekent het heel weinig werk aan het oppervlak.
Hoi Rolf, we vroegen ons precies dit af. Dus we hebben het geprobeerd! En… het werkte niet echt! De lichte variatie in dikte van de wapening veroorzaakte te veel gebieden die niet voldoende consolidatiedruk kregen. Er zijn wellicht enkele proceswijzigingen die de zaken zouden kunnen verbeteren, maar op basis van onze bevindingen was het schuim 'afsnijsel' niet wat we gehoopt hadden!
Hoi Matt, stem genoteerd! Wij willen het ook doen. We hebben de volgende paar al gepland, maar blijf geabonneerd en hopelijk komen we er snel aan toe!
Nee, zelfs bij volledig vacuüm is het XPS prima. Geëxpandeerd polystyreen zou het niet verdragen, maar we zouden EPS sowieso niet aanbevelen.
Bedankt voor de opmerking, ik snijd liever eerst de bovenkant, omdat anders de gewichten op het schuim het hele blok doen doorzakken, wat betekent dat het bovenoppervlak enigszins verschoven zou eindigen. Ik heb nooit problemen gehad met waar de draad uitkomt, maar ik weet zeker dat er momenten kunnen zijn waarop eerst de onderkant snijden de voorkeur zou hebben.
Ze zijn vergelijkbaar qua druksterkte per gram, en dus is het verschil (en de voorkeur) genuanceerder. Voor deze eindplaten is de schuifkracht vrij beperkt, en daarom zou de kern met de laagste dichtheid de beste optie zijn. Aangezien het moeilijk is om de lage dichtheid van een Nomex-kern in aluminium te evenaren, gaat hier de voorkeur uit naar Nomex.
We hebben een paar proefdraaien gedaan met het kleinere element, puur om het proces te verfijnen, maar dat was het dan ook. Het is moeilijk te zeggen hoeveel tijd het van begin tot eind kostte, maar afgezien van het bouwen van de hete draad, waren we in 3 dagen klaar met filmen, en het grootste deel van die tijd bestond uit uithardingstijden, dus gezien de grootte en complexiteit van het onderdeel, zou ik zeggen dat het vrij weinig uren kostte. Ontwerptijd is daar ook niet bij inbegrepen.
Er zijn VEEL manieren om gewicht uit dit onderdeel te halen, maar ze voegen vrijwel allemaal complexiteit toe en riskeren potentieel de productie van een defect onderdeel. Dit project is niet geoptimaliseerd voor gewicht, maar het is zeer vergevingsgezind en zal vrijwel zeker een sterk onderdeel produceren met een acceptabel laag gewicht.
Het overleeft perfect, dus ja, u zou de Mylar zeker kunnen hergebruiken.
Hoi Nathan, ja, zeker. Het is niet echt anders dan wat we hier doen, mits de vorm van de spoiler een parallel profiel is.
Voor de vleugels zou het proces zeer vergelijkbaar zijn. RC-vliegtuigvleugels worden al vele jaren gemaakt met behulp van heet gesneden XPS, bedekt met koolstof of glas, bevochtigd met epoxy. Andere onderdelen, zoals de romp, worden meestal gemaakt met een handlaminering van gelcoat, vervolgens koolstof of glas en hars, soms (maar niet altijd) vacuüm verpakt. Bekijk het kanaal van RAMY RC om een meestervakman in RC-vliegtuigbouw te zien.
We hebben een interessant proces voor samengestelde krommingen en willen dit graag delen in een toekomstige video, dus blijf op de hoogte.
Jazeker, er zijn een aantal situaties waarin het maken van een harspasta met gemiddelde dichtheid (pyrogeen silica voor de thixotrope eigenschap en glazen bellen om de dichtheid te verminderen) een goede optie kan zijn. Andere lichtere materialen kunnen ook worden vervangen door het zwaardere aluminium, vooral als u de legering niet tapt.
EEN OPMERKING OF VRAAG ACHTERLATEN
PRODUCTEN DIE IN DIT PROJECT ZIJN GEBRUIKT
Hoewel het niet per se een uitputtende lijst is, werden de volgende gereedschappen en materialen, geleverd door Easy Composites, in dit project gebruikt.
De hieronder getoonde hoeveelheid is de geschatte hoeveelheid die in het project is gebruikt, afgerond naar de dichtstbijzijnde beschikbare kitgrootte of hoeveelheid.
MATERIALEN & VERBRUIKSARTIKELEN
GEREEDSCHAP & APPARATUUR
VACUÜMZAKBENODIGDHEDEN
HULPMATERIALEN
VERSTERKINGEN
DISCUSSIE (25)
Deel al uw vragen of opmerkingen over deze videohandleiding.
Dezelfde methode zou moeten werken zolang uw kern sterk genoeg is, experimenteer bijvoorbeeld met geprinte infill enz. Voor een complexe vorm zult u vrijwel zeker problemen krijgen met vouwen als u een enkel stuk mylar gebruikt, omdat het niet gemakkelijk uitrekt of zich aanpast aan complexe krommingen. Mogelijk moet u knippen en overlappen om vouwen te verwijderen en rekening houden met een beetje nabewerking.
Het is nuttig om te weten dat het goed werkte voor uw toepassing met dikker Mylar. De versteviging die in de video werd getoond, was een eenvoudige lay-up die goed werkte, maar verder verfijnd kon worden zoals vermeld, dus de extra verstevigingsstrip rond de voorrand is een goede manier om de lay-up voor de zweefvlieger te optimaliseren.
U heeft uiteraard 100% gelijk. We noemen dit inderdaad als een tekortkoming van deze methode (evenals oppervlaktegolving), maar de eenvoud van deze methode en het gemak voor eenmalige toepassingen betekent dat de voordelen voor veel mensen ruimschoots opwegen tegen de gewichtsstraf. Veel FSAE- en vergelijkbare teams hebben te maken met krappe budgetten, krappe ontwikkelingstijden en daarom is het compromis in gewicht soms de moeite waard.
Als u goed kijkt, ziet u de ademdoek over de achterrand en ook onder de Through Bag Connector. Dat is voldoende luchtpad om ingesloten lucht uit het laminaat te laten ontsnappen.
Dat is zeer chassisspecifiek, vandaar dat we het hier niet hebben behandeld.
In theorie zou je koolstofvezel rond de meeste kernmaterialen kunnen wikkelen, maar het is niet noodzakelijkerwijs de meest efficiënte manier om het onderdeel te maken, maar als je vorm het gebruik van dat materiaal dicteert, dan zou het moeten werken.
Het hangt ervan af of het vleugelontwerp parallel is (of complexere samengestelde vormen heeft), en ook of het matrijsontwerp toegang tot de uiteinden biedt (d.w.z. de mallen zijn open aan de uiteinden). Als het parallel en open is, kunt u de boven- en onderkant oplamineren, ze vervolgens 'nat' samenbrengen en voorzichtig extra natte versteviging over de verbinding aanbrengen. Als u geen toegang heeft via de uiteinden, moet u de twee helften meestal afzonderlijk maken en ze daarna aan elkaar lijmen.
De tape wordt niet verwijderd. Aangezien de stof zeer licht overmaats is gemaakt, worden de randen met de tape aan het einde van de vleugelproductie afgesneden.
Er zijn geen 'rimpels' omdat de Mylar niet gevouwen of gekreukt is, maar er zijn wel golvingen/onregelmatigheden, die we eerlijk behandelen in de samenvatting, inclusief het pannen van de camera langs de vleugel om de golvingen te tonen.
Zweefvliegtuigen zijn een goed onderwerp om veel interessante en belangrijke concepten te demonstreren, net als elke vliegtuigvleugel. Met de gloeidraad wordt het hele profiel in één keer gesneden; de nauwkeurigheid van de boven- en onderkant moet zeer goed zijn (meer dan voldoende voor dit proces); we zien een tolerantie van minder dan 0.5mm.
Het is opgesteld als een generieke vleugel in plaats van iets specifieks. De specifieke profielen die werden gebruikt waren echter 'Eppler423' voor het hoofdelement en 'NACA4412' voor het secundaire element.
Als je het hebt over de golvingen/onregelmatigheden in het oppervlak, dan heeft dit meer te maken met de wapening die aan de buitenkant wordt toegevoegd (en de variërende hoeveelheden hars) dan met inconsistentie/onregelmatigheid van de kern, dus ik denk niet dat de golving verbeterd zou kunnen worden door een 3D-geprinte kern en het zou moeilijk zijn om een kern te printen die ook maar in de buurt komt van de lage dichtheid van XPS (wat ongeveer 25kg/m3 is of (ook bekend als een dichtheid van 0.025)).
Hoi Keith, ja, het biedt een veel beter uitgangspunt wat betreft de oppervlakteafwerking. Het is zeker niet perfect, zoals we in de video hebben besproken, maar voor veel toepassingen is het meer dan goed genoeg en betekent het heel weinig werk aan het oppervlak.
Hoi Rolf, we vroegen ons precies dit af. Dus we hebben het geprobeerd! En… het werkte niet echt! De lichte variatie in dikte van de wapening veroorzaakte te veel gebieden die niet voldoende consolidatiedruk kregen. Er zijn wellicht enkele proceswijzigingen die de zaken zouden kunnen verbeteren, maar op basis van onze bevindingen was het schuim 'afsnijsel' niet wat we gehoopt hadden!
Hoi Matt, stem genoteerd! Wij willen het ook doen. We hebben de volgende paar al gepland, maar blijf geabonneerd en hopelijk komen we er snel aan toe!
Nee, zelfs bij volledig vacuüm is het XPS prima. Geëxpandeerd polystyreen zou het niet verdragen, maar we zouden EPS sowieso niet aanbevelen.
Bedankt voor de opmerking, ik snijd liever eerst de bovenkant, omdat anders de gewichten op het schuim het hele blok doen doorzakken, wat betekent dat het bovenoppervlak enigszins verschoven zou eindigen. Ik heb nooit problemen gehad met waar de draad uitkomt, maar ik weet zeker dat er momenten kunnen zijn waarop eerst de onderkant snijden de voorkeur zou hebben.
Ze zijn vergelijkbaar qua druksterkte per gram, en dus is het verschil (en de voorkeur) genuanceerder. Voor deze eindplaten is de schuifkracht vrij beperkt, en daarom zou de kern met de laagste dichtheid de beste optie zijn. Aangezien het moeilijk is om de lage dichtheid van een Nomex-kern in aluminium te evenaren, gaat hier de voorkeur uit naar Nomex.
We hebben een paar proefdraaien gedaan met het kleinere element, puur om het proces te verfijnen, maar dat was het dan ook. Het is moeilijk te zeggen hoeveel tijd het van begin tot eind kostte, maar afgezien van het bouwen van de hete draad, waren we in 3 dagen klaar met filmen, en het grootste deel van die tijd bestond uit uithardingstijden, dus gezien de grootte en complexiteit van het onderdeel, zou ik zeggen dat het vrij weinig uren kostte. Ontwerptijd is daar ook niet bij inbegrepen.
Er zijn VEEL manieren om gewicht uit dit onderdeel te halen, maar ze voegen vrijwel allemaal complexiteit toe en riskeren potentieel de productie van een defect onderdeel. Dit project is niet geoptimaliseerd voor gewicht, maar het is zeer vergevingsgezind en zal vrijwel zeker een sterk onderdeel produceren met een acceptabel laag gewicht.
Het overleeft perfect, dus ja, u zou de Mylar zeker kunnen hergebruiken.
Hoi Nathan, ja, zeker. Het is niet echt anders dan wat we hier doen, mits de vorm van de spoiler een parallel profiel is.
Voor de vleugels zou het proces zeer vergelijkbaar zijn. RC-vliegtuigvleugels worden al vele jaren gemaakt met behulp van heet gesneden XPS, bedekt met koolstof of glas, bevochtigd met epoxy. Andere onderdelen, zoals de romp, worden meestal gemaakt met een handlaminering van gelcoat, vervolgens koolstof of glas en hars, soms (maar niet altijd) vacuüm verpakt. Bekijk het kanaal van RAMY RC om een meestervakman in RC-vliegtuigbouw te zien.
We hebben een interessant proces voor samengestelde krommingen en willen dit graag delen in een toekomstige video, dus blijf op de hoogte.
Jazeker, er zijn een aantal situaties waarin het maken van een harspasta met gemiddelde dichtheid (pyrogeen silica voor de thixotrope eigenschap en glazen bellen om de dichtheid te verminderen) een goede optie kan zijn. Andere lichtere materialen kunnen ook worden vervangen door het zwaardere aluminium, vooral als u de legering niet tapt.
EEN OPMERKING OF VRAAG ACHTERLATEN
100% VEILIG
BETAALMETHODEN
Easy Composites EU B.V., geregistreerd in Nederland 73601195. Alle inhoud auteursrecht (C) Easy Composites Ltd, 2025. Alle rechten voorbehouden.